AX78402
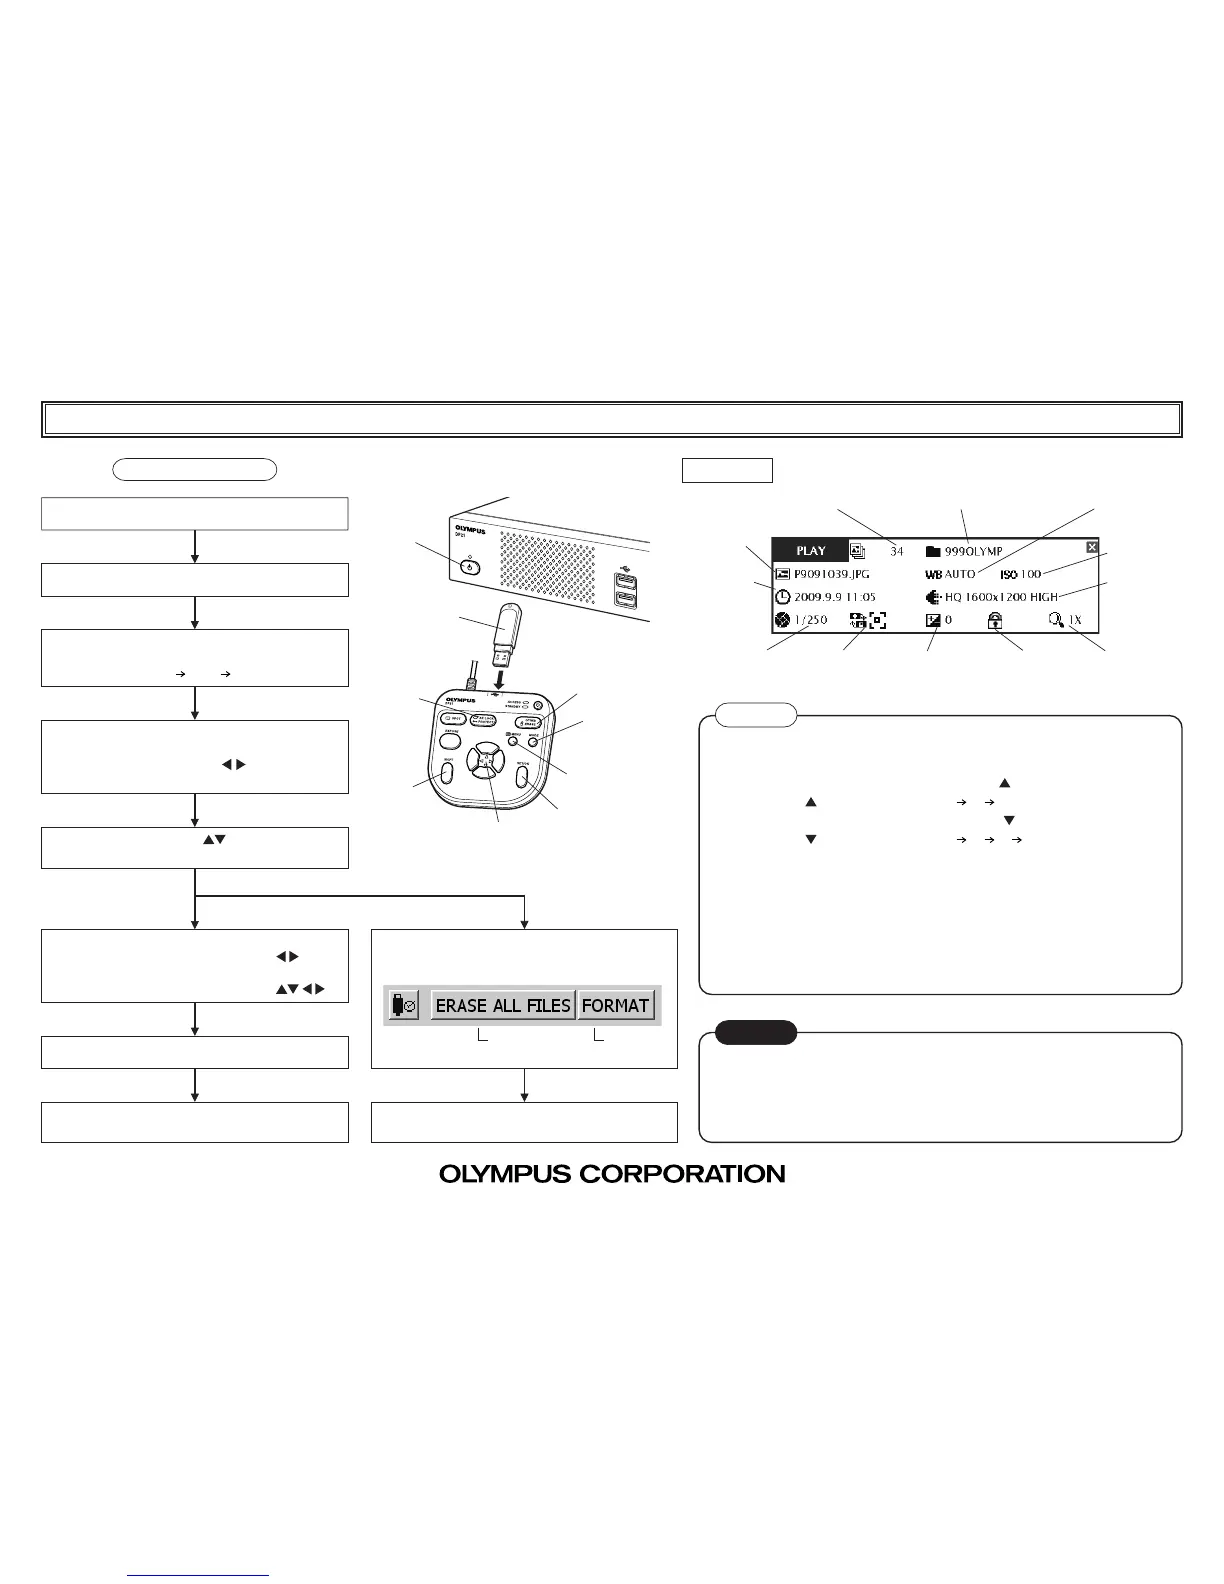
Image No. Save folder name (p.54) White balance (p.33)
File name
(p.33)
ISO speed
(p.30)
Date / Time
(p.53)
Image quality
(p.30)
Protect (p.52)Exposure time
(p.34)
Metering area
(p.26)
Exposure
adjustment (p.26)
Zoom (p.27)
DP21 QUICK OPERATION GUIDE
-- Playback --
Playback Procedure
1
2
3
9
8
7
4
5
Insert a USB memory @ containing recorded images.
Press the main switch ² to ON.
PLAY mode setting
Each press of the MODE button ³ switches the modes
in order of REC AUTO PLAY REC MANUAL.
1-image playback
· Press the SET/OK button 4 (to switch the index
display to 1-image display).
· Press either cursor button
5 to select an
image.
Played image zooming
Press either cursor button
5 to select one of
“Index display” to “4x.”
1-image erasure
Erased image selection
· 1-image display: Use cursor button 5 .
· Index display: Place cursor on the desired image
using cursor buttons 5
.
Press the ERASE button 6.
When the confirmation message is displayed, press
the SET/OK button 4 to enter selection.
All-image erasure
Press the MENU button 7 to display the MENU dis-
play, select [ERASE ALL FILES] and press the SET/
OK button 4.
All-file
erasure
Formatting
When the confirmation message is displayed, press
the SET/OK button 4 to enter selection.
INFO display (The page numbers below are those in the instruction manual.)
Tips
· Hide the MENU display before zooming an image (the display can be viewed or
hidden using the MENU button 7).
· To increase the zoom ratio, press cursor button 5 .
(Each press of
switches it in order of 1x 2x 4x.)
· To decrease the zoom ratio, press cursor button 5 .
(Each press of switches it in order of 4x 2x 1x Index dislay.)
· To scroll an image during 2x or 4x zooming, press cursor buttons 5 while holding
the SHIFT button 8 or SET/OK button 4.
· To switch index display to 1-image playback display, select the desired image and
press the SET/OK button 4.
· To turn the INFO display off, Press the Shift + MENU buttons.
· To protect image data (erasure prohibition), select the desired image and press the
PROTECT button 9.
CAUTION
· The protected images cannot be erased. (They should be unprotected before at-
tempting erasure.)
· When FORMAT is selected, all of the files in the USB memory, including the pro-
tected images as well as document files, will be erased.
6