Do you have a question about the Olympus PT-059 and is the answer not in the manual?
Key safety and usage guidelines to be reviewed before operating the camera case.
Highlights critical warnings and cautions regarding product handling and potential hazards.
Verify that all included accessories are present and undamaged upon receipt.
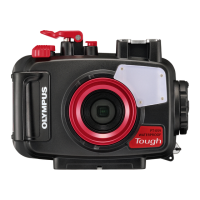
Identifies and labels all external components and controls of the camera case.
Guidance on utilizing various optional accessories with the camera case.
Instructions for attaching and properly wearing the hand strap for secure handling.
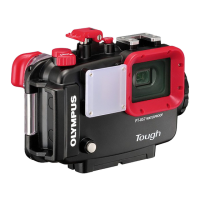
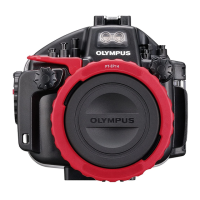
Procedures for installing and removing the monitor hood and lens cap.
Steps to ready the digital camera before placing it inside the waterproof case.
Ensure sufficient battery power and image storage before loading the camera into the case.
Steps to prepare the camera, including strap removal and antireflective ring installation.
Detailed steps for safely removing the O-ring from the case groove for inspection.
Instructions for cleaning the O-ring and its groove to prevent contamination.
Guidance on properly applying silicone grease to the O-ring for sealing integrity.
Steps for correctly reinstalling the O-ring into the case groove after maintenance.
Procedure for safely unlocking and opening the camera case rear lid.
Instructions for inserting the camera and silica gel bags into the case.
Checklist to ensure the camera and accessories are correctly positioned before sealing.
Steps to securely close and lock the camera case for waterproofing.
Verify that the camera's functions are accessible and operational through the case.
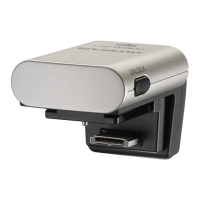
Procedure for connecting the optional underwater flash via optical fiber cable.
Configuring the camera and flash settings, particularly for RC flash mode.
Overview of different underwater shooting modes available for the camera.
Guide on selecting specific underwater shooting scenes and modes.
Instructions on how to lock the autofocus during underwater photography.
Instructions for rinsing the case with fresh water to remove salt and debris after use.
Guidance on thoroughly drying the case exterior, especially around seals.
Careful procedure for removing the camera from the case after use.
Proper methods for drying the case interior and exterior to prevent damage.
Steps for removing the O-ring as part of regular maintenance.
Cleaning the O-ring and associated parts to ensure proper sealing.
Procedure for reapplying silicone grease to the O-ring for optimal performance.
Reinserting the O-ring correctly after cleaning and greasing.
Recommendations for replacing the O-ring and other consumable parts.
Technical details including compatible models, dimensions, weight, and pressure resistance.
| Material | Polycarbonate |
|---|---|
| Case type | Hard case |
| Mountable on | - |
| Product type | Camera Case |
| Compatibility | TG-6 |
| Product color | Black, Red, Silver |
| Waterproof up to | 45 m |
| Brand compatibility | Olympus |
| Protection features | Waterproof |