USG-400
ISSUE1 3-9 Installation and Connection
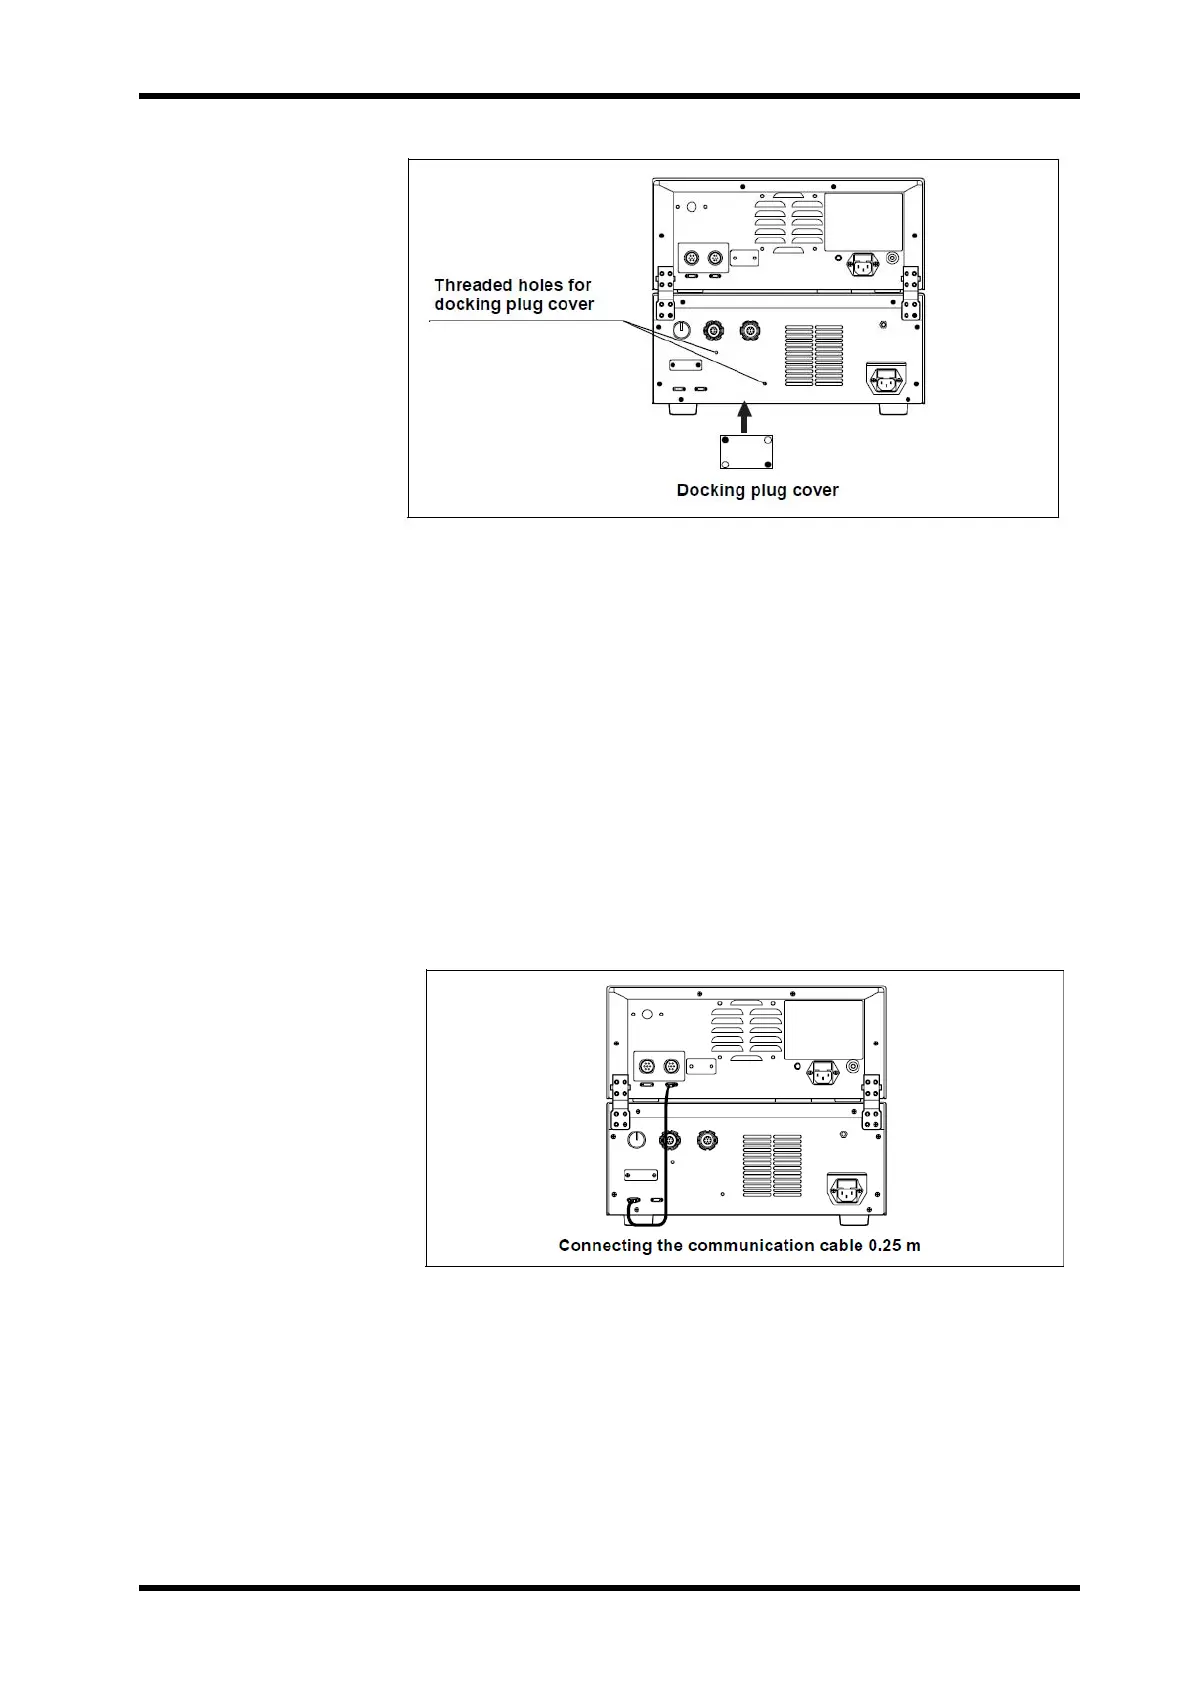
Figure 3.8
9. Storing the tool
Store the hex wrench in a nearby location such as the drawer of the cart.
10. Connecting the communication cable 0.25m
Connect the LINK-IN and LINK-OUT plugs of the communication cable
0.25 m to the communication connectors on the rear panels of the ultrasonic
generator and compatible electrosurgical generator. After connection, secure
each plug by pushing it in while turning the screws on both sides of the plug
(see Figure 3.9).
Example: Connect the communication cable 0.25 m LINK-IN plug to the
LINK-IN connector on the rear panel of the ultrasonic generator
and connect the communication cable 0.25 m LINK-OUT plug
on the other end to the communication connector on the rear
panel of the compatible electrosurgical generator.
Figure 3.9