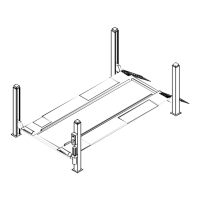
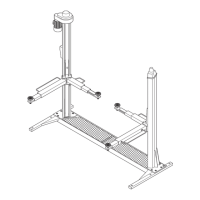
FISSAGGIO AL SUOLO DELLE COLONNE
Far scen de re la piat ta for ma (ve de re istru zio ni d’u so) fino a cir ca 30
cm. da ter ra.
Po si zio na re le co lon ne in modo tale che i pat ti ni in ny lon (po ste rio-
re 37 e la te ra le 38) sia no a con tat to con le co lon ne (Fig.53).
Ef fet tua re la mes sa a piom bo del le co lon ne spes so ran do dove ne -
ces sa rio le pia stre di base.
L’o pe ra zio ne di spes so ra men to deve es se re la più am pia pos
-
si bi le e sem pre in pros si mi tà dei fori di fis sag gio.
Pre me re il pul san te di sa li ta
(SB1 in Fig.50) ed ef fet tua re una
cor sa com ple ta; du ran te tale cor
-
sa é bene con trol la re (se ne ces
-
sa rio fer man do si ogni 20-30 cm.)
che lo scor ri men to del le tra ver se
av ven ga re go lar men te sen za
ano ma li sfre ga men ti.
Se du ran te que sta ope ra zio ne si
ve ri fi ca no mal fun zio na men ti é
ne ces sa rio ri ve de re la mes sa a
piom bo del le co lon ne.
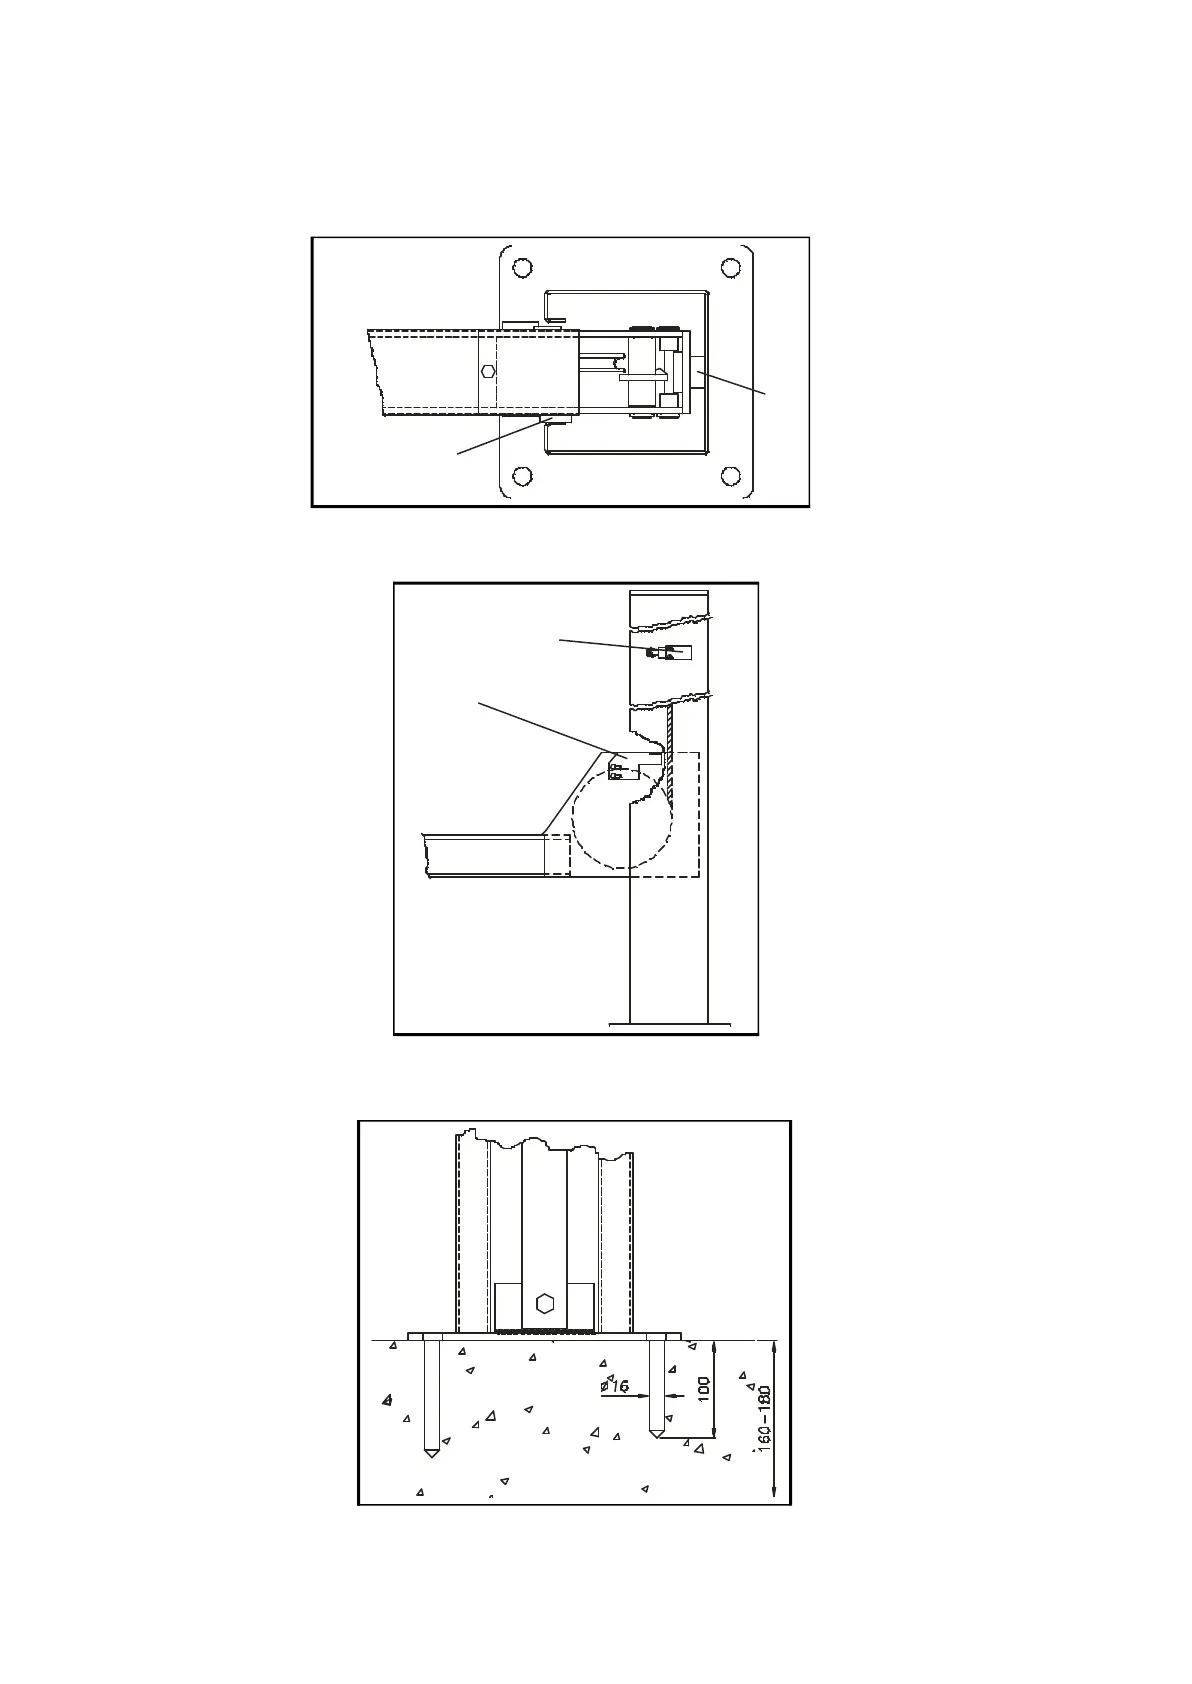
Fig.53 Re go la zio ne pat ti ni
Al ter mi ne del la sa li ta con trol la re il cor ret to
fun zio na men to del fi ne cor sa sa li ta (pos.39,
Fig.54) e se ne ces sa rio ef fet tua re la re gi -
stra zio ne tra mi te la cam ma (40) po sta sul la
tra ver sa.
Fig.54
Fare scen de re la piat ta for ma ar re stan -
do si a cir ca 30 cm. dal suo lo,pro ce de re
quin di alla fo ra tu ra del pa vi men to at tra
-
ver so i fori del le pia stre di base del le
co lon ne.
Per il fis sag gio usa re tas sel li Ø16mm.,
M 10, lun ghi 65mm., tipo FI SCHER
SLM 10 o equi va len ti.
Ser ra re le viti con chia ve di na mo me tri -
ca ta ra ta a 35 Nm.
Fig.55 Fis sag gio del le co lon ne
SECURING THE POSTS TO THE GROUND
Lower the plat form (see ope ra ting in struc tions) un til it is about 30
cm from the ground.
Po si tion the posts so that the ny lon shoes (rear 37 and side 38) are
in con tact with the posts (fig.53.
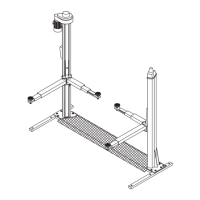
Plumb the posts to en su re that they are per fectly per pen di cu lar to
the flo or, in ser ting shims whe re ne ces sa ry un der the ba se pla tes.
Use shims that are as lar ge as pos sib le and al ways in stall
them clo se to the an chor ho les.
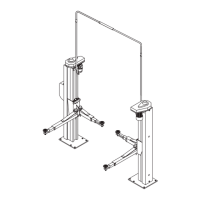
Press LIFT but ton (SB1 in fig.50)
and com ple te the lift cycle; du ring
the cycle check that the cross-pie
-
ces sli de fre ely and wit ho ut un due
rub bing fric tion (you may want to
stop the lift mo tion every 20 or 30
cm to make this in spec tion ea sier).
If you no ti ce any mal func tions du
-
ring this ope ra tion, check that the
posts are per fectly per pen di cu lar.
Fig.53 Shoe adjustment
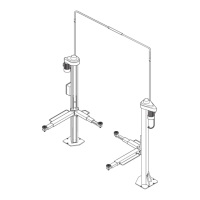
When the lift cyc le is com ple ted, make sure
that the lif ting li mit switch (pos.39, fig.54) is
wor king pro perly and if ne ces sa ry, adjust
using the cam (40) on the cross- pi e ce.
Fig.54
Lower the plat form un til it is about 30
cm from the ground and then drill into
the flo or through the fi xing ho les in the
base pla tes.
Use screw an chors size Ø 16 mm, M
10, length 65 mm, type FI SCHER SLM
10 or equi va lent.
Tigh ten the screws with a tor que
wrench set to 35 Nm.
Fig.55 Post an cho ring
30
40
39
36
37
 Loading...