Parte 8
13
IMPORTANTE
Pulire singolarmente tutte le
parti smontate in acqua tiepida
e detersivo per stoviglie (non
aggressivo),utilizzando uno
scovolino o un panno.
Risciacquare in acqua calda e
asciugare.
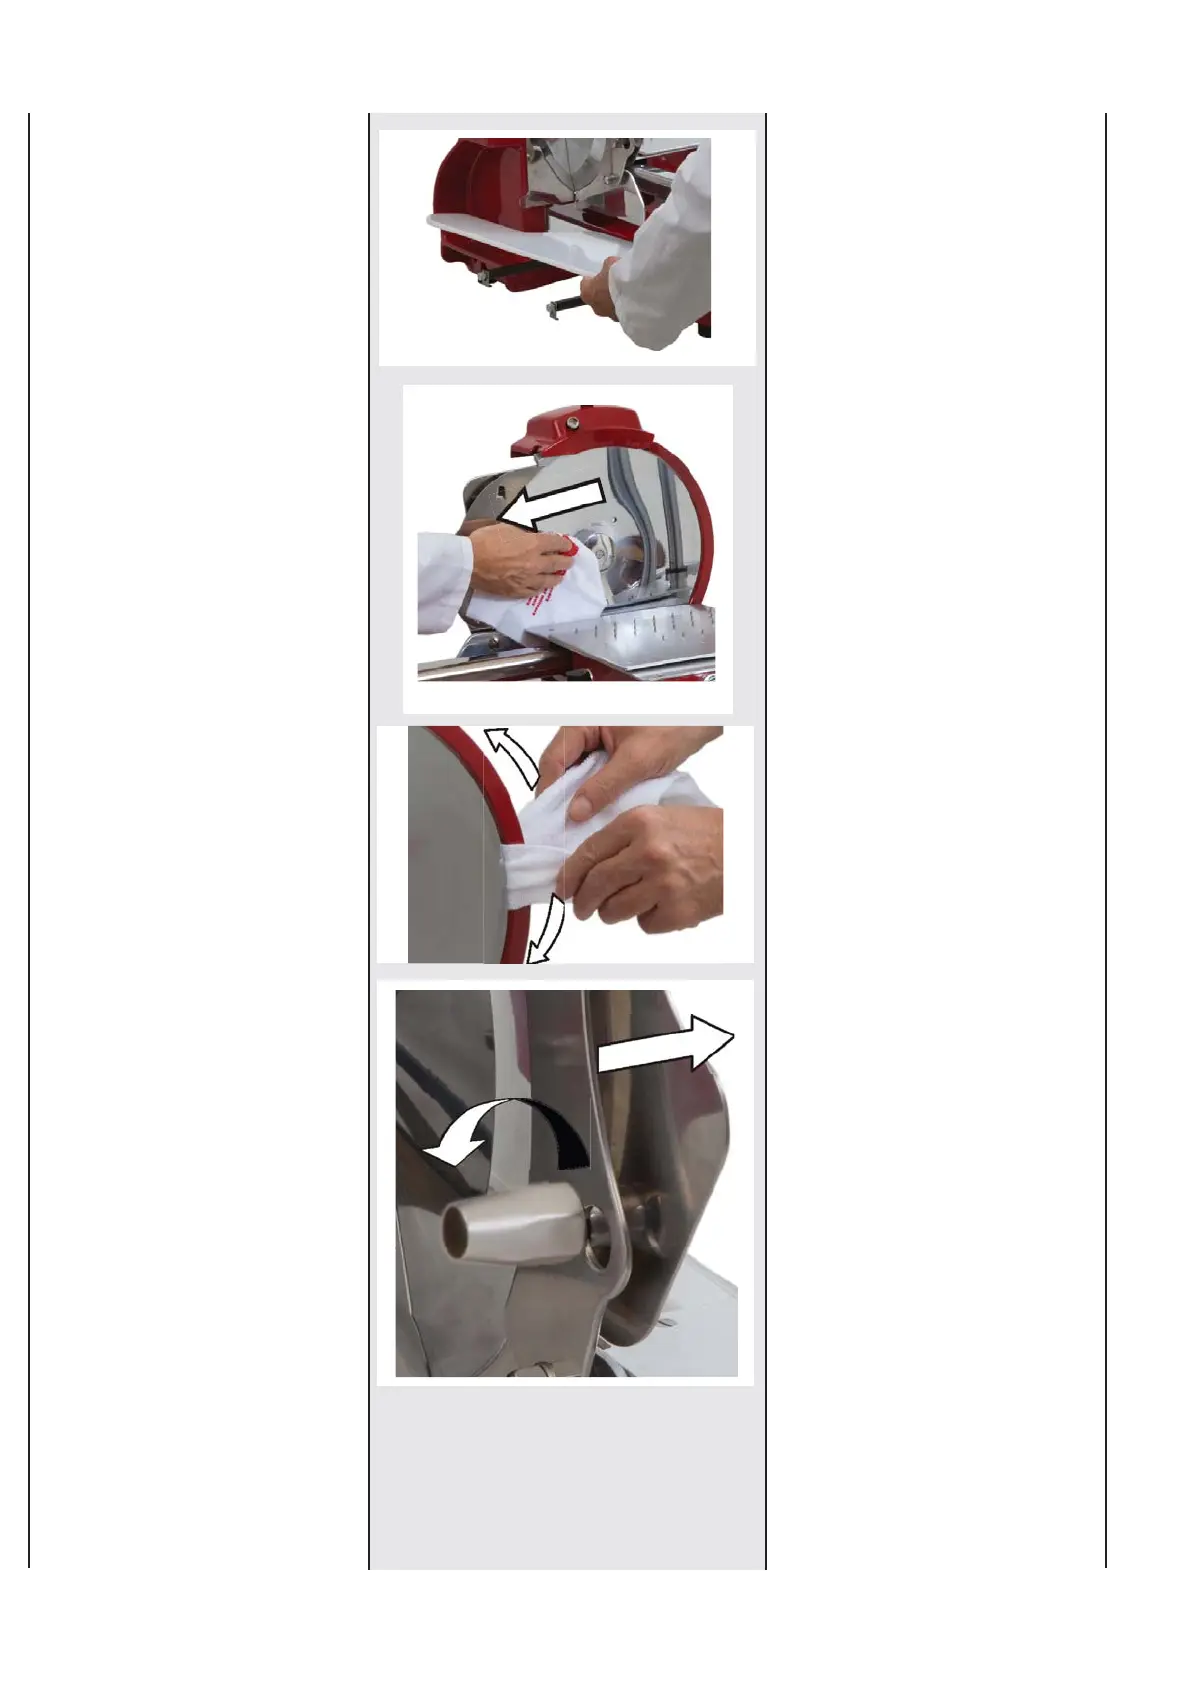
Allentare i due fermi e sfi lare
il pianoposafette.
4
Piano posafette
PERICOLO
Durante le operazioni di
pulizia della lama, evitare
accuratamente il contatto
accidentale con la lama.
Pulizia lama
Premere un panno umido sulla
parte anteriore della lama e
spostarsi molto lentamente
dal centro verso l'esterno,
nella direzione indicata
dalla freccia, asciugare.
Pulire, nello stesso modo, la
parte posteriore della lama.
5
Pulizia protezione lama
Inserire un panno umido tra
l'anello di protezione e la
lama.
6
Allentare completamente
l'impugnatura in senso an-
tiorario, sfi lare la protezione
lama.
7 Farlo scorrere tra la lama e
la protezione.
8
PERICOLO
La parte di lama utilizzata per
il taglio non è protetta.
The part of the blade used for
cutting is now uncovered.
DANGER
Terminata l'operazione di
pulizia, riposizionare la
protezione lama, strigere
l'impugnatura di blocaggio.
9
IMPORTANT
All the disassembled parts
have to be cleaned indivi-
dually with water and dishes
detergent (do not use strong
detergents), using a brush or a
cloth. Then rinse them in warm
water and dry them.
Part 8
Loosen the two handles and
pull out the tray
4
Slicer Receiving Tray
DANGER
During the blade cleaning
operations, carefully avoid
accidental contacts with the
blade.
Blade cleaning
Press a wet cloth on the
blade front side and move
it slowly outwards from the
centre, as indicated by the
arrow. Dry with another cloth,
then clean the back side of
the blade in the same way.
5
Blade protection cleaning
Insert a damp cloth between
the blade and the blade pro-
tection ring.
6
Loosen completely the
knob by turning it counter-
clockwise, then pull out the
blade protection.
7 Rub it between the blade
and the protection.
8
Once you have fi nished the
cleaning operations reposi-
tion the blade protection and
rotate the knob in the oppo-
site direction to re-lock it.
9


 To Next Page
 Loading...