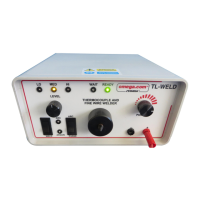
Welding
Arc Welding
1. Connect the work-holding pliers to the red output
socket.
2. Depress the purge switch for 3 or 4 seconds to rid the
system of air.
3. Reset the mode to “Arc”.
4. Set the energy level to the desired value.
5. Prepare the wires to be welded and grip in the pliers,
leaving about 1mm or more protruding.
6. Position the wires 5 or 6mm in front of the carbon,
whilst steadying the hand.
7. Press the “weld” switch or foot switch and slowly
move the work towards the carbon until the arc is
struck.
8. Release the switch and remove the work for examina-
tion.
Preparation of Wires for Arc welding
For small diameter wires, strip off about 12mm of insula-
tion and twist together. Then, with side cutters or scissors
cut the wire off square leaving sufficient un-insulated
material to give approximately 1mm protruding when
gripped in the welding pliers. Larger diameter wires may
be held side by side in the welding pliers, but ensure that
they are in firm contact with each other and trimmed off
square. This method will be found useful for attaching
solid leads to resistance thermometer detectors. However,
when attaching stranded leads, it will be found more con-
venient to use the twisting method and then to carefully
untwist after welding.
- 6 -
 Loading...