ENGLISH
• 3 •
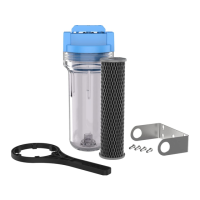
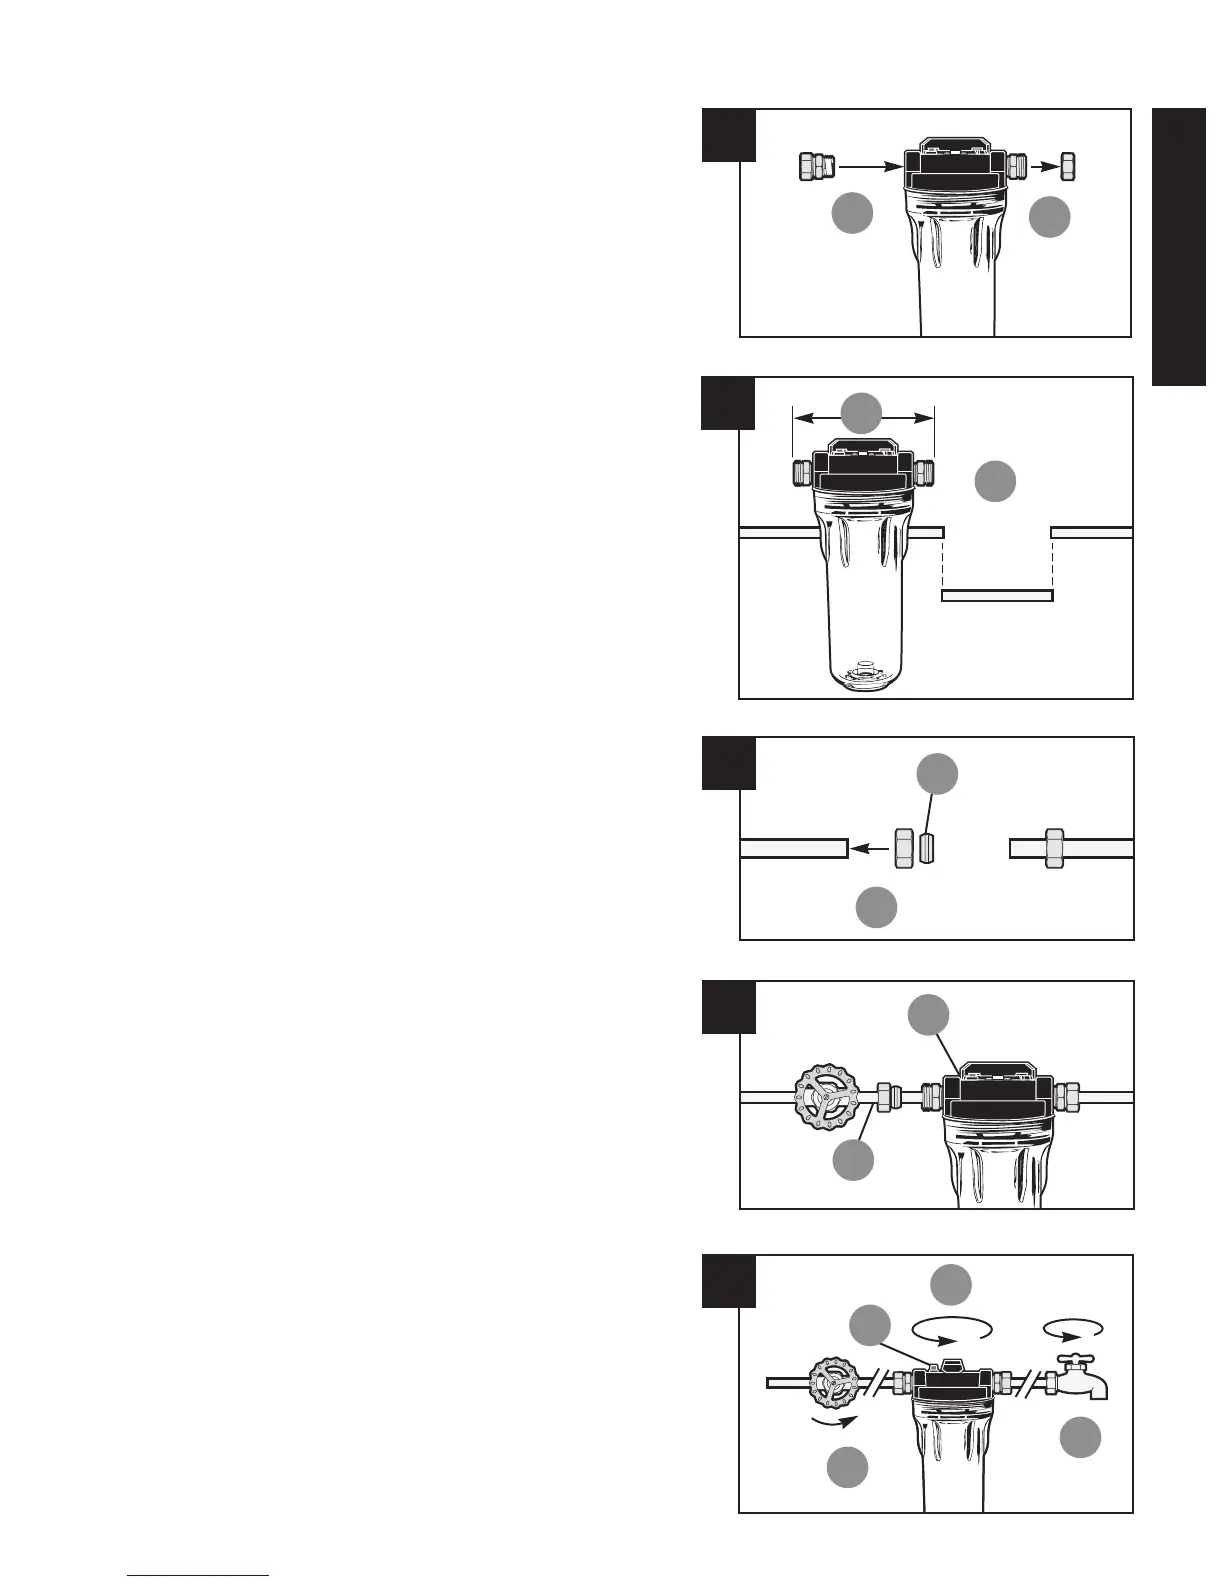
(D)2. Assembleallttings.Startadaptersintocapbyhand.Usea
wrenchtotightenrmly.DONOTOVER-TIGHTEN.Aboutonethread
shouldremainvisible.(E)Removecompressionnutsfromttings.
NOTE:Ifusingmountingbracket,besuretoinsertttingsthrough
bracketbeforethreadingintoltercap.
Measurelengthacrossassembledttings3. (F)andsubtract1inchfor
3/4-inchpipe,foratotalsubtractionof2inches.Marksectionofpipe
toberemoved.
NOTE:
Approximately6incheswillberemovedfor3/4-inchpipe.
Usingapipecutterorhacksaw,cutpipeandremovemarkedsection
(G).Fileorsandsharpedgesonremainingpipe.
Slipbrasscompressionnut4. (H)andbrassferrule(I)ontoeachendof
3/4-inchpipe.
Alignlterassemblywithendsofpipe,makingcertaincapopening5.
marked“IN”(J)isfacingyourincomingwatersupply(K).Itwillbe
necessarytospreadendsofpipeaparttoinstalllterassembly.Using
twoadjustablewrenches,holdinletadaptersecurelywithonewrench
andtightenwithsecondwrench.Repeatprocessforoutletadapter.
Turnonwatersupply6. (L).Slowlyturnhandleonhousing(M)toallow
ltertollwithwater,thendepressredpressure-reliefbutton(N)on
topofcaptoreleasetrappedair.Checkforleaks.Thenrotatehandle
fullyto“ON”position.(O)Opennearestfaucetandushcartridge
for5minutes.
CAUTION:
Ifwaterpipesareusedtogroundelectricalsystems,
appliancesorphones,becertaintoinstallajumperwire.Contacta
qualiedelectricianwithanyquestionsaboutyourhome’selectrical
system.
3
4
6
5
2

 Loading...