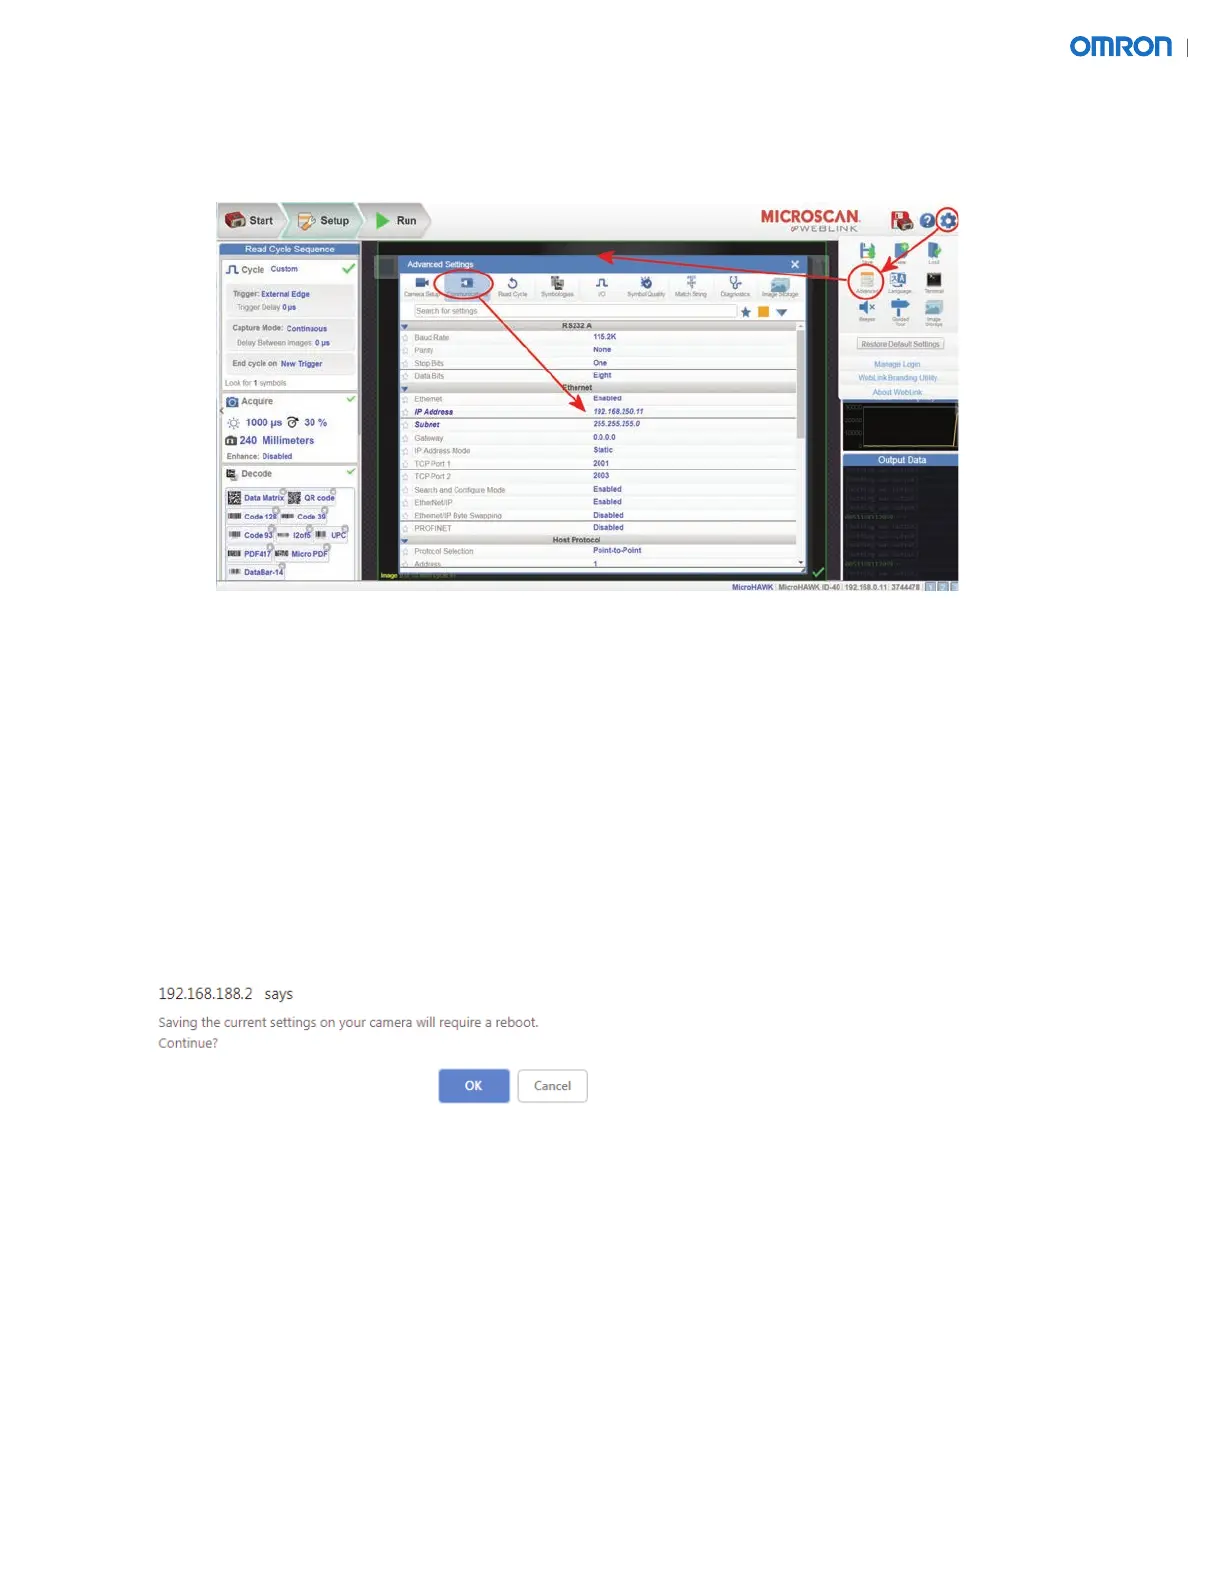
2.6.1. Click the gear icon > Advanced > Communications as shown below.
2.6.2. Set the IP addresses and subnets to the values listed below:
• Reader 1 = 192.168.250.11, subnet 255.255.255.0
• Reader 2 = 192.168.250.12, subnet 255.255.255.0
• Reader 3 = 192.168.250.13, subnet 255.255.255.0
• Reader 4 = 192.168.250.14, subnet 255.255.255.0
• Reader 5 = 192.168.250.15, subnet 255.255.255.0
• Reader 6 = 192.168.250.16, subnet 255.255.255.0
2.7. Click the Save button to save the changes to the reader. You should receive a warning stating, “Saving
the current settings on your camera will require a reboot. Continue?” Click "OK".
2.8. Repeat steps 2.1 to 2.7 for Readers 2 through 6.
2.9. Change the PC's IP address to 192.168.250.101, subnet 255.255.255.0.
2.10. Disconnect power to all the ID-40 readers and wait 10 seconds.
2.11. Connect the ID-40 reader's Ethernet cables to the Ethernet switch.
2.12. Re-connect power to the ID-40 readers. Wait 30 seconds for the readers to boot.
2.13. Using your PC's internet browser, type the IP address for reader 1 and make sure the PC connects
to WebLink.
2.14. Save the reader’s settings to a le. Click the gear icon > Advanced > Save.
2.15. Repeat steps 2.13 and 2.14 for all remaining ID-40 readers.
7