15
V700-L21
User's Manual
Section 2
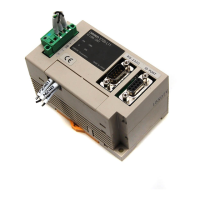
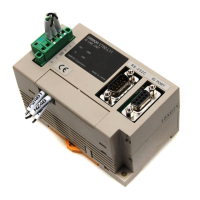
2.1 CIDRW controller: Model V700-L21
Section 2
Unit Specifications
2.1.2 Interface specifications
(1) SECS port
■ Cable connection example
<Connection with DOS/V PC>
Connect the upstream controller to the CIDRW controller using the cable whose configuration is speci-
fied below. Limit the whole cable length to 15 m.
*1 Ground the shielded cable either on the PC/AT side or CIDRW controller side.
*2 The controller can run without a wiring between RS and CS. Note, however, that a wiring connec-
tion from RS to CS(*2-2)enables verification of correct connection with the CIDRW system. Fur-
thermore, with an additional connection from RS to CS(*2-1),the directionality of cable will be lost.
• Recommended cable: CO-MA-VV-SB 5PX28AWG (Hitachi Cable, Ltd.)
•
Recommended connector: socket-Model XM2D-0901 (OMRON), hood-Model XM2S-0913 (OMRON)
Characteristic Specification
Connector specification 9-pin D-SUB male connector with #4-40UNC lock screws
Communication standard RS-232C
Synchronization Asynchronous, start-stop synchronization
Communications control
standard
SEMI E4 SECS I, E5 SECS II
Baud rate 1200, 2400, 4800, 9600, 19200, 38400, 57600, 115200 bps
(9600 bps is default; selectable in setup mode)
Character format
(E4 SECS I, fixed)
Start bit Data bit Parity bit Stop bit Total
18None110
Total cable length 15 m max.
(Pin arrangement)
Pin No. Signal name Symbol Direction Comment
1 <N.C.> Unused
2 Receive data RD Input
3 Send data SD Output
4 −−Output Normally OFF
5 Signal ground SG −
6 −−Input Leave this pin OPEN.
7 Request send RS Output Normally OPEN during service
8 Clear to send (CS) Input Not functioning
9 <N.C.> Unused
DOS/V PC
D-SUB
9-pin
socket
#4-40
Symbol Pin No. Pin No. Symbol
CIDRW
controller
D-SUB
9-pin
socket
#4-40
11
RD 2 2 RD
SD 3 3 SD
44
SG 5 5 SG
66
RS 7 7 RS
CS 8 8 CS
9
9
Wrong wiring connection can lead to a malfunction of the equipment. Be fully sure of the correct
wiring connections.
1
96
5
*1
*2
*2-1 *2-2
 Loading...