Chapter 2: Installation & Initial Adjustments
Again: Check that the water tank is full and the water pump is operating smoothly every time before
using the engraver. If temperatures hotter than about 35°C (95°F) cannot be avoided, be sure to add
some ice or cool water to the tank but do not allow the water itself to become ice-cold. If temperatures
of 0°C (32°F) or below cannot be avoided, be sure to add antifreeze and run it through the machine.
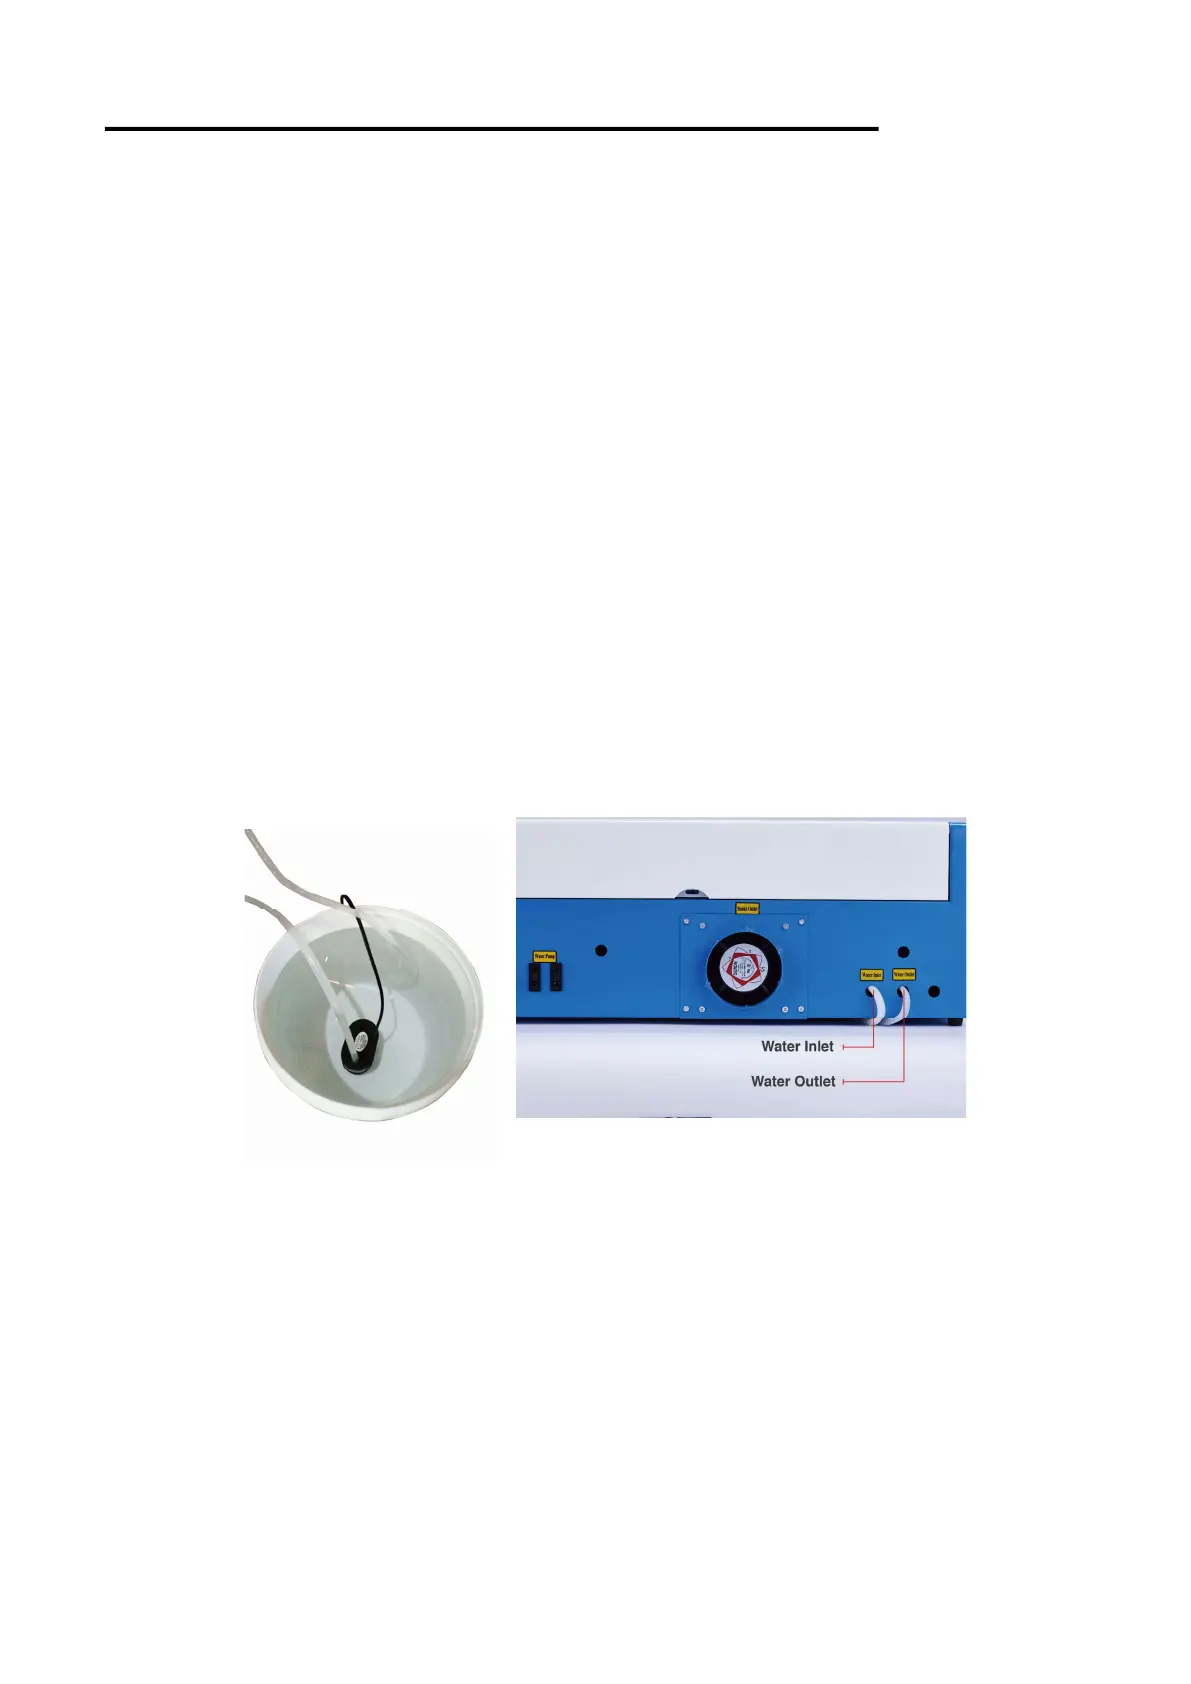
Fig. 2–1. The cooling water system.
A complete working system is composed of the laser engraving machine, its exhaust fan & pipe, its
water pump & tank, and a USB cable. Users can configure the associated computers, printers, scanners
and so on to suit their needs by themselves.
2.1. Set down the laser engraver
Be sure to use a location that meets the criteria in the Safety Instructions (p. 1–2). The location
should stable, level, dry, well-ventilated, and climate controlled. It should be free from children,
combustible or explosive materials, and sensitive EMI devices. The power cord should be plugged
into a stable, reliable power source. There should be fire-fighting equipment nearby.
2.2. Connect the water pump
The cooling water system is very important to the engraver. When this laser machine works without
cooling water, the laser tube explodes from the heat. Fill the water tank, connect the clear pipes from
the back of the engraver to the tank, and connect the water pump to your power supply (Fig. 2–1). The
water will start running.
8