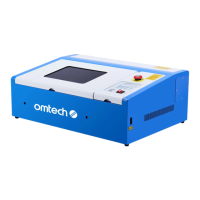
(3) Test Switch
When the on/off switch and the laser switch are both on, pressing the test switch button will fire the
laser. This button will be used when adjusting laser power with the current regulation knob and when
aligning the laser beam.
(4) Current Knob
This knob regulates the laser’s power, as shown in the current meter beside it. Turning the knob clock-
wise (right) increases the laser’s power. Turning the knob anti-clockwise (left) decreases it.
(5) Current
This is an analog ammeter, displaying the amount of milliamperes in the laser’s current. Generally,
the meter should read lower than 15mA when the machine is in use. When aligning the mirrors
(See 4.2), use a current lower than 10mA for safety reasons.
ATTENTION: Because of the potential danger of the engraver’s class 4 laser, this equipment
features an automatic cut-off when the water pump is not operating correctly. No laser should be
emitted if the machine is not being cooled by flowing water. When you first begin using your laser
engraver, you should test this function before beginning any other work. Cut off the flow of water
by tying or crushing the two water pipes, being careful not to damage the pipes themselves.
Attempt to use the laser. If the laser fires, turn off the machine and do not use it before contacting
customer service for repair. If the laser does not fire, release the water pipes and continue setting
up your laser engraver.
3.2 Operation Procedure
Step One: Prepare Your Design and Machine
Make or load your design in the engraver software.When you are ready to engrave your material,
check to make sure that the engraver isready as well. Check that the water tank has plenty of cool
(but not ice-cold) water. If working with a new material, double check that it can withstand the heat
of the laser engraver and that it will not release harmful fumes when processed. Check that the
exhaust hose is secured in its window or that its purifier is working properly.
Step Two: Prepare the Material to be Processed
Make sure the material is dry and clean. Fix the material securely in place using the clamp. The top
surface of the material should be at the same level as the clamp frame to keep the laser’s focus
distance correct. This distance is about 5 centimetres (2 in.), as shown in Figs. 3–3 to 6 below.
Note: An incorrect distance will lead to a bad engraving effect.
12