24
Processing Image Files
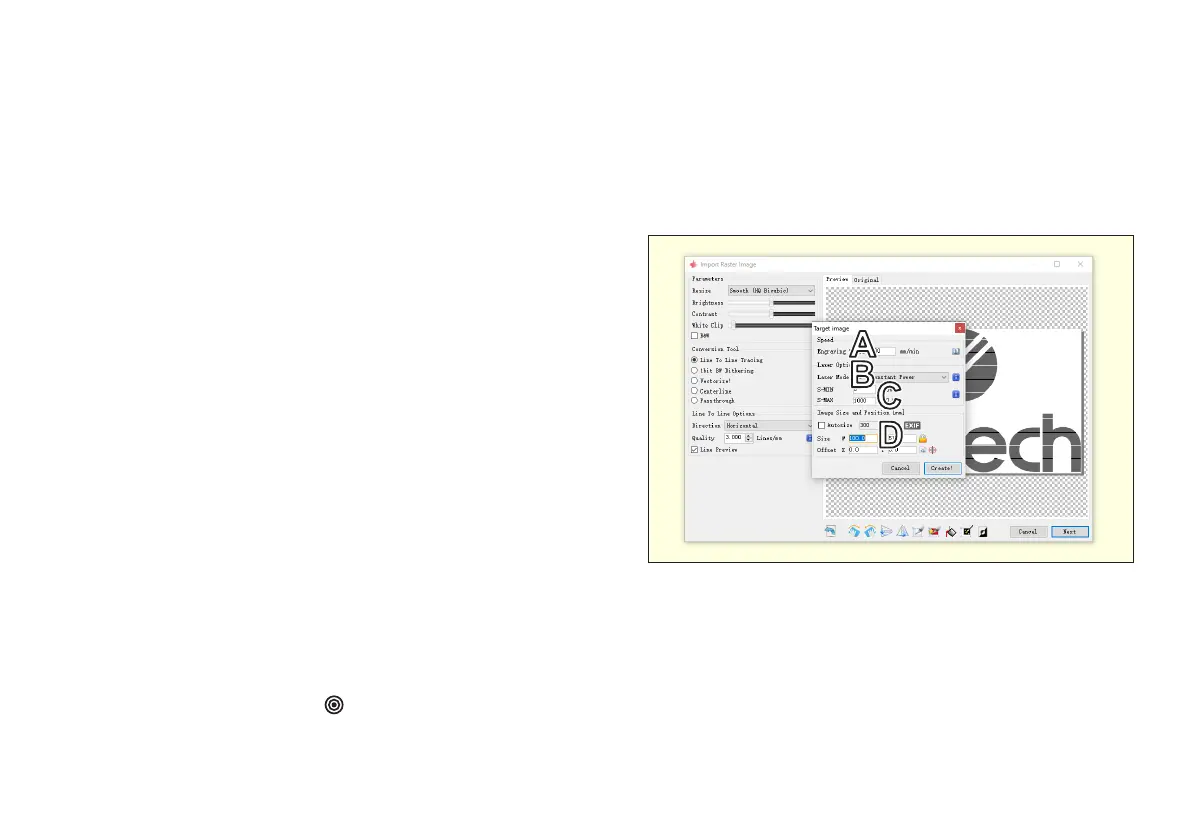
After clicking Next, you will open the Target Image window. This
allows you to set the overall parameters for the current engraving
session.
A. Speed—This sets the maximum engraving speed in mm/min. This
speed must be accelerated to aer corners and edges, which can
cause some areas to be engraved darker than intended.
B. Laser Mode—This allows you to toggle between constant
power (M3) that uses 100% of the S-MAX setting for black areas,
fractional power in gray areas corresponding to its darkness, and
the S-MIN setting for white areas and dynamic power (M4) that
adjusts the M3 values to try to compensate for the slower speeds
around the corners and edges.
C. Power Settings—These settings control the power level that will
be used for pure white areas (S-MIN) and pure black areas (S-MAX)
during engraving. The default settings are 0 and 1000 using a ⅒
percent scale. If you adjust the $30 parameter, the values need to
be changed to match.
D. Image Size and Position—After processing, the image can be
resized automatically to use a set number of dots per inch (DPI)
or to t a certain width (W) or height (H) in mm. The default is to
maintain the proportions of the image. Click the lock icon open
if you want to distort the image by changing its width and height
separately.
By default, engraving begins from the front left corner of the
work area. The Oset value can be used to begin from a dierent
position, entered in mm away from the origin. Press the recycle
icon to remove this. Press the icon to use the center of the work
area as the origin.
Once everything is perfect, click Create! to begin engraving!