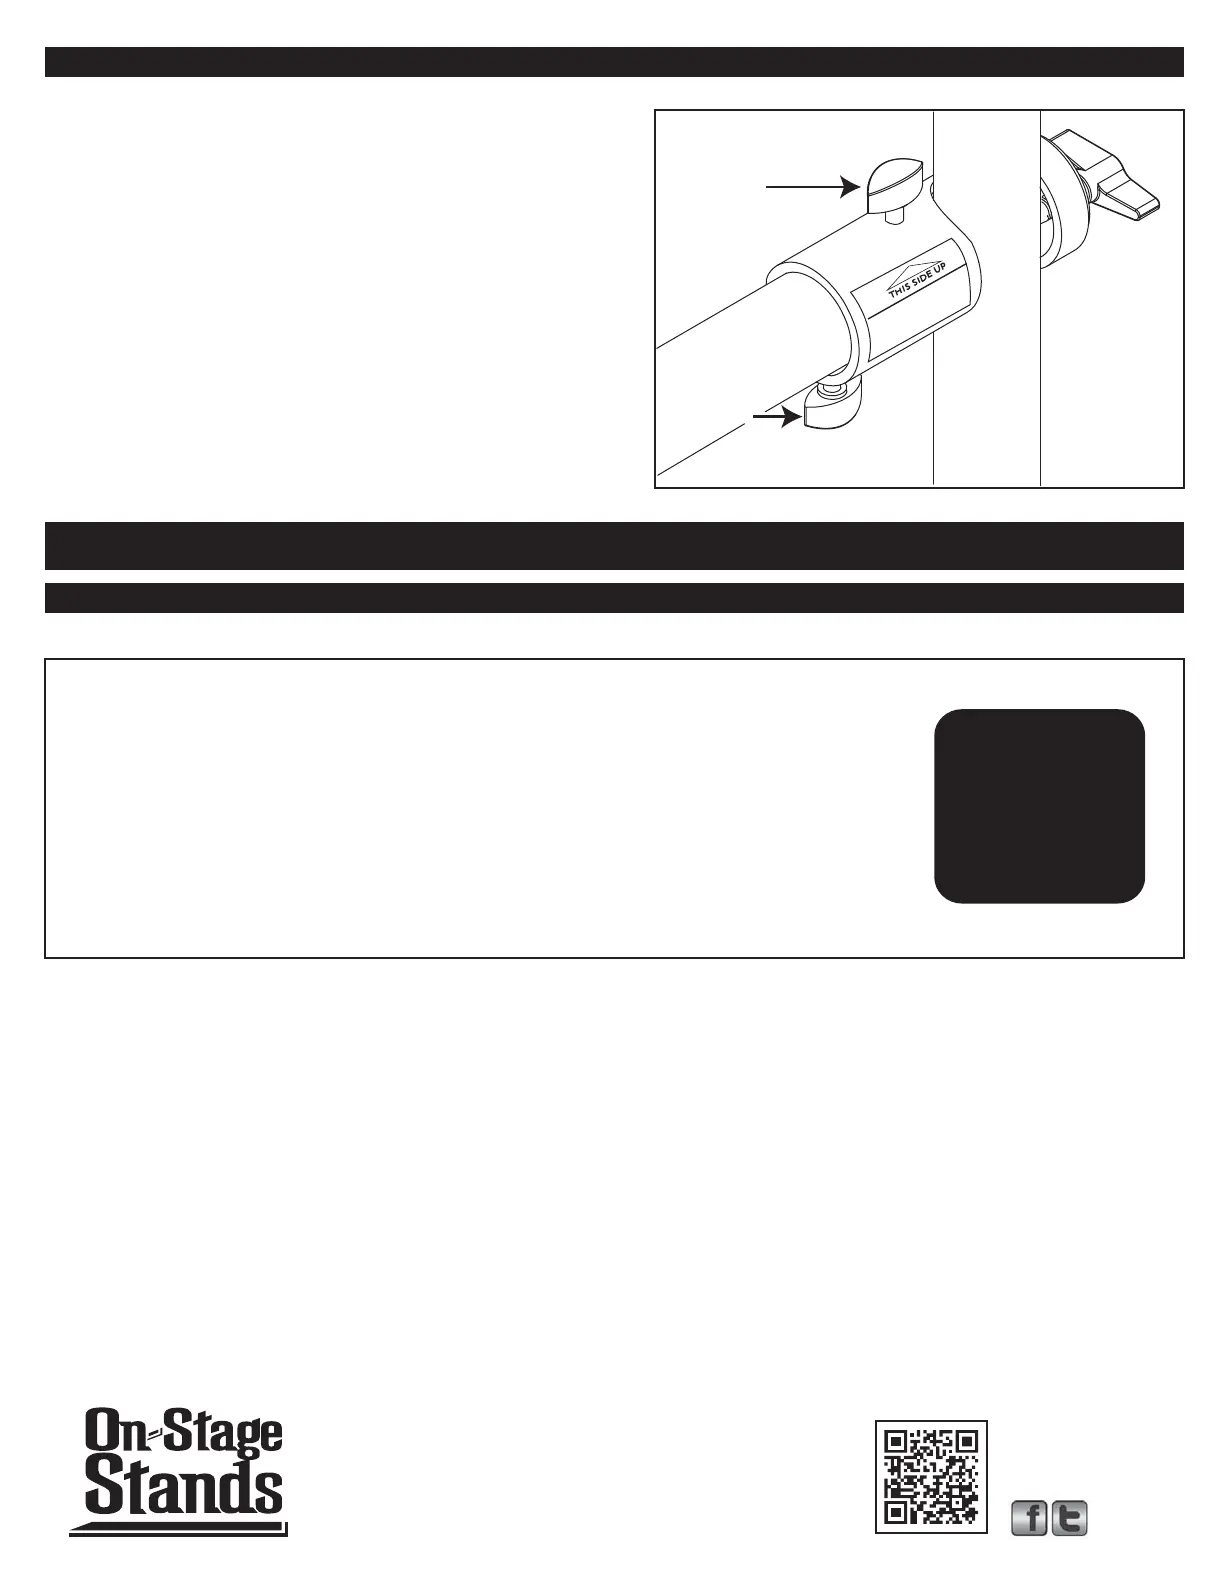
Fig. C
Tighten 2nd
IF needed.
Tighten 1st
IF needed.
6.
Check to ensure hardware is facing in the proper direction
for LED/PAR assembly, and that all knobs are tight. If knobs
are loose, or need to be loosened to adjust direction of
hardware, be sure to tighten the bottom knob FIRST
followed by the top knob, for each lighting arm before
proceeding to the next step (See figure C).
7.
Mount your LED/PAR lights to each Lighting Arm using the
included hardware. Start from the inner-most positions and
work your way outward to maintain balance.
8.
Connect electrical cords to your lights.
9.
If applicable, follow the instructions to finish assembly of
your lighting stand or speaker stand, and enjoy your new
light show.
PLEASE KEEP THIS INSTRUCTION SHEET HANDY FOR FUTURE REFERENCE.
®
REGISTER ONLINE. HERE’S WHY:
Lightning Fast Service - Get the fastest turn-around in the
unlikely event of a warranty claim.
Product Notifications - We can contact you directly with
product notifications and safety information.
Better Products - Your registration helps us to improve our
products and develop new ones.
On-Stage.com
Model #LSA7700P
© 2013 TMP, Inc.
www.onstagestands.com