Do you have a question about the on stage SMS6600 and is the answer not in the manual?
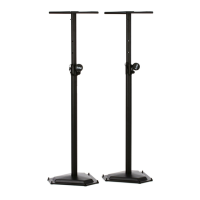
Two square platforms for placing studio monitors.
Two hexagonal bases providing stability for the stands.
Two screws with washers used for attaching platforms.
Two shafts that allow for height adjustment.
Spikes to aid leveling on carpeted surfaces.
Tool provided for tightening screws.
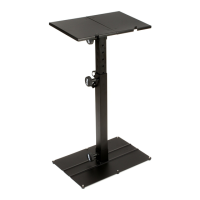
Thread the bottom of the adjustable vertical shaft into the base until fully engaged.
Thread socket cap screw with washer through platform into shaft, tighten with Allen wrench.
Place stand, level platform by adjusting rubber feet or inserting carpet spikes.
Loosen knob on shaft to move monitor plate to desired height.
Insert safety pin through the vertical shaft at the lowest exposed hole.
Details height adjustment, platform size, base spread, weight capacity, construction, and color.
Benefits include lightning-fast warranty service, product notifications, and product improvement.
| Type | Microphone Stand |
|---|---|
| Base Type | Tripod |
| Material | Steel |
| Boom | No |
| Color | Black |