TO STARTER SIDE
OF
START
SOLENOI~
TO G‘ROUND
SOLENOID PRIMER
’
A742
REGULATOR
FIGURE
31.’
ALGAS SOLENOID PRIMER
To
adjust for proper priming of a cold engine, set the
primer
so
a hot engine (one with gas in the regulator-
carburetor hose and the carburetor) sounds slightly
rough and produces slightly dark exhaust when the
engine first starts firing.
Coarse Adjustment:
1.
Remove regulator-carburetor hose at regulator
2.
Turn primer clockwise (richer) until you can hear
3. Remove voltage, connect hose and attempt to
If the engine starts within 3 seconds, the p.rimer is
correctly adjusted.
If
not, remove the hose at the
regulator and crank the engine for a few seconds to
empty the hoseand carburetorof gas and readjust the
primer slightly. Connect the hose and attempt to start.
Continue until the enginestarts within 3 secondsfrom
an empty hose and carburetor. When the primer is
properly adjusted, be sure the regulator locks off
when the unit stops.
and apply battery voltage across primer.
a small flow of gas at outlet.
start engine.
.
To
test the primer, remove it from the regulator,
noting the number of turns necessary to unscrew
it
and operate the start switch. The plunger must extend
out. If not, the wiring or primer solenoid may be
defective or the plunger is stuck in the primer body.
AIR
CLEANER
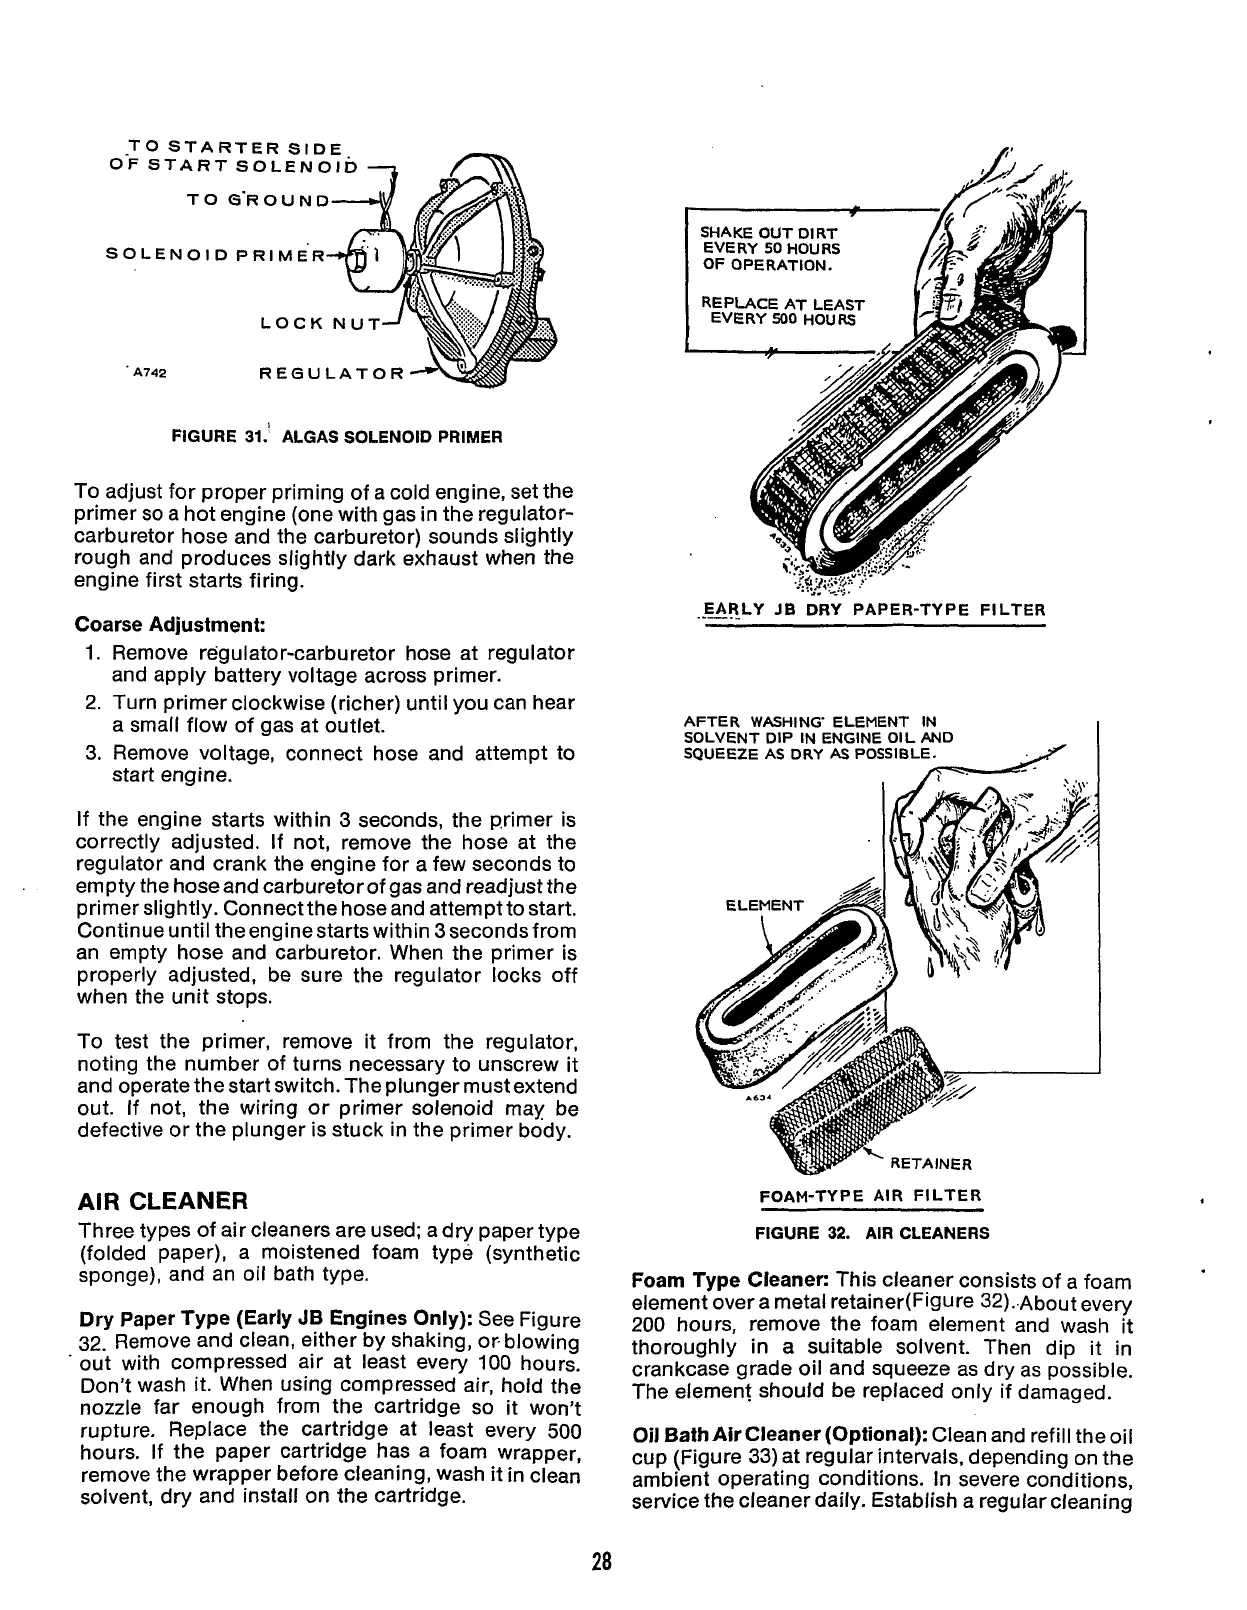
Three types of air cleaners are used; a dry paper type
(folded paper), a moistened foam type (synthetic
sponge), and an oil bath type.
Dry
Paper Type (Early
JB
Engines Only):
See Figure
32. Remove and clean, either by shaking,
or.
blowing
out with compressed air at least every
100
hours.
Don’t wash it. When using compressed air, hold the
nozzle far enough from the cartridge
so
it won’t
rupture, Replace the cartridge at least every 500
hours.
If
the paper cartridge has a foam wrapper,
remove the wrapper before cleaning, wash
it
in clean
solvent, dry and install on
the
cartridge.
EARLY
JB
DRY PAPER-TYPE FILTER
AFTER WASHING ELEMENT IN
SOLVENT DIP IN ENGINE
01
L AND
SQUEEZE
AS
DRY
AS
POSSIBLE
FOAM-TYPE
AIR
FILTER
FIGURE
32.
AIR
CLEANERS
Foam Type Cleaner:
This cleaner consists of a foam
element over a metal retainer(Figure 32)..About every
200 hours, remove the foam element and wash
it
thoroughly in
a
suitable solvent. Then dip
it
in
crankcase grade oil and squeeze as dry as possible.
The element should be replaced only if damaged.
Oil Bath Air Cleaner (Optional):
Clean and refill the oil
cup (Figure 33) at regular intervals, depending on the
ambient operating conditions.
In
severe conditions,
service the cleaner daily. Establish a regular cleaning
28
Redistribution or publication of this document,
by any means, is strictly prohibited.
 Loading...


