Reassembly and Installation (Walbro)
1.
Install needle valve and seat, main jet and fioat
assembly. Make sure that float pivot pin is properly
placed and that float moves freely without binding.
2.
Gently push float tang down until needle
just
seats.
(Figure
4).
Measure float level; adjust
if
necessary.
Release float tang and measure float drop; adjust if
necessary. When checking float level and drop,
measure
to
float body, not seam.
3.
Position gasket on carburetor and attach carburetor
sections together with screws.
4.
Slide in throttle shaft and install plate using new
screws. Before tightening the screws, the plate must
be centered in the bore. To do
so,
back
off
the
throttle stop screw as necessary and completely
close the throttle lever. Seat the plate by tapping
with a small screwdriver, then tighten screws. Install
the choke shaft and plate in the same manner.
5.
Install idle adjustment screw, throttle stop screw,
and main fuel adjustment needle.
6.
Mount carburetor on intake manifold and install
assembly on engine.
7.
Mount air cleaner assembly. Connect air intake
hose, breather hose, fuel line, vacuum line, and
throttle linkage.
8.
Adjust carburetor and governor according
to
direc-
tions given in this section.
Reassembly and Installation
(Nikki limited idle adjustment)
1.
Install needle valve, main jet, and float assembly.
Make sure float pivot pin is properly placed and floa/
moves freely without binding.
2.
Turn carburetor on its side and measure float level
(Figure
4).
Adjust float level only
if
necessary.
Measure float drop (the distance from the top of
carburetor body
to
top of float). Adjust only
if
necessary.
3.
Position gasket on lower carburetor section and
install upper carburetor section.
4.
Install idle adjustment screw, throttle stop screw,
and fixed main jet plug.
?
5.
Mount' carburetor on intake manifold and install
?
assembly on engine.
6.
Mount' air cleaner assembly. Connect air intake
hose, breather hose, fuel line, vacuum line, and
throttle linkage.
7.
Adjust carburetor and governor according
to
direc-
tions given in this section.
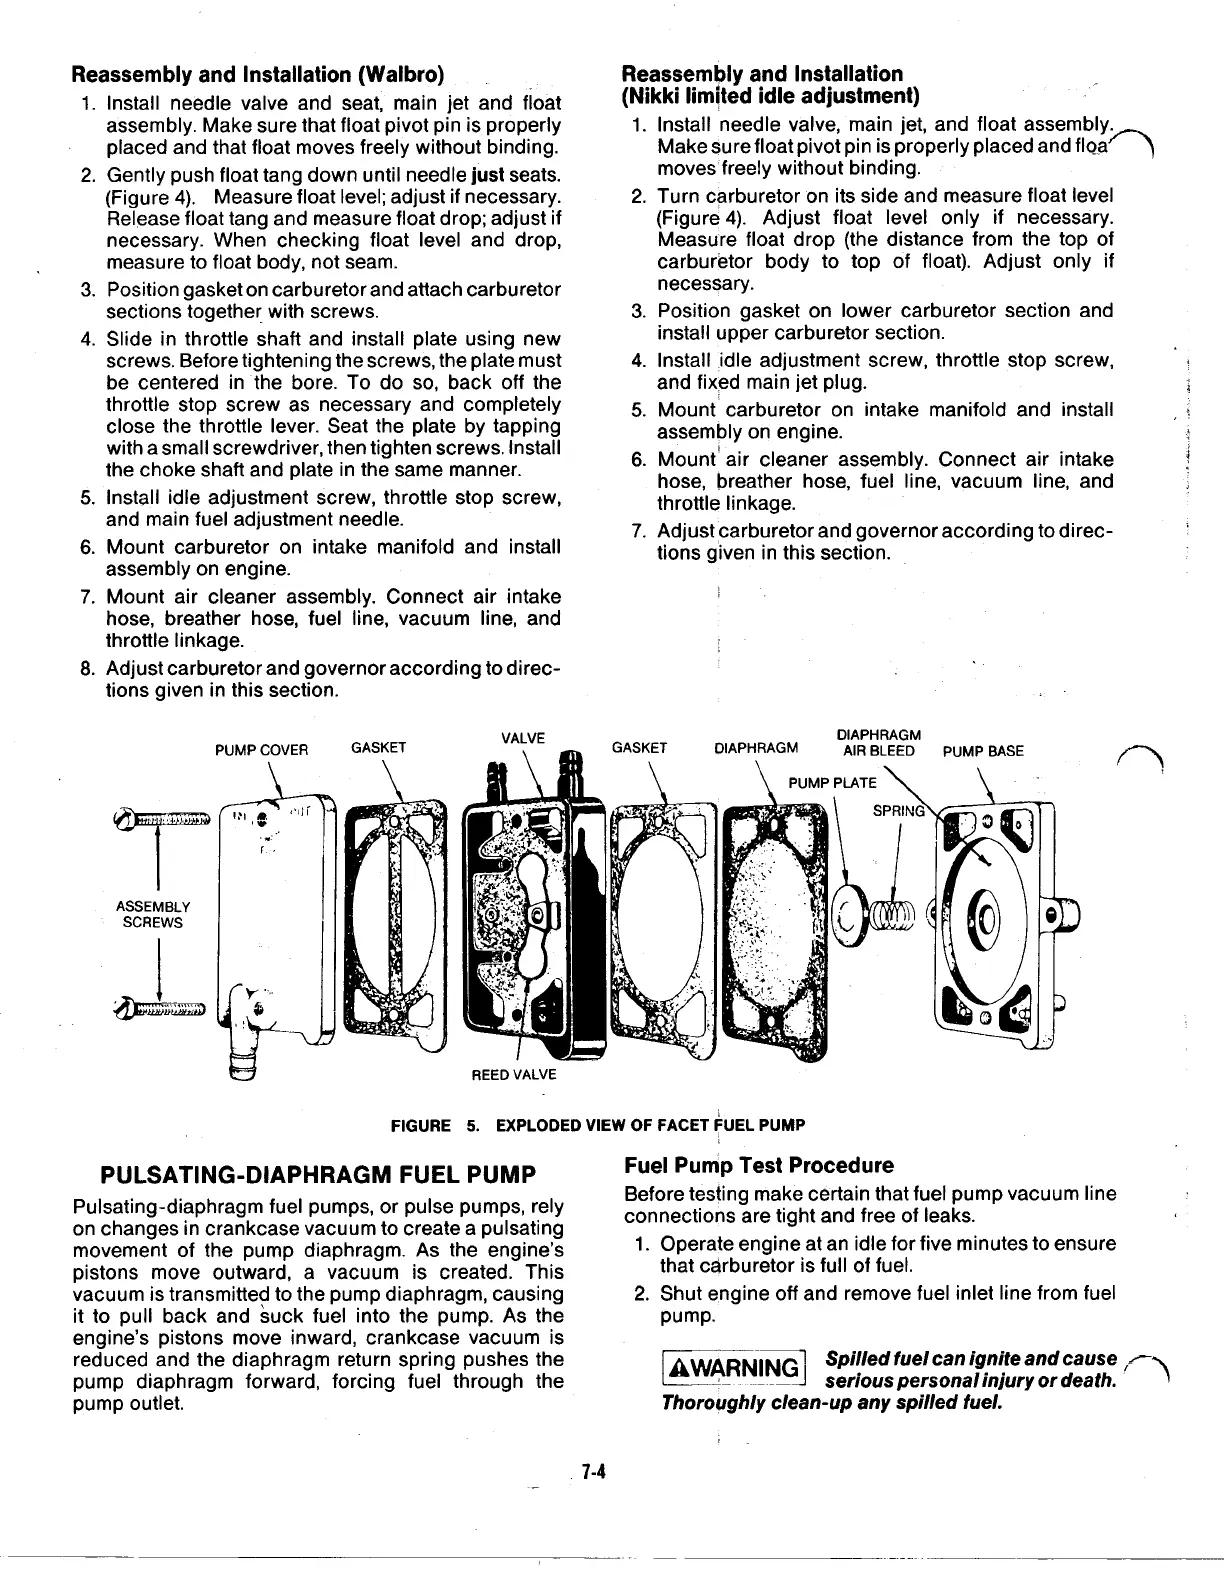
ASSEMBLY
SCREWS
VALVE DIAPHRAGM
REED VALVE
FIGURE
5.
EXPLODED
VIEW
OF
FACET
FUEL
PUMP
PULSATING-DIAPHRAGM FUEL PUMP
Pulsating-diaphragm fuel pumps, or pulse pumps, rely
on changes in crankcase vacuum to create a pulsating
movement of the pump diaphragm. As the engine's
pistons move outward, a vacuum is created. This
vacuum is transmitted
to
the pump diaphragm, causing
it
to
pull back and suck fuel into the pump. As the
engine's pistons move inward, crankcase vacuum is
reduced and the diaphragm return spring pushes the
pump diaphragm forward, forcing fuel through the
pump outlet.
PUMP BASE
\
Fuel Pump Test Procedure
Before testing make certain that fuel pump vacuum line
connections are tight and free of leaks.
1.
Operate engine at an idle for five minutes
to
ensure
2.
Shut engine
off
and remove fuel inlet line from fuel
that carburetor is full of fuel.
pump.
WARNING
WARNING
Spilled fuel can ignite and cause
serious personal injury or death.
Thoroughly clean-up any spilled fuel.
 Loading...

