7
onesc
re
e
nso
lu
t
i
ons.
c
om
|
+1
858.552.0290
|
Un
i
t
ed
St
ate
s|
Pa
k
i
st
an
|
Colom
bi
a
|
Mexico
|
UAE
4. GettingReady!
4.1.
InstallingtheWallmount
Formountingtheunit,checktheintegrityofthewall,whetheritcanenduretheloadoftheunit.Afterthat,
clean the surface on whichthe unit is to be installed. Make sure your technician has the proper tools to
installthewallmount(theseincludescrews,washers,drillmachine,
screwdriveretc.)
Followthestepsgivenbelow:
Atleasttwopersonsarerequiredtoliftthescreen.
HangtheHorizontalmountwithsufficientnumberofscrews.
Checkthelevelofthemountandmakesurethatitisproperlyadjusted.
Attachand screwthe mounting arms
onthe backsideofunitpr operly,make surethat screwsdo
notdamagethescreen.
Hangthescreenwiththehelpofothersandmakesurethatthemountingarmsproperly alignand
fixthemselvesonthemount.
Makesurethatspacingbetweenwallandscreenis5
cmormoreforproperventilation.
Finally, place a little force downward and sidewise to check whether the mount withstands the
forces.
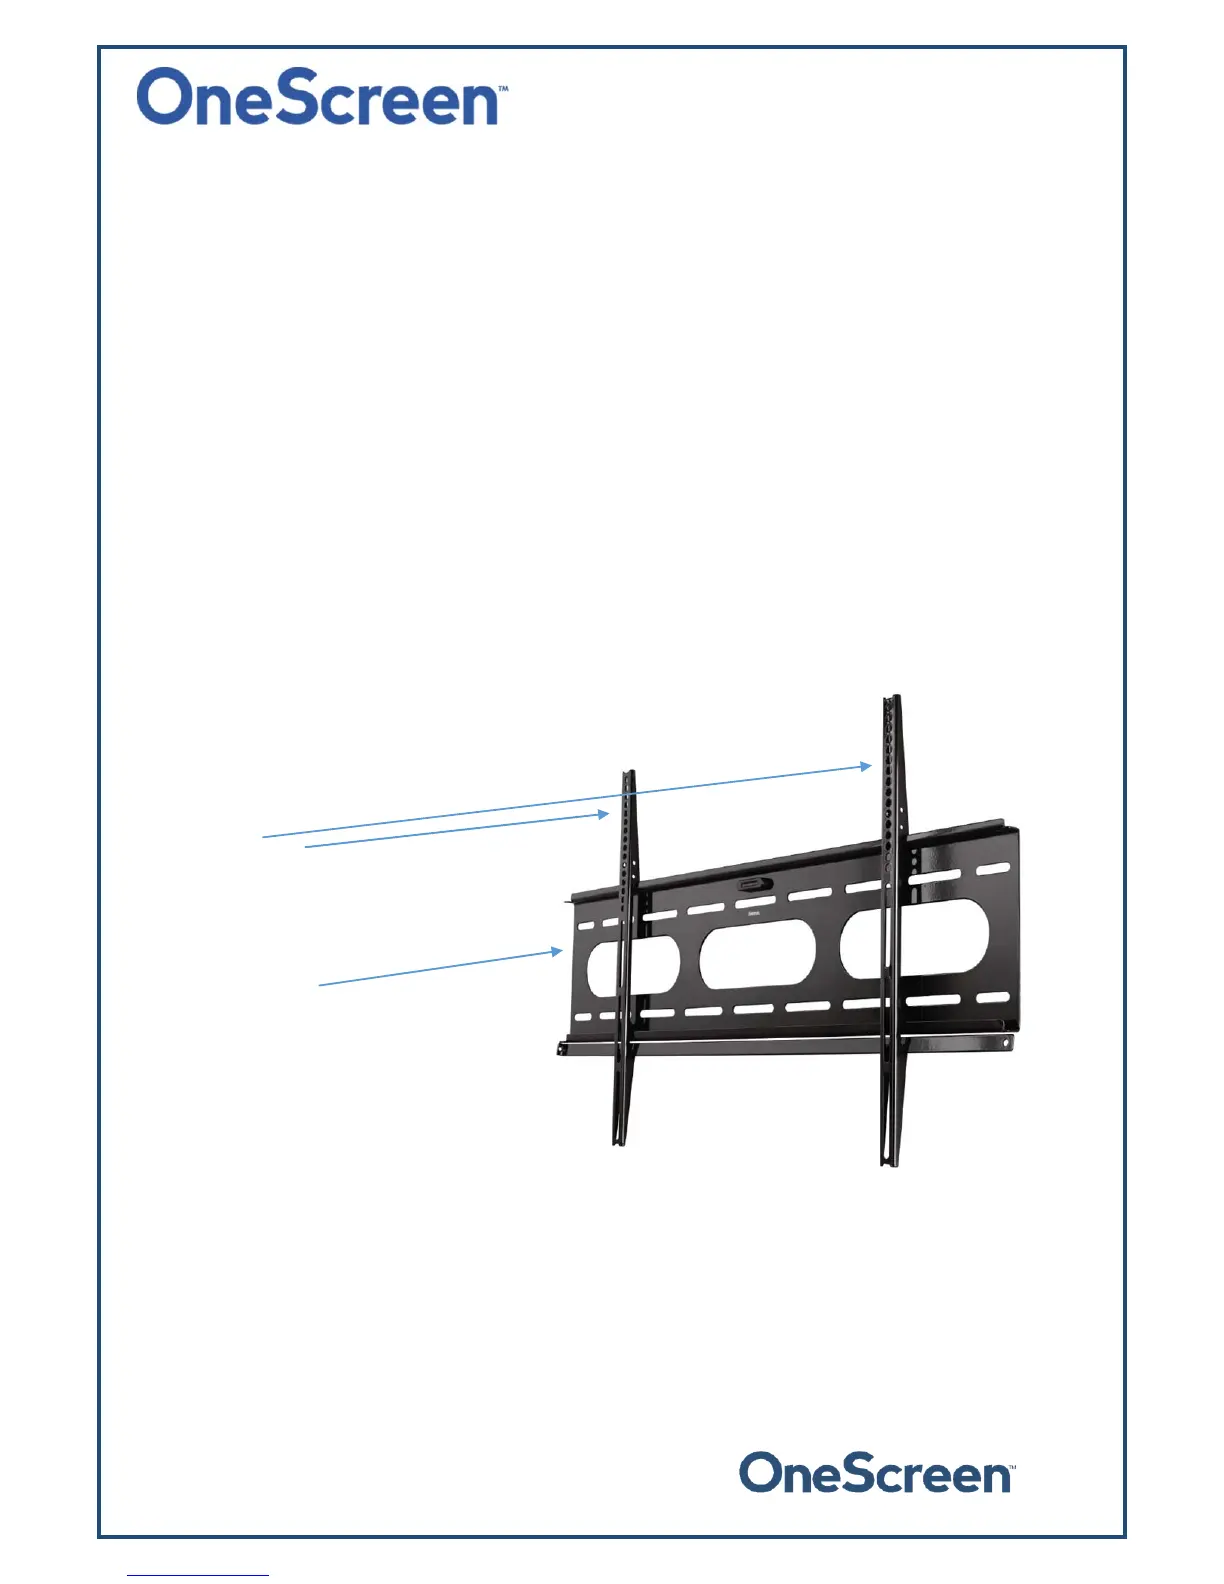
Thefollowingfigureshowsthemountingarmsandhorizontalwallmount:
Mountingarms
(tobeplacedatthebackofthescreenusing
screws)
Horizontalmount
(tobeplacedonthewallwithscrews)
Note:TheVESAmountpatternsforourdifferent unitsareasfollows.Itisrecommendedthatyoureinforce
thewalltobeartheloadoftheunit.
TheVESAmountpatternforthe55"unitis400x400
TheVESAmountpatternforthe65"unitis400x400
TheVESAmountpatternforthe75"unitis600x400
TheVESAmountpatternforthe84"unitis600x400