Onset Computer Corporation
13
Task 8: Add More Data Nodes to
the Network
Now that you are familiar with the procedure for adding a data
node to the network, you can add the rest of your data nodes.
A. Supply Power to Data Nodes (Task 3 on page 4).
IMPORTANT: Make sure you are familiar with the
power options, and the implications of using one or the
other. See Powering Data Nodes on page 18.
B. Click the Form Network button at the bottom of the
HOBOnode Manager window.
C. Add data nodes to the network by briefly pressing the
button located inside the small hole at the bottom of the
case, as shown in Task 5 on page 7.
D. When all data nodes are added to the network and they
appear in the Device Table, exit Form Network mode by
clicking the X on the Form Network progress indicator.
Next Task: Configure Advanced Features (Optional)
Onset Computer Corporation
14
Task 9: Configure Advanced Features
(Optional)
This section outlines a variety of features to help you set up
and monitor your network, and to plot data in HOBOware or
another application. You can configure these features now or at
a later time.
For details on a specific feature, click the Help button located
on the window related to the feature (if applicable), or open the
entire Help by clicking the Help button at the bottom of the
HOBOnode Manager window.
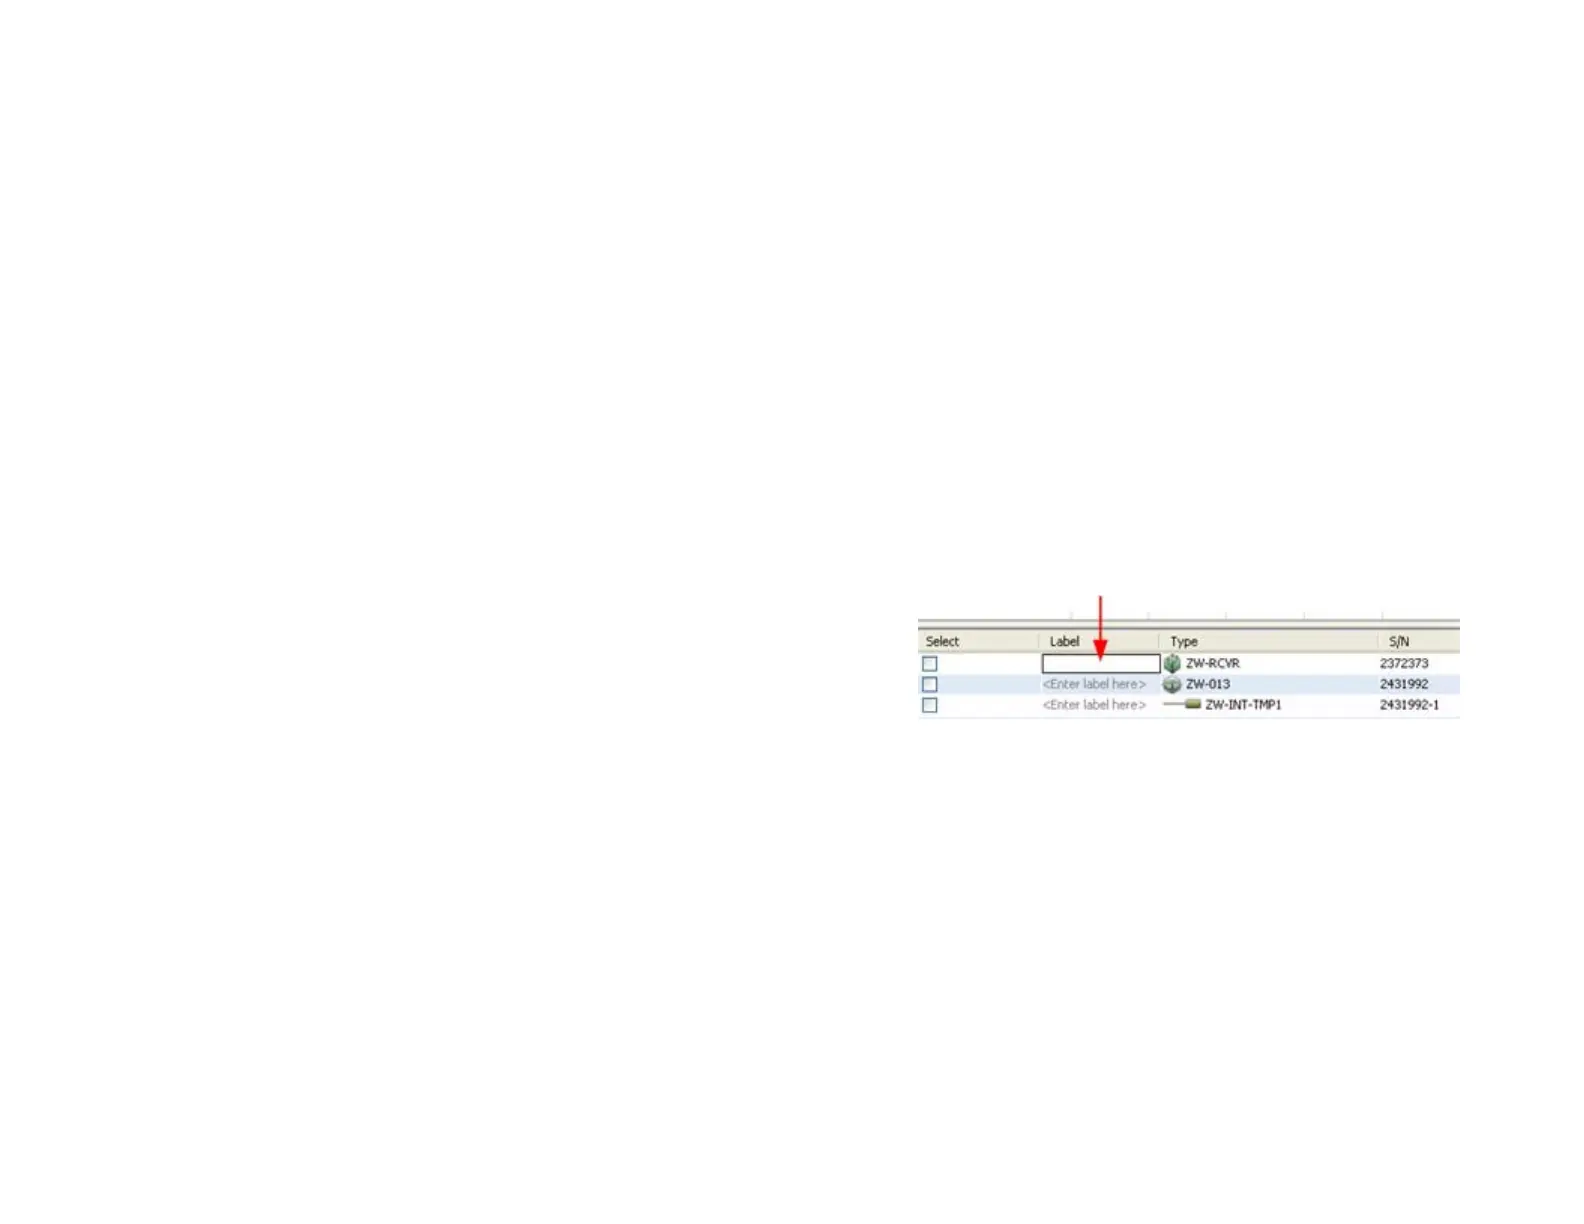
Add Labels
You can enter a descriptive label for each data node and sensor
to help you identify them in the Device Table when configuring
alarms and when plotting/exporting data.
To label a device, double-click the Label column where it says
<Enter label here> and type in the label.
 Loading...