Onset Computer Corporation
15
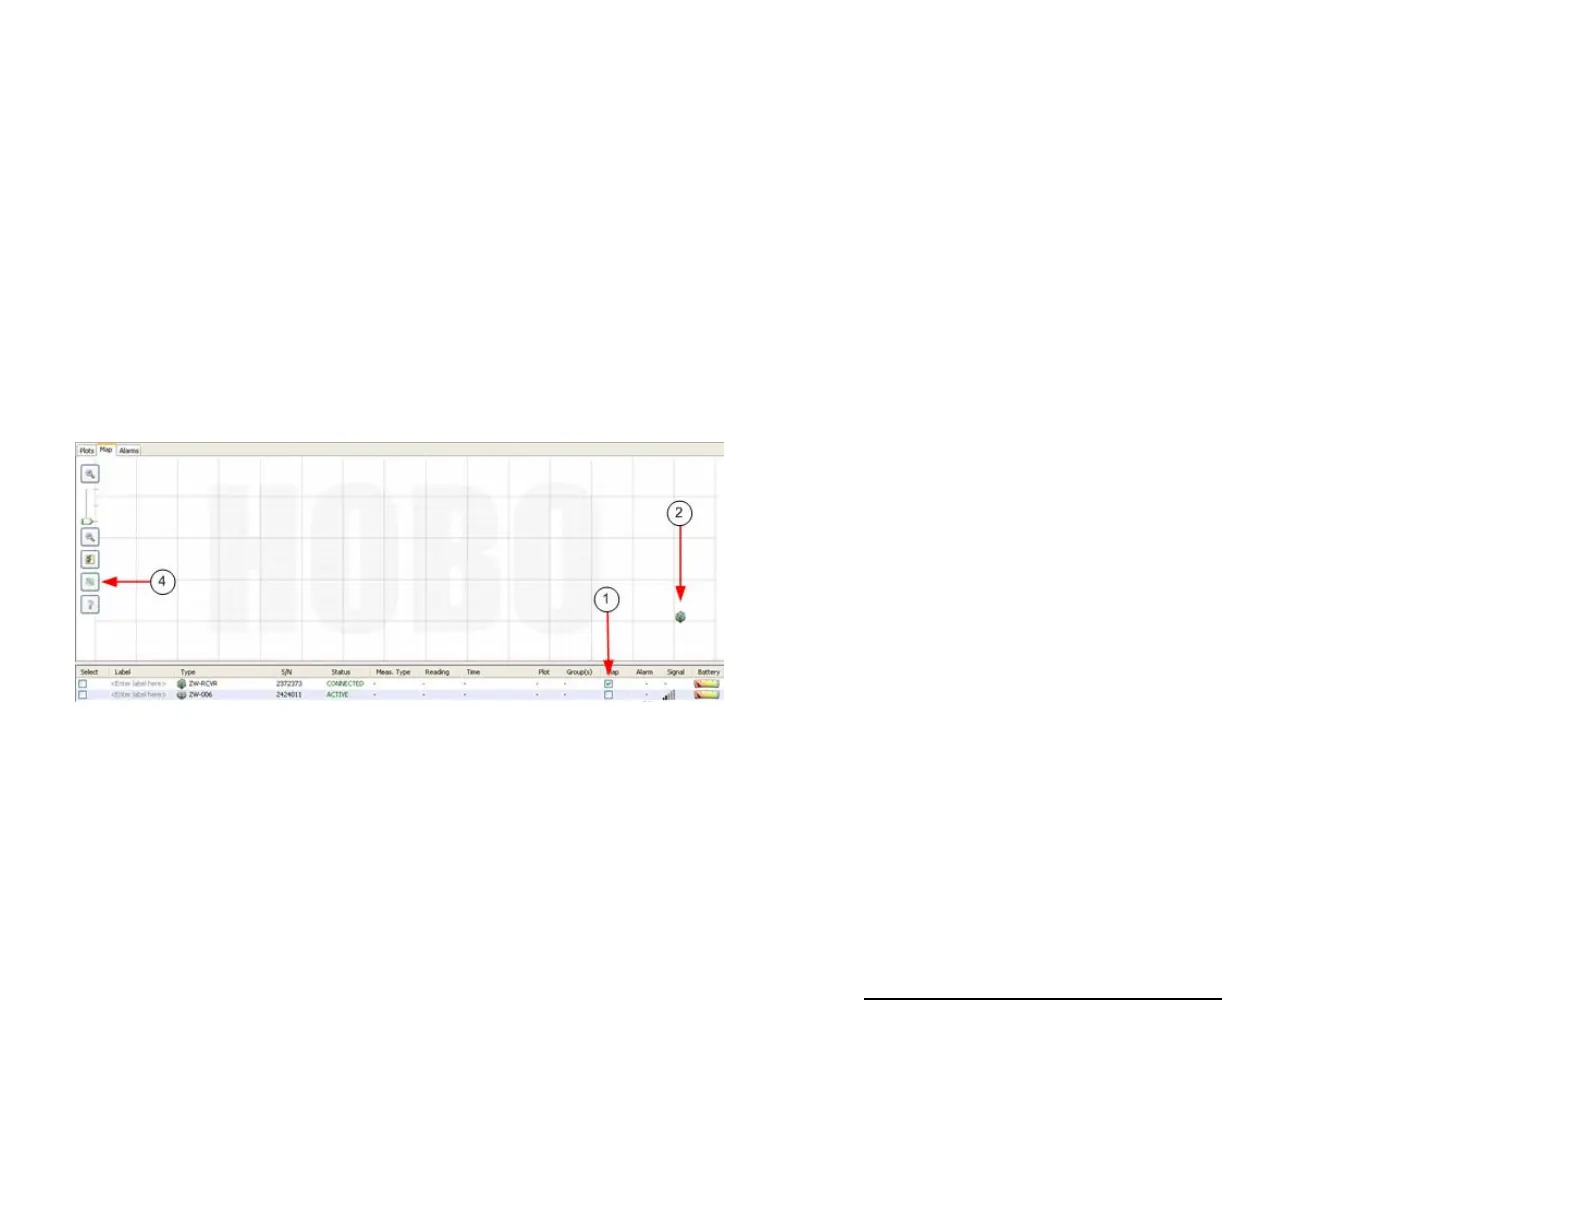
Add Data Nodes to the Network Map
Place icons on the Network Map to help you keep track of your
devices. You can expand Information Balloons on the device to
view status information and sensor readings.
1. Check the Map box for the device in the Device Table.
2. Click on the map where you want to place the icon for
the device.
3. Repeat steps 1 and 2 for each device you want to add to
the map.
4. Click the Refresh Network Paths button to display
updated connection paths.
For More Information: Click the Help button on the Network
Map.
Edit Logging and Connection Intervals
By default, data nodes log data from sensors once per minute
(Logging Interval), and connect to the receiver every 10
minutes (Connection Interval). To change the default Logging
Interval and Connection Interval for a data node, double-click
the row for the data node in the Device Table and change the
values in the Configure Node window.
To change the default for all data nodes added going forward,
click the Actions button at the bottom of the HOBOnode
Manager window, select Edit HOBO Data Node Preferences and
then change the values in the General preferences section.
Onset Computer Corporation
16
Enable Alarms
There are two types of alarms that you can enable in
HOBOnode Manager:
• Sensor Alarms - You can configure alarms to be notified
if a sensor reading is out of a configured range.
• System Alarms - The Missing Node alarm notifies you if
a data node has not connected to the receiver within a
specified period of time. The Heartbeat alarm
periodically notifies you that the receiver is active and
communicating with data nodes. The Low Battery alarm
alerts you when the batteries are low in data nodes
and/or routers.
To configure a Sensor Alarm in HOBOnode Manager, click the
button in the Alarm column in the Device Table. This opens the
Add Sensor Alarm window. Enter alarm values as desired.
To quickly set up an alarm for now, just select either a Visual or
Audible notification Action. To set up email or text message
notifications, you will need to configure SMTP settings in the
Alarm Preferences (see below).
For More Information: Click the Help button on the Add
Sensor Alarm window.
To enable a System Alarm (Missing Node, Heartbeat, or Low
Battery), click the Alarms tab at the top of the HOBOnode
Manager window, click the System tab, and then click the
Enable button for the desired alarm.
To quickly set up an alarm for now, just select either a Visual or
Audible notification Action. To set up email or text message
notifications, you will need to configure SMTP settings in the
Alarm Preferences (see below).
For More Information: Click the Help button in the
corresponding alarm window.
Email or Text Message Notifications
Before you can set up alarms with Email or Text Message
notifications, you must set your Alarm Preferences. At the
bottom of the HOBOnode Manager window click the Actions
button and then select Edit HOBO Data Node Preferences.
 Loading...