5
GETTING STARTED
1. Connect the charger to input power. “Duratrax Onyx 225” will be displayed on the LCD.
2. The “CHARGE START” screen will automatically follow after the Duratrax Onyx 225. The top line of this screen will
show which of the ten memories is active (0–9). All settings for this memory will scroll across the bottom line of this
screen. If these settings match your battery and needs, skip to the BATTERY CONNECTION section.
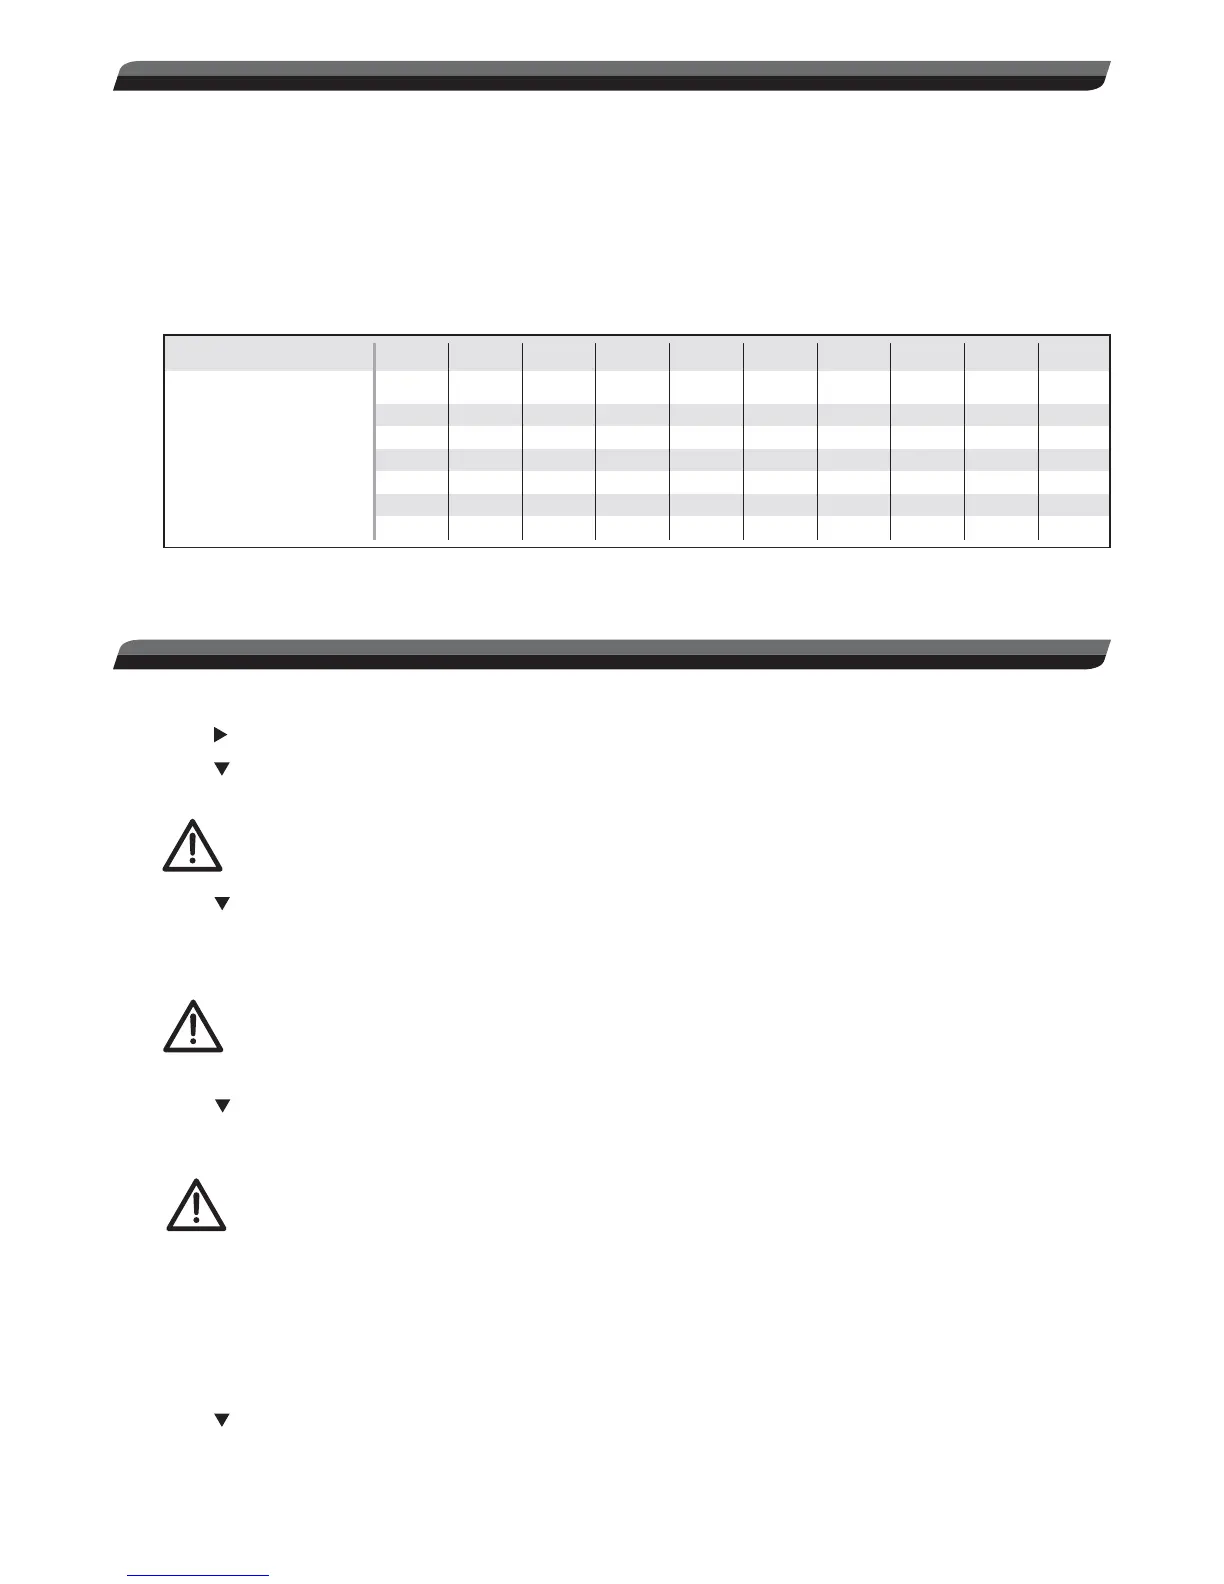
3. If the settings in the displayed memory do not match your battery or needs, refer to the chart below for the factory
default settings for all memories. To select one of these memories, while in the START screen press the CHANGE
button. The memory number will ash. Press + or – to select a different memory number. Press CHANGE to activate
this memory. Skip to the BATTERY CONNECTION section.
MEMORY NUMBER0123456789
Battery Type
Cell Count
Capacity (mAh)
Current
Safety Time (minutes)
Delta Peak (mV/C)
Trickle Current (mA)
LiPo
2
4000
4.0A
120
–
–
LiPo
2
5000
5.0A
120
–
–
LiPo
2
5700
5.7A
120
–
–
LiPo
3
5000
5.0A
120
–
–
LiPo
3
6400
6.4A
120
–
–
NiCd
6
1800
1.8A
90
10
200
NiMH
6
3000
3.0A
90
8
250
NiMH
6
5000
5.0A
90
8
250
NiMH
7
3000
3.0A
90
8
250
NiMH
7
5000
5.0A
90
8
250
4. If none of the memories have settings which meet your needs, proceed to the ADJUSTABLE SETTINGS section
below to change settings manually.
ADJUSTABLE SETTINGS
1. Select the memory (0 through 9) that you wish to modify.
2. Press
to nd the “BATT SETUP” screen.
3. Press
to move down to the BAT.TYPE screen. Press CHANGE to cause the setting to ash, then press (+) or (–)
to nd the desired battery type. Press CHANGE to con rm the new setting.
WARNING! NEVER set the BAT.TYPE screen to a type that does not match your battery! For example,
accidentally charging a LiPo battery in the NiCd setting could result in an overcharge condition on
the battery, which could result in an intense FIRE!
4. Press
to nd the CELL screen, to set the number of cells / nominal rated voltage of the battery. The number of
cells in the pack is shown on the top line, and the nominal rated voltage of the pack will show on the bottom line.
Press CHANGE to cause the setting to ash, then press (+) or (–) to nd the setting which matches your pack Press
CHANGE again to con rm the new setting.
WARNING! For LiPo and LiIon batteries, NEVER set the voltage to a value which is higher than the
rated voltage printed on the battery! Attempting to charge such a battery to a voltage that is higher
than its rating could result in an overcharge condition on the battery, which could result in a very
intense FIRE!
5. Press
to nd the CAPACITY screen. If the charger fails to detect full charge, this function can stop the charge
process after a certain amount of energy (mAh) has been delivered to the battery. This protects the battery from
accidental overcharge.
WARNING!! For LiPo, LiIon, and LiFe cells, always set the value in this screen to the exact rated
capacity of the battery (or as close as possible). Lithium battery types can EASILY BECOME
DAMAGED if overcharged and possibly START A FIRE! NEVER set the number in this screen to a
value higher than the capacity (mAh) value printed on the lithium battery.
Setting this screen to 110–130% of a NiCd or NiMH battery’s rated “mAh” value is recommended. As shown in the
quick reference chart on page 6, locate the rated capacity of your battery in the left column, then nd your battery’s
110% or 130% capacity value to the right. Enter the desired capacity value into this screen.
Press CHANGE to cause the setting to ash, then press (+) or (–) to nd the proper capacity value (as close as
possible). Press CHANGE to con rm the new setting.
6. Press
to nd the fast charge CURRENT screen:
a. For lithium based batteries, the charger will automatically set the charge current to a value of 1C (based on the
value entered in the CAPACITY screen described above). This can be overridden manually.
 Loading...