5
4. Charge current:
a. Press and hold the SETTINGS button for 3 seconds. The
charge current setting will show on the LCD.
b. Briefl y press the SETTINGS button again to scroll through all
charge current options – 0.8A, 1.5A, 3.0A, and 5.0A. Refer to
the chart at right for a list of recommended charge currents
for different size batteries.
c. Once the desired current is found, press and HOLD the
SETTINGS button again for 3 seconds. The LCD will return
to the opening screen.
BATTERY CONNECTION
1. After determining which battery type is to be charged, what connector is being used and all appropriate programming
is completed, the correct adapter will need to be installed prior to charging. If an adapter other than what is included is
needed, please refer to the “CONTROLS AND CONNECTIONS” section on page 4 for a list of adapters that are sold
separately.
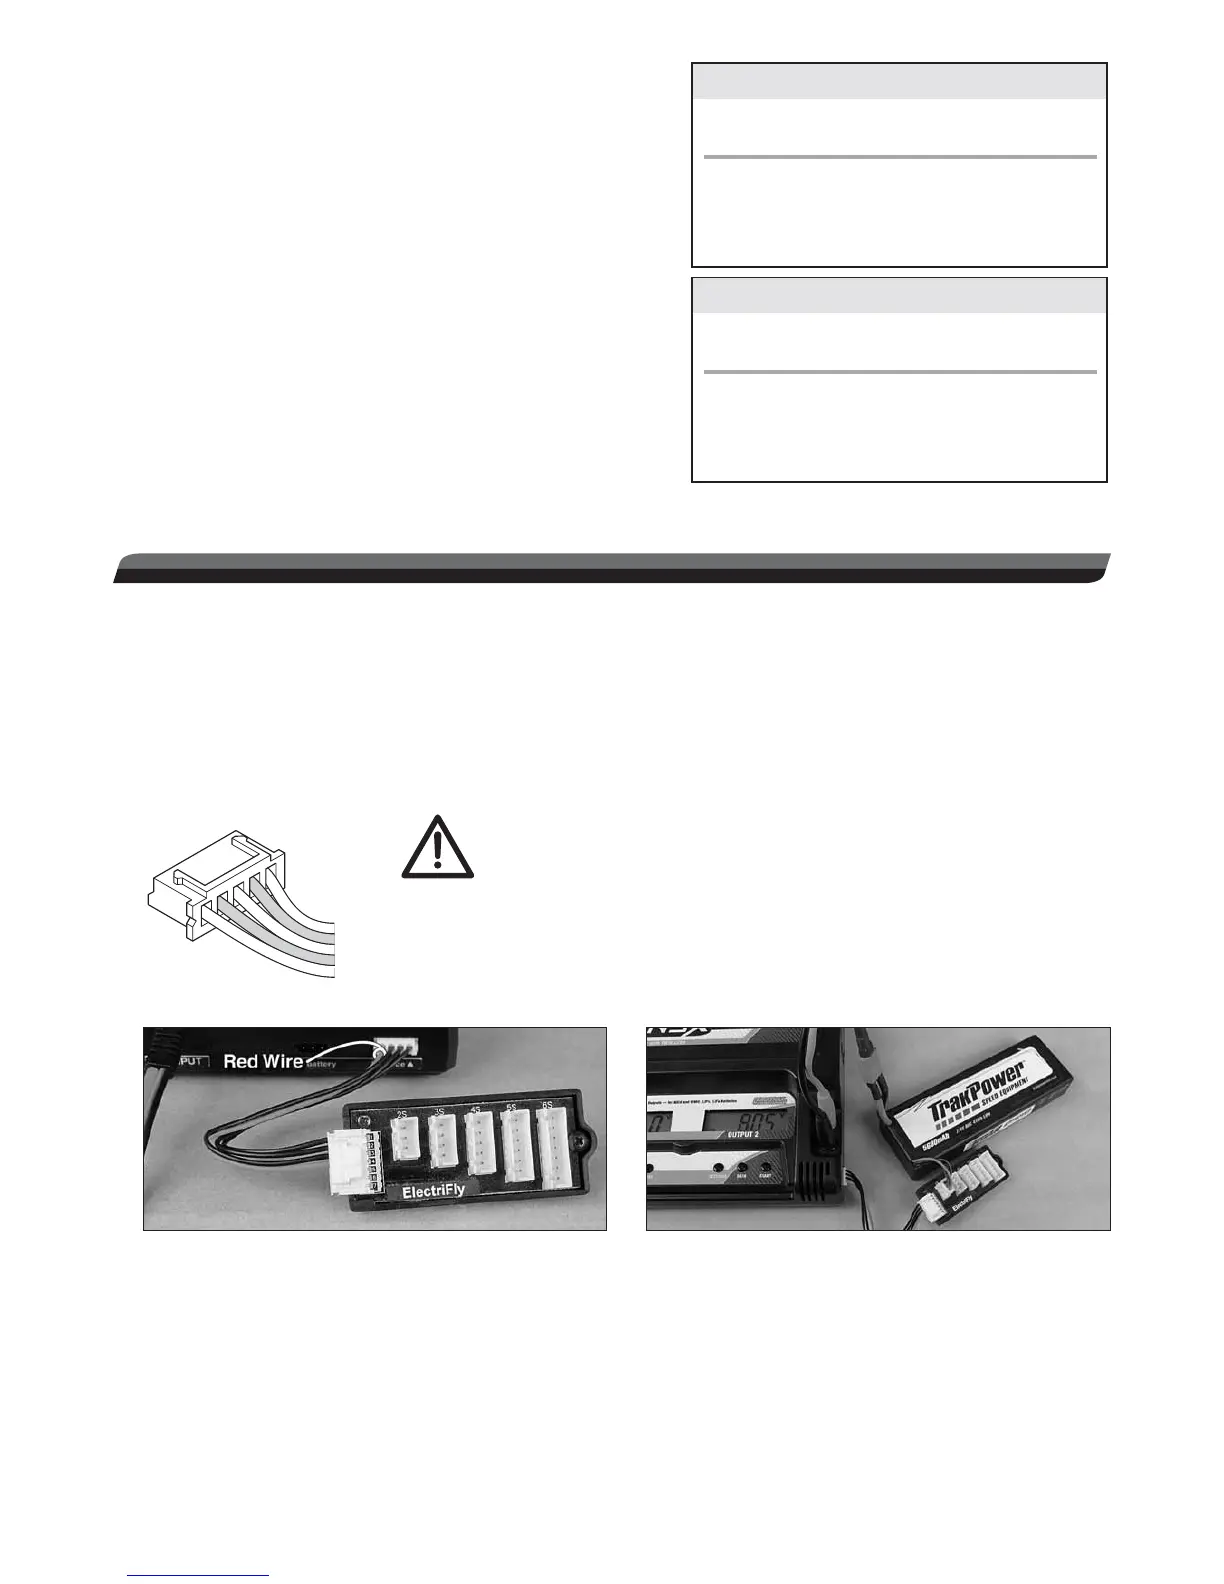
2. For LiPo, Li-Ion OR LiFe: Lithium batteries for R/C are now commonly wired for balancing, having a unique connector
which has more than two wires going to the pack itself (like shown below, left). Each wire is connected to an individual
cell inside the pack, by which the charger monitors the condition of the individual cell and controls whether it should
be charged. Such packs SHOULD be charged with a LiPo charger that is capable of balancing, such as the Onyx 245.
IMPORTANT: The Onyx 245 will only charge
2S and 3S lithium batteries if both the balance
lead and main lead of the lithium battery are
connected to the charger. If either the balancing lead or main
lead of the lithium battery is not connected, the charger will
sound an alarm and refuse to initiate charge. The Onyx 245
will charge 1S packs normally through the main lead and
without the need for a balance lead.
3. To balance a lithium battery during charge, connect the balance board adapter that matches your battery’s balance
connector to the charger’s balancing jack (above left). The red wire will always be on the left. Then connect the battery’s
balance lead to the balancing board. Lastly, connect the battery’s main power lead to the adapter connected to the
charger’s banana jacks (shown above right, note proper polarity).
4. For NiCd/NiMH: Plug the adapter into the charger FIRST. Then connect the battery to the adapter ONLY after it has
been connected to the charger. Proceed to the “Starting Charge” section.
Balancing
Connector
750 –1000mAh
1000 –1400mAh
1500 – 2400mAh
2500 – 5000mAh
0.8 A
1.5 A
3.0 A
5.0 A
NiCd/ NiMH Charge Current Recommendations
Battery’s
Rated Capacity
Charge
Current Setting
750 –1200mAh
1200 – 2200mAh
2200 – 3500mAh
3500 – 7500mAh
0.8 A
1.5 A
3.0 A
5.0 A
Lithium Charge Current Recommendations
Battery’s
Rated Capacity
Charge
Current Setting