L’installazione standard prevista a catalogo sono
relative ad imbarcazioni a poppa diritta verticale.
Ogni altra configurazione deve essere concordata con il
nostro Ufficio tecnico.
Per il montaggio della passerella consultare le illustrazioni accom-
pagnate dalle descrizioni.
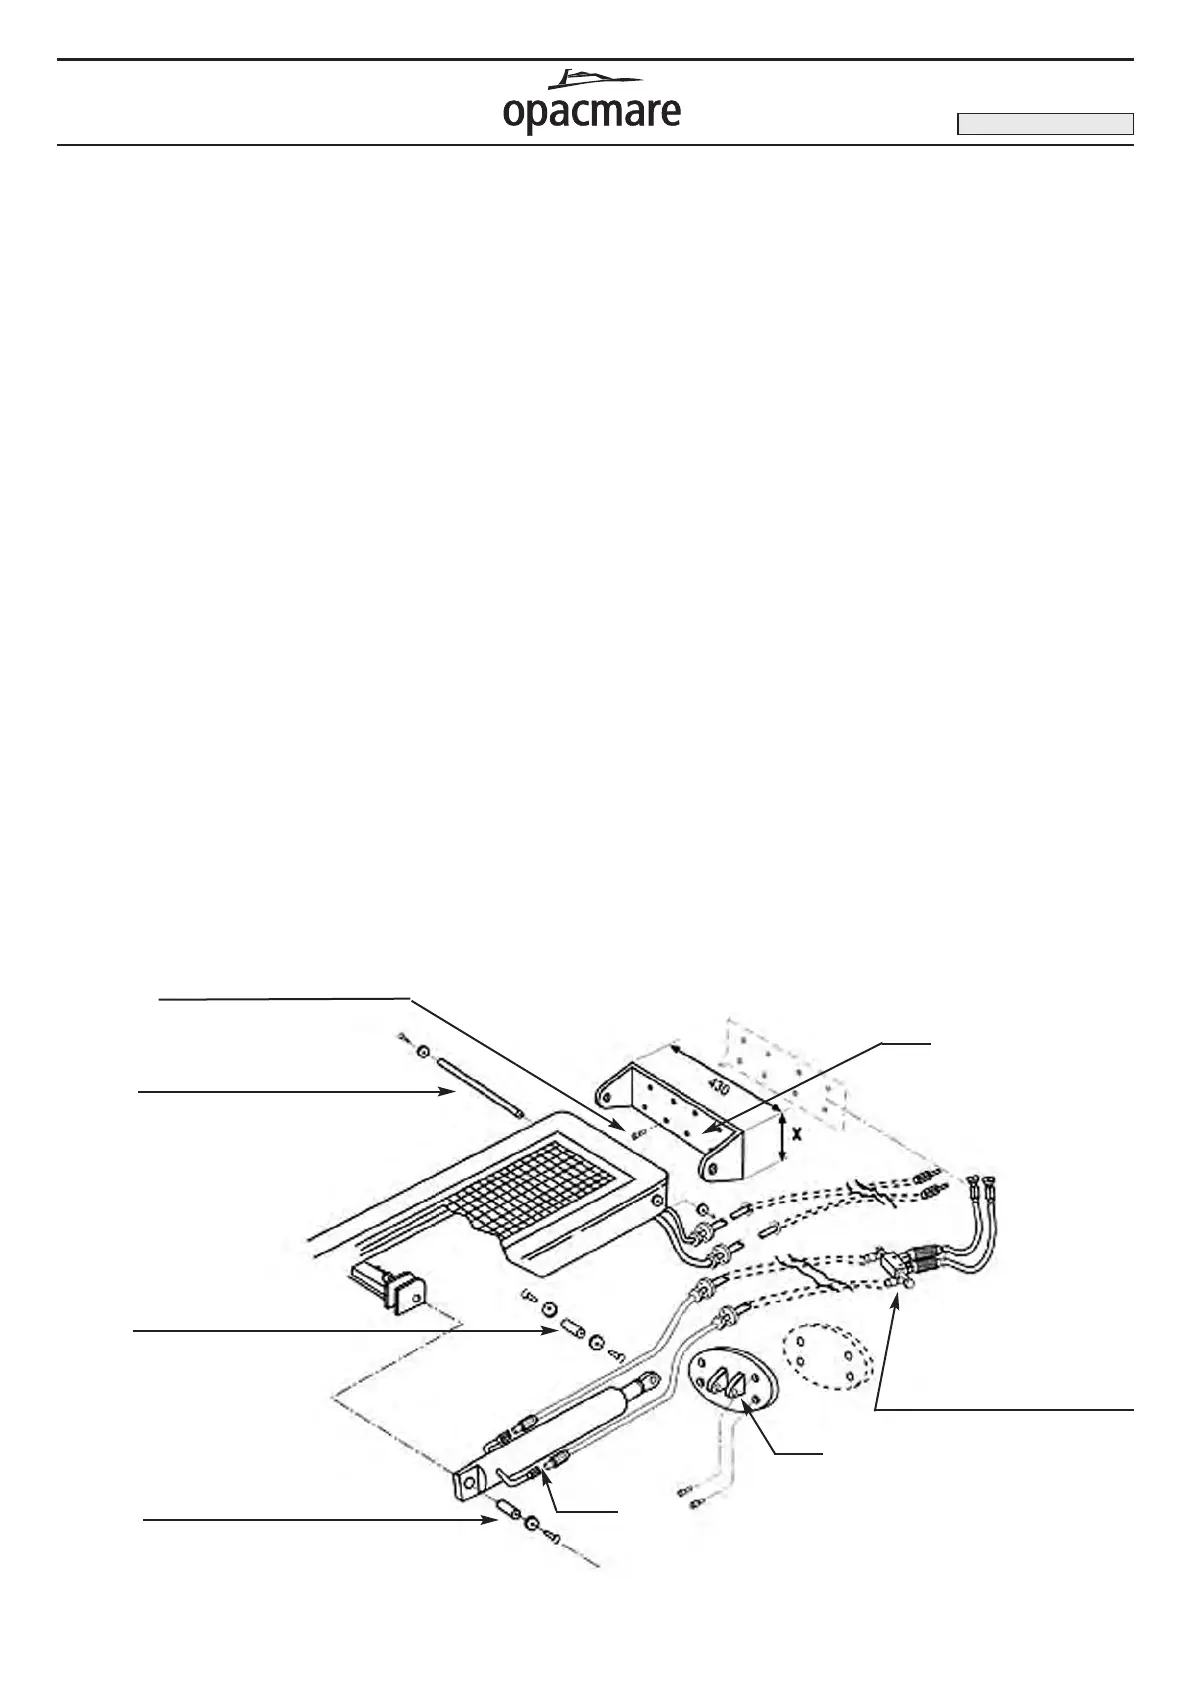
n Sfilare i perni di collegamento del pistone di sollevamento
(rif.A e B).
n Praticare i fori di fissaggio sulla poppa dell'imbarcazione,
utilizzando come dima di foratura le stesse piastre di
ancoraggio C e D fornite con la passerella.
n Fissare alla poppa le due piastre di ancoraggio mediante viti
inox AISI 316 da M8 sigillandone il perimetro con silicone,
infilando i tubi idraulici nei fori precedentemente realizzati.
n Collegare la passerella sulla piastra C usando il perno E.
n Ricollegare il pistone alla passerella, rimontando i perni di
collegamento.
n Avvitare i raccordi ad ogiva del gruppo valvola-regolatori di
flusso ai tubi dell'olio, quindi serrare i raccordi ad occhio
girevoli orientando il gruppo valvola nella posizione voluta.
n Effettuare i collegamenti idraulici alla centralina idraulica e
quelli elettrici delle elettrovalvole e della pulsantiera con il box
elettronico.
n Alimentare l'elettronica alla batteria dell'imbarcazione con il
cavo elettrico in dotazione ed eventualmente prolunghe
aggiuntive.
n Alimentare il motore elettrico con cavi di sezione appropriata
attraverso un fusibile (materiale non fornito standard
dall'OPACMARE), controllando la corretta tensione.
(Vedi tabella pagina 8).
n Controllare il riempimento del serbatoio olio della centralina,
alimentare il sistema elettrico ed effettuare lo spurgo del
pistone compiendo 3 o 4 cicli di manovra. Se necessario,
rabboccare il serbatoio della centralina.
n Verificare l'assenza di perdite d'olio.
9
USE AND MAINTENANCE INSTRUCTIONS
MANUALE DI USO E MANUTENZIONE
The standard installation that is foreseen in the cata-
logue is relating to boats with vertical and straight
stern. Every other configuration must be agreed with our
technical department.
For the assembly you must consult the illustrations together with
the relative descriptions in the next pages:
n Remove the connection pivot of the lifting cylinder (A and B).
n Drill holes for fixings on the stern of yacht, using as template
the same fixing plate C and D supplied with the gangway.
n Fix the two anchor plates to the stern with 8 mm AISI 316
stainless screws and seal around the edges with silicon filler.
Insert the hydraulic pipes into the holes that you have previously
realized.
n Connect the gangway on plate C using the pin E.
n Reconnect the cylinder to the gangway by replacing the
connecting pivot E.
n Screw the ogive nipples of the flow regulator valve to the
hydraulic pipes. Tighten the swivel joints with the flow
regulator valve in the desired direction.
n Make the hydraulic connections to the hydraulic unit and the
electric connections of the solenoid valve and of the panel
control to the electronic box.
n Connect the electronic unit to the battery of the boat with the
supplied electric cable or eventually with another extension
cable.
n Feed the electric motor with cable of suitable section by a fuse
(material non standard supplied by Opacmare), checking the
correct tension. (See pag. 8).
n Check that the tank of the hydraulic unit is correctly filled with
fluid, and connect electrical power. Flush the lifting cylinder
making 3 or 4 operation cycle.
n Top up the tank of the hydraulic unit if necessary.
Check that the hydraulic circuits have no leaks.
Picture 2: Installation gangway mod. 4994 - 6996 / Fig. 2: Installazione passerella mod. 4994 - 6996
Stainless steel screws (not incluse)
Viti in acciaio inox (non incluse)
Block valve and flow regulator
Valvola di blocco e regolatore
di flusso
Connection pivot “A”
Perni di collegamento “A”
“C”
“D”
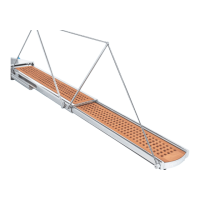
Transom gangway
Passerella esterna
EDITION OF 08/2008
Tubi
Tubi
Connection pivot “B”
Perno di collegamento “B”
Pivot “E”
Perno “E”