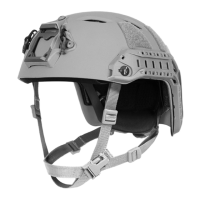
0.5”-1”
PRO SETUP
FAST Helmets were designed for professionals who expect the most from their equipment. Just like
ne-tuning the suspension on a racecar or sighting in a re-arm, the helmet must be set up properly before
use to function correctly. If you do not follow these instructions, your helmet will not function in accordance
with stated performance.
1
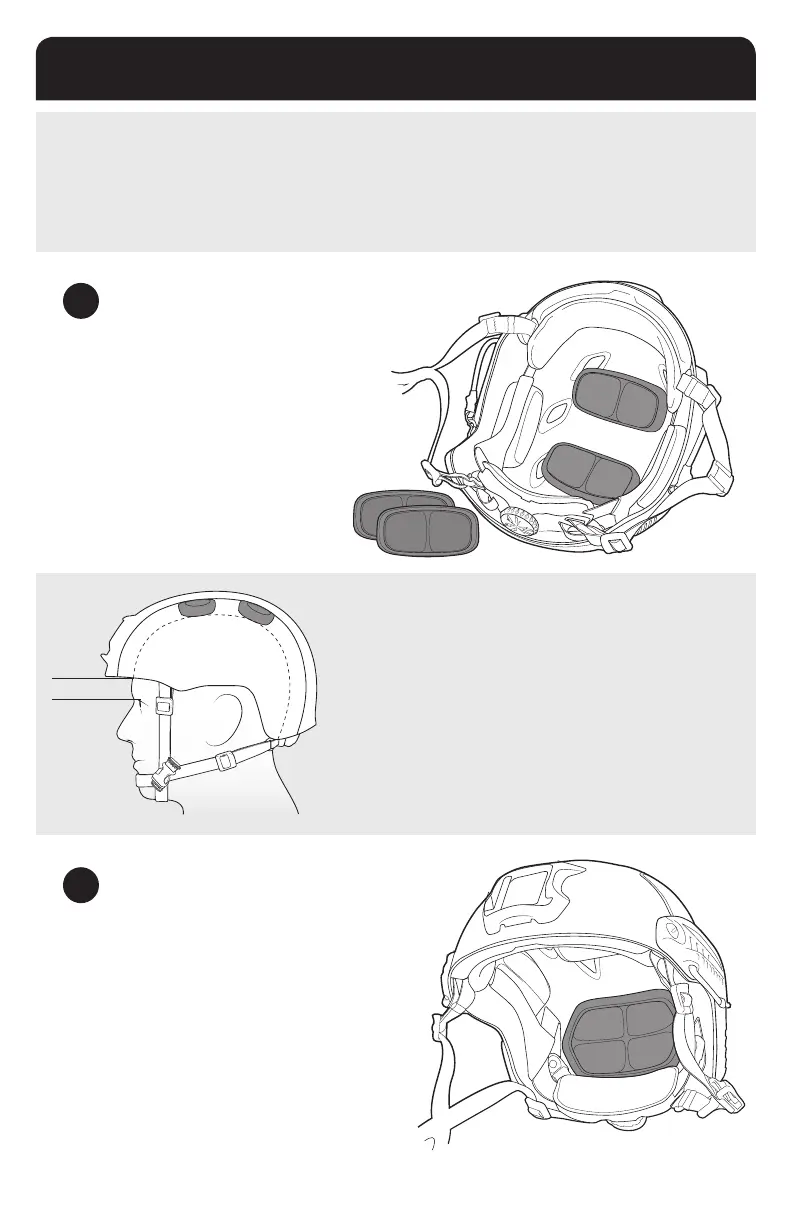
ADJUST THE TOP PADS
• Put the helmet on. ½” pads come
pre-installed in the helmet. Turn the dial to loosen the
tband so that all of the helmet weight is resting on
top of your head.
• With the tband loose, check how high / low the
helmet is sitting. Forehead pad should be above and
not resting on the bony ridge of your eyebrows.
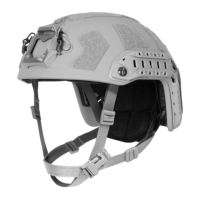
2
ADJUST THE REAR PADS
• Install the ¾” rear pad. Put the helmet on.
• If you feel uncomfortable pressure on your forehead, take
the ¾” pad out and put in the ½”pad.
• If it feels the same as with the ½” pad (can’t notice the
difference) then keep the ¾” installed. This will make the
helmet more stable and comfortable.
HEIGHT ADJUSTMENT
• The distance from the top of the eyebrow to the bottom of the tband
should be approximately 0.5”- 1”. There should also be enough room
around your ears for COMMs / hearing protection.
• If the helmet sits too low on your head, remove the ½” top pads and
install the ¾” top pads.
• If the helmet sits at an uncomfortable angle, adjust the top pads, or
use a combination of ½” and ¾” top pads until it sits correctly.
8