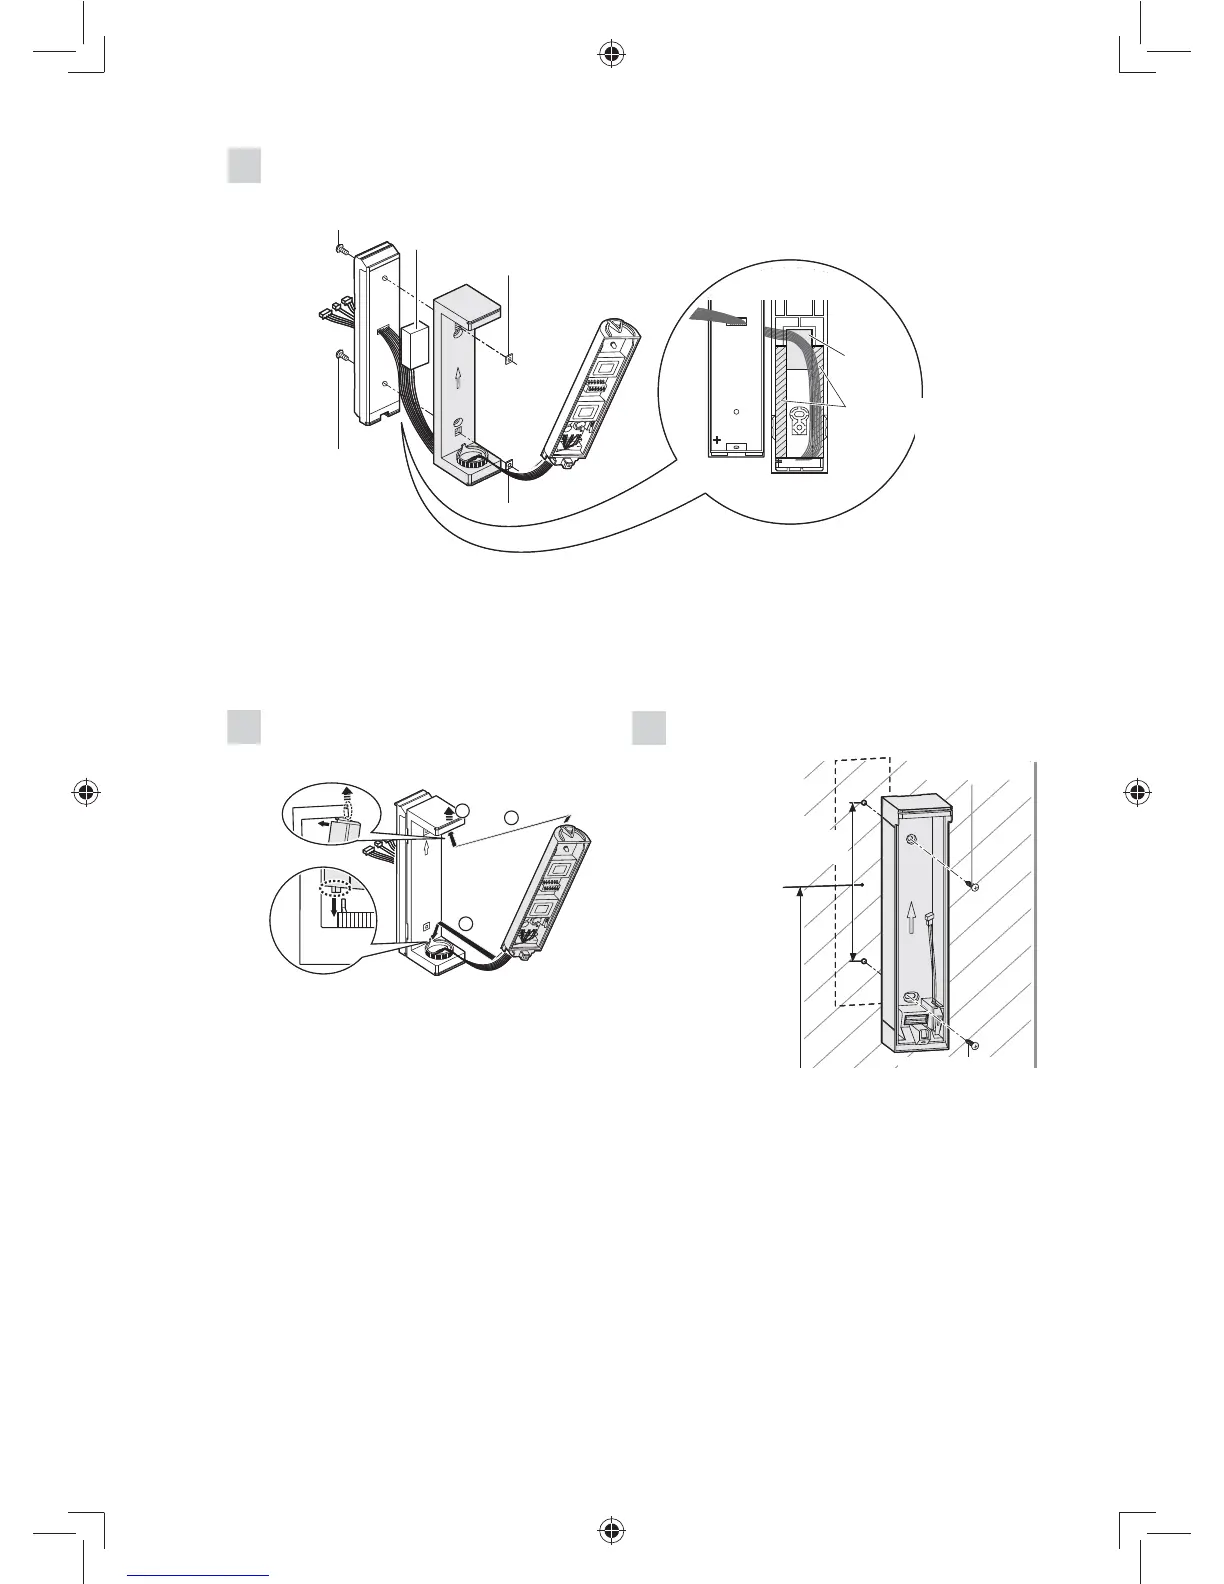
8
Attach the separate box cover and the bracket.
Notes>>
Be careful not to attach separate box cover upside down.
Be careful not to pinch wires.
•
•
Screw (3 × 10 mm)
Screw (3 × 10 mm)
Sponge
Plate nut
Wiring
Sponge
Plate nut
Double-sided tape for
temporary fixing
Screw (3 × 10 mm)
Screw (3 × 10 mm)
Sponge
Plate nut
Wiring
Sponge
Plate nut
Double-sided tape for
temporary fixing
9
Hold the top part of the bracket and
mount the main unit.
1
3
2
1
3
2
10
Mount the separate box on the wall.
Screw (3 × 20 mm)
Screw (3 × 20 mm)
Mounting height:
0.8 – 1.2 m (2'7" – 3'11")
Screw (3 × 20 mm)
Screw (3 × 20 mm)
Mounting height:
0.8 – 1.2 m (2'7" – 3'11")
100 mm
(3.94")
- 8 -