2423
Digital 12 00 Digital 12 00
Quick Set Operations
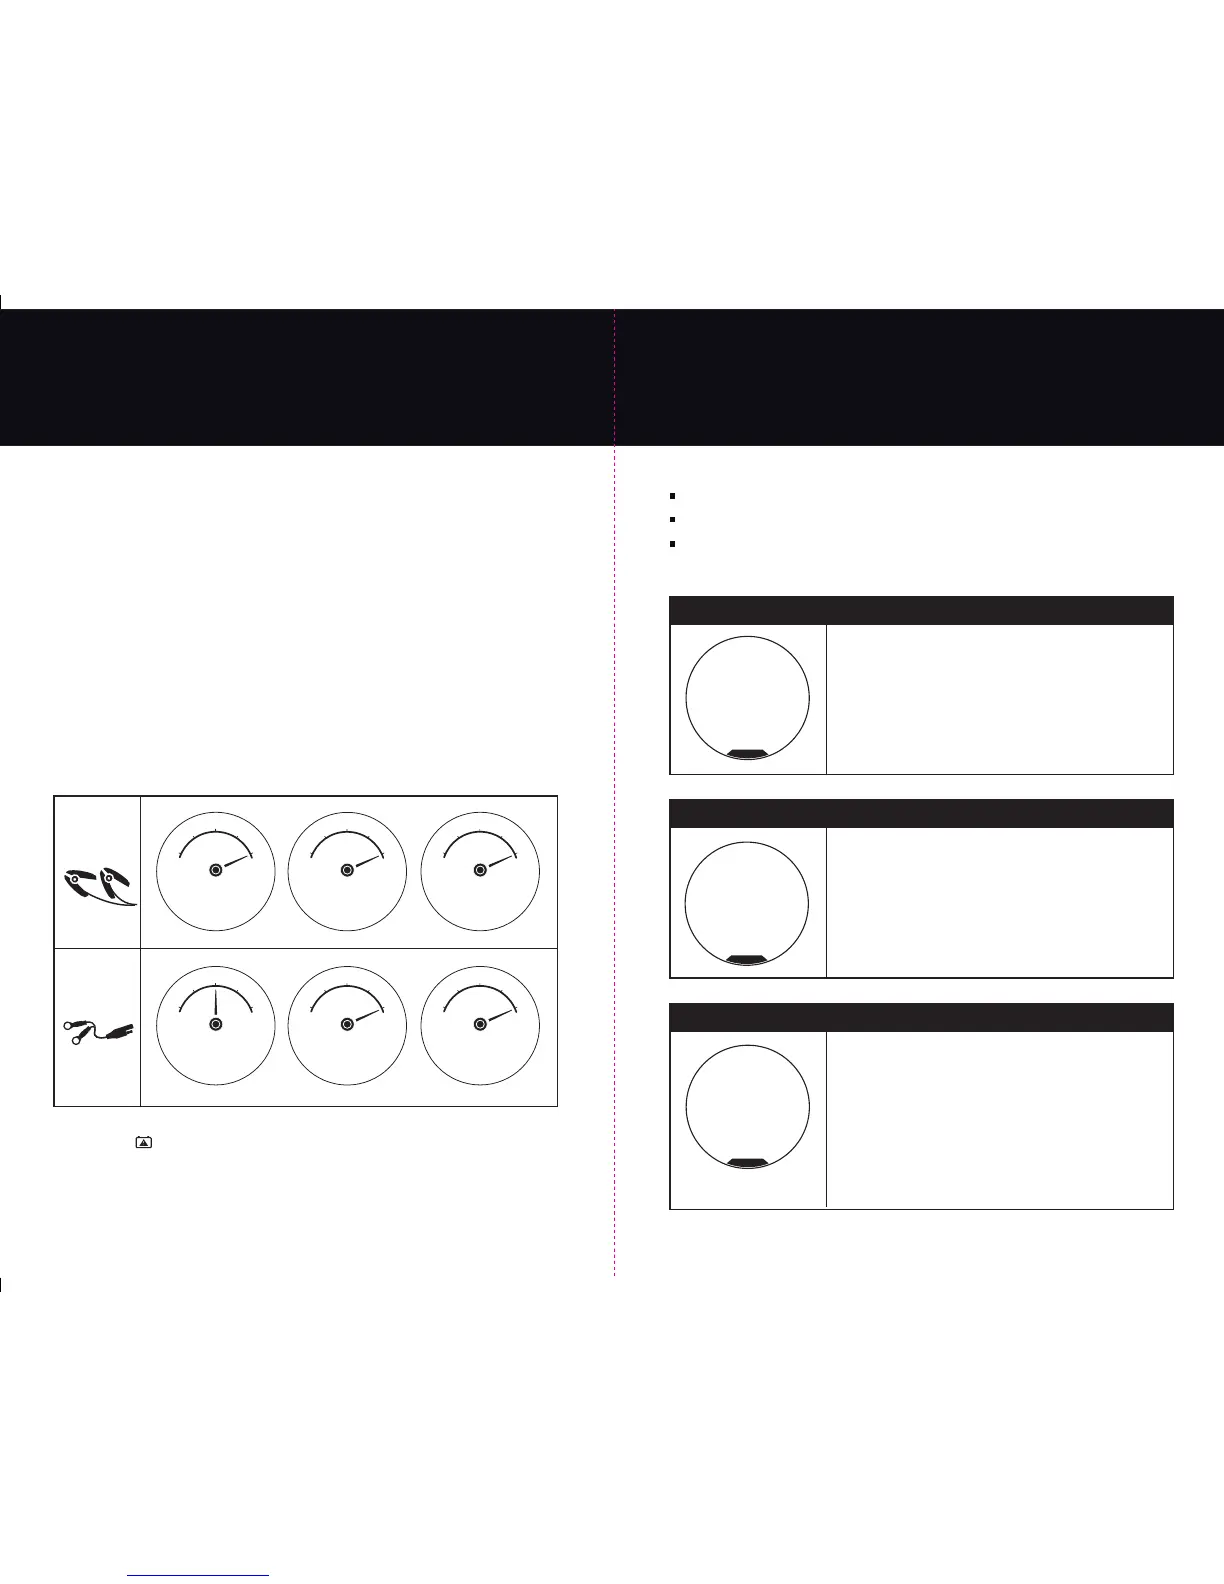
3. Quick Set Battery Auto-Maintainer by Connection Type.
From the RIGHT SIDE “Maintainer Quick Set Selector” choose a maintainer connection type
that matches your set up as outlined on pages:
Page 18: Easy Set Up - “Charging with DC Clamps out of a Vehicle”
or
Page 19: Easy Set Up - “Charging with DC Clamps in a Vehicle”
or
Page 20: Easy Set Up - “Auxiliary Side Port Maintainer Setup” for in or out of vehicle auto-maintaining.
Select the battery maintainer by using the touch button quick sets:
A. “DC Charging Clamps”
B. The “Auxiliary (AUX)” side port maintainer (for hardwired in or out of vehicle connections).
After making a selection the charger will begin its auto-maintain process and will sequence
through the following LCD screens as shown below for the connection type selected:
Note: For short and long term storage the OPTIMA
®
Digital 1200 will automatically recondition
batteries every 30 days for 3 hours.
Note: If the charger identifies a fault during this process or any quick set process it will
illuminate the “Check Battery” icon on the top of the charger and it will “chirp” with an
audible tone letting you know to read the fault message and attend to the battery or charger.
See pages 24 and 25 for Fault Screens and Troubleshooting steps.
Battery
Maintainer
Plug in On Side
AUX
Maintainer
A
B
13.4 1.0
Volts DC Amps DC
see manual
F
E
50
%
25
%
0
%
75
%
100
%
MAINTAINING
12V BATTERY
13.4 1.0
Volts DC Amps DC
see manual
F
E
50
%
25
%
0
%
75
%
100
%
MAINTAINING
12V BATTERY
13.4 1.0
Volts DC Amps DC
see manual
F
E
50
%
25
%
0
%
75
%
100
%
30 DAY 3 HR
12V RECONDITION
13.4 3.0
Volts DC Amps DC
see manual
F
E
50
%
25
%
0
%
75
%
100
%
MAINTAINING
12V BATTERY
13.4 1.0
Volts DC Amps DC
see manual
F
E
50
%
25
%
0
%
75
%
100
%
MAINTAINING
12V BATTERY
13.4 1.0
Volts DC Amps DC
see manual
F
E
50
%
25
%
0
%
75
%
100
%
30 DAY 3 HR
12V RECONDITION
Fault Screens and Trouble Shooting
If at any time a fault is identified by the charger the following will appear:
“Check Battery” icon red LED will illuminate.
The charger will have an audible “chirp” identifying attention is needed.
A fault message will be displayed in the LCD center display
Below are the OPTIMA
®
Digital 1200 LCD fault screens in addition to basic trouble shooting steps.
Verify both leads from the charger are connected to the battery.
Verify connection type (clamps or ring terminal) is correct.
Battery voltage may be too low to accept a charge. Return
battery to dealer for testing. If battery is under 1.25VDC another
battery may be used in parallel to start the charging process,
then be removed.
Verify aux. ring terminal connector is securely plugged into charger.
see manual
CHECK CONNECTION
OR BATTERY<1.25V
Check Connection or Battery < 1.25V
Reverse Polarity - Wiring Fault
Check connection red postive cable clamp or ring
terminal to positive post.
see manual
REVERSE POLARITY
WIRING FAULT
see manual
CHARGER HI-TEMP
FAULT CONDITION
Charger Hi-Temp - Fault Condition
Ambient temperature and/or unit temperature are too high
to charge at this time.
Charger will automatically resume charging when appropriate.
If recharging a deeply discharged battery it is not uncommon for the
charger to enter the Hi-Temp fault condition in order to protect the
charger and battery. Charger will automatically resume charging in
3 to 15 minutes depending on the ambient temperature and condition
of the battery. Do not block cooling vents on bottom of charger and
locations in the AC coil wrap area and place only on a hard surface.