SOP-TN-002 Rev. Q
T60 Operations and Service Manual
5
32
CABLE TENSIOMETER
PACIFIC SCIENTIFIC
1
16
3
32
1
8
3
16
7
32
1
4
POUNDS TENSION
10
20
30
40
50
60
70
80
90
100
110
120
130
140
150
200
125+
125-
5
1
4
3
16
1
16
1
8
HANDLE
CABLE
STOP PIN
HANDLE
32
CABLE TENSIOMETER
PACIFIC SCIENTIFIC
1
16
3
32
1
8
3
16
7
32
1
4
POUNDS TENSION
10
20
30
40
50
60
70
80
90
100
110
120
130
140
150
200
125+
125-
5
1
4
3
16
1
16
1
8
1
8
" Ø EXAMPLE
CABLE SIZE
INDICATOR
32
CABLE TENSIOMETER
PACIFIC SCIENTIFIC
1
16
3
32
1
8
3
16
7
32
1
4
POUNDS TENSION
10
20
30
40
50
60
70
80
90
100
110
120
130
140
150
200
125+
125-
5
1
4
3
16
1
16
1
8
a b c
LATCH
SIZE GAGE
CABLE SIZE
1
4
3
16
1
16
1
8
4-2. OPERATING INSTRUCTIONS - Either the right- or left-hand may be used to operate this
instrument. The handle latch retains the actuating handle. The latch is automatically released when
the actuating handle is squeezed. To re-latch the actuating handle, the handle must be squeezed
firmly against the side of the Tensiometer and the handle latch pushed up from the bottom against its
spring load and held in the extended position while the actuating handle is slowly released against the
handle latch. The latch end will be retained in the detent socket provided in the actuating handle.
Note: When operating the instrument handle, the handle should never be allowed to snap open; it should be
released gradually, allowing the unit to clamp firmly on the cable.
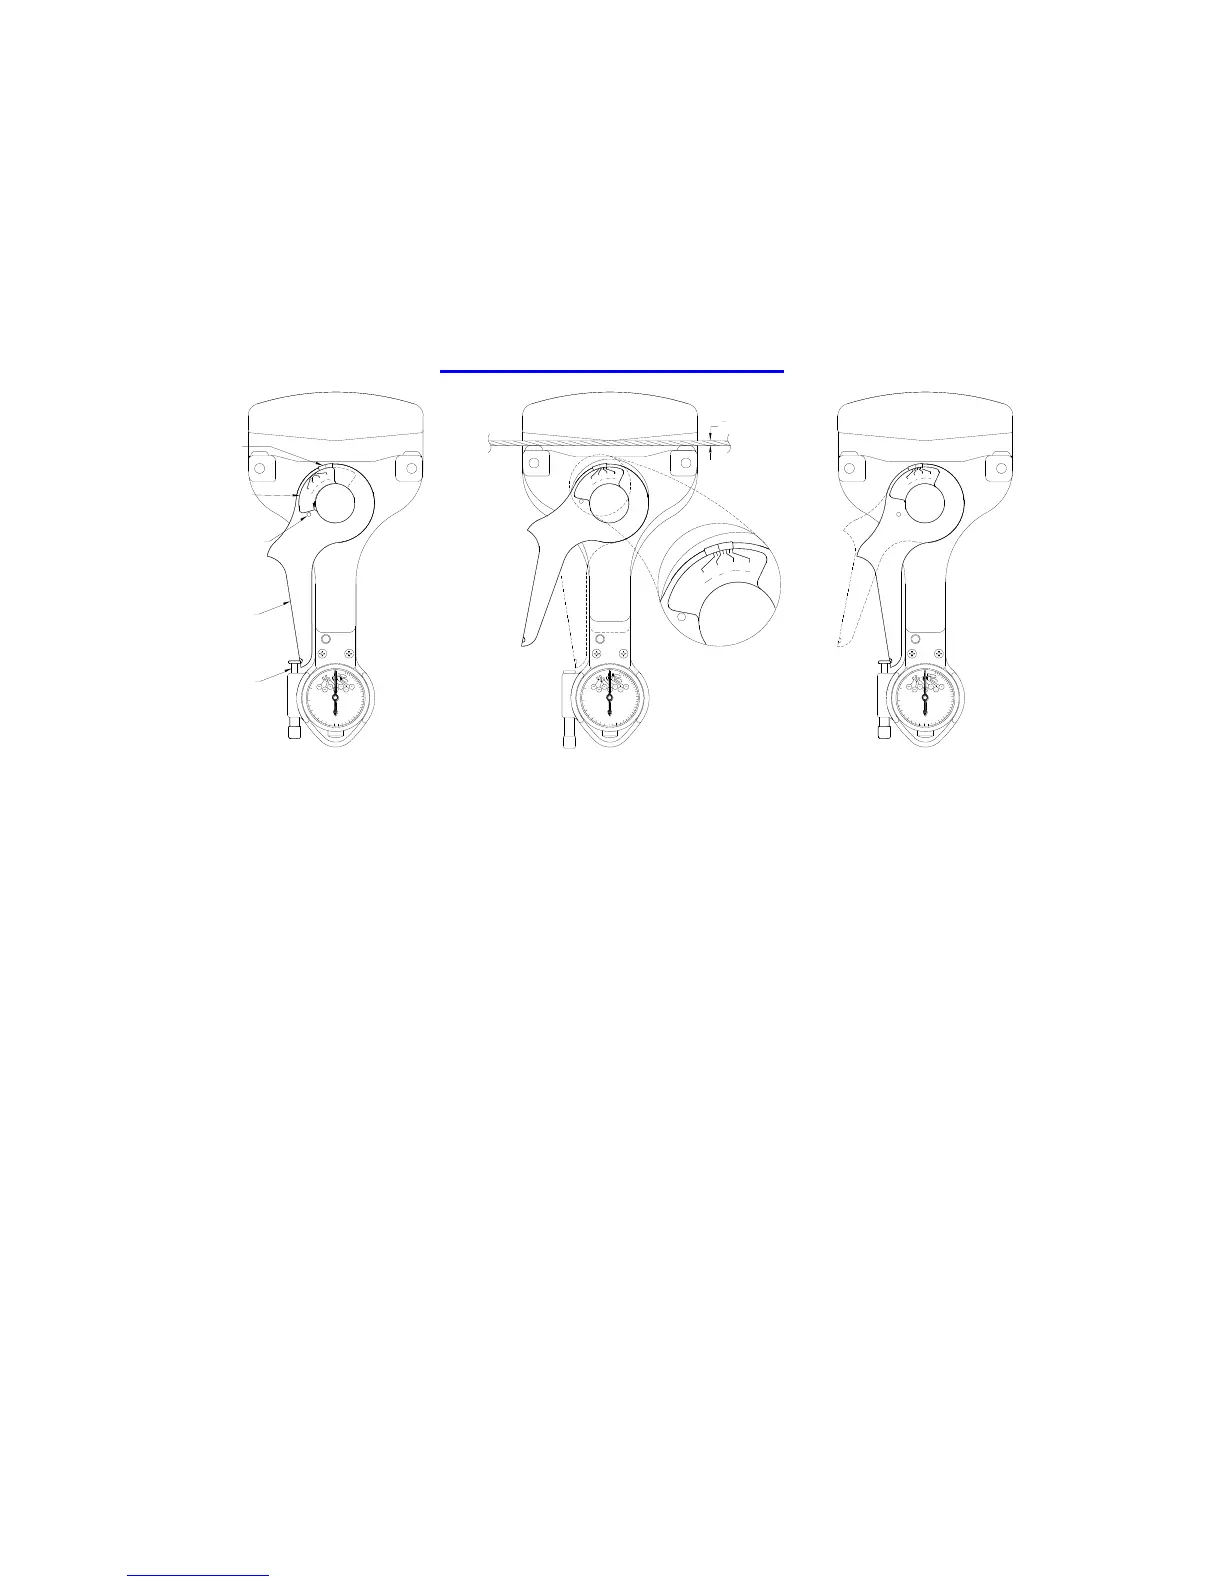
4-3. MEASURING CABLE DIAMETERS
Figure 2- T60 Cable Diameters
a. With the actuating handle in the latched position, move the cable size gage to the left against the
cable stop pin. See Figure 2a.
b. Release handle latch by squeezing the actuating handle. Retain the actuating handle unlatched
against the side of the Tensiometer. Place the instrument on the cable, making certain that the
cable is squarely aligned in the jaws and resting on the sectors and riser block. Care should be
taken that the cable is resting flat against the jaw base. Slowly release the actuating handle,
allowing the sectors to slide up and grip the cable. Remove all restraint from the actuating handle.
See figure 2b.
c. Remove Tensiometer from the cable by returning the actuating handle to the latched position. The
black line opposite the position on the cable size gage indicates the cable diameter. See figure 2c.
Warning: When re-latching actuating handle, verify that the latch is positioned in the detent socket before
releasing the handle. If this is not done, the handle will be allowed to snap open with possible personal injury.
 Loading...