47
ends. You should also check the housing for loose cables, bent ends, cuts and signs of wear. If
you think there is a problem with the cables, do not ride your bike. Change the cable or take
your bike to your authorized dealer.
Once a month, check the function of the left shifting lever or front derailleur. Every time you
change the chainring, the front derailleur must be in a position that it does not rub against the
chain. Furthermore, the chain must not fall off the outside or inside chainring at any time.
Once a month, check the function of the right shifting lever or rear derailleur. Every time you
shift, the cog should be situated so that the chain can run smoothly without jumping. Further-
more, the chain should not fall off the outside or inside cog at any time.
Adjustment
Shifter adjustment must be performed with the bike rmly secured to a work bench, or with
someone holding the rear wheel in the air, so that the gear shifting system and drivetrain can
work in a stationary position.
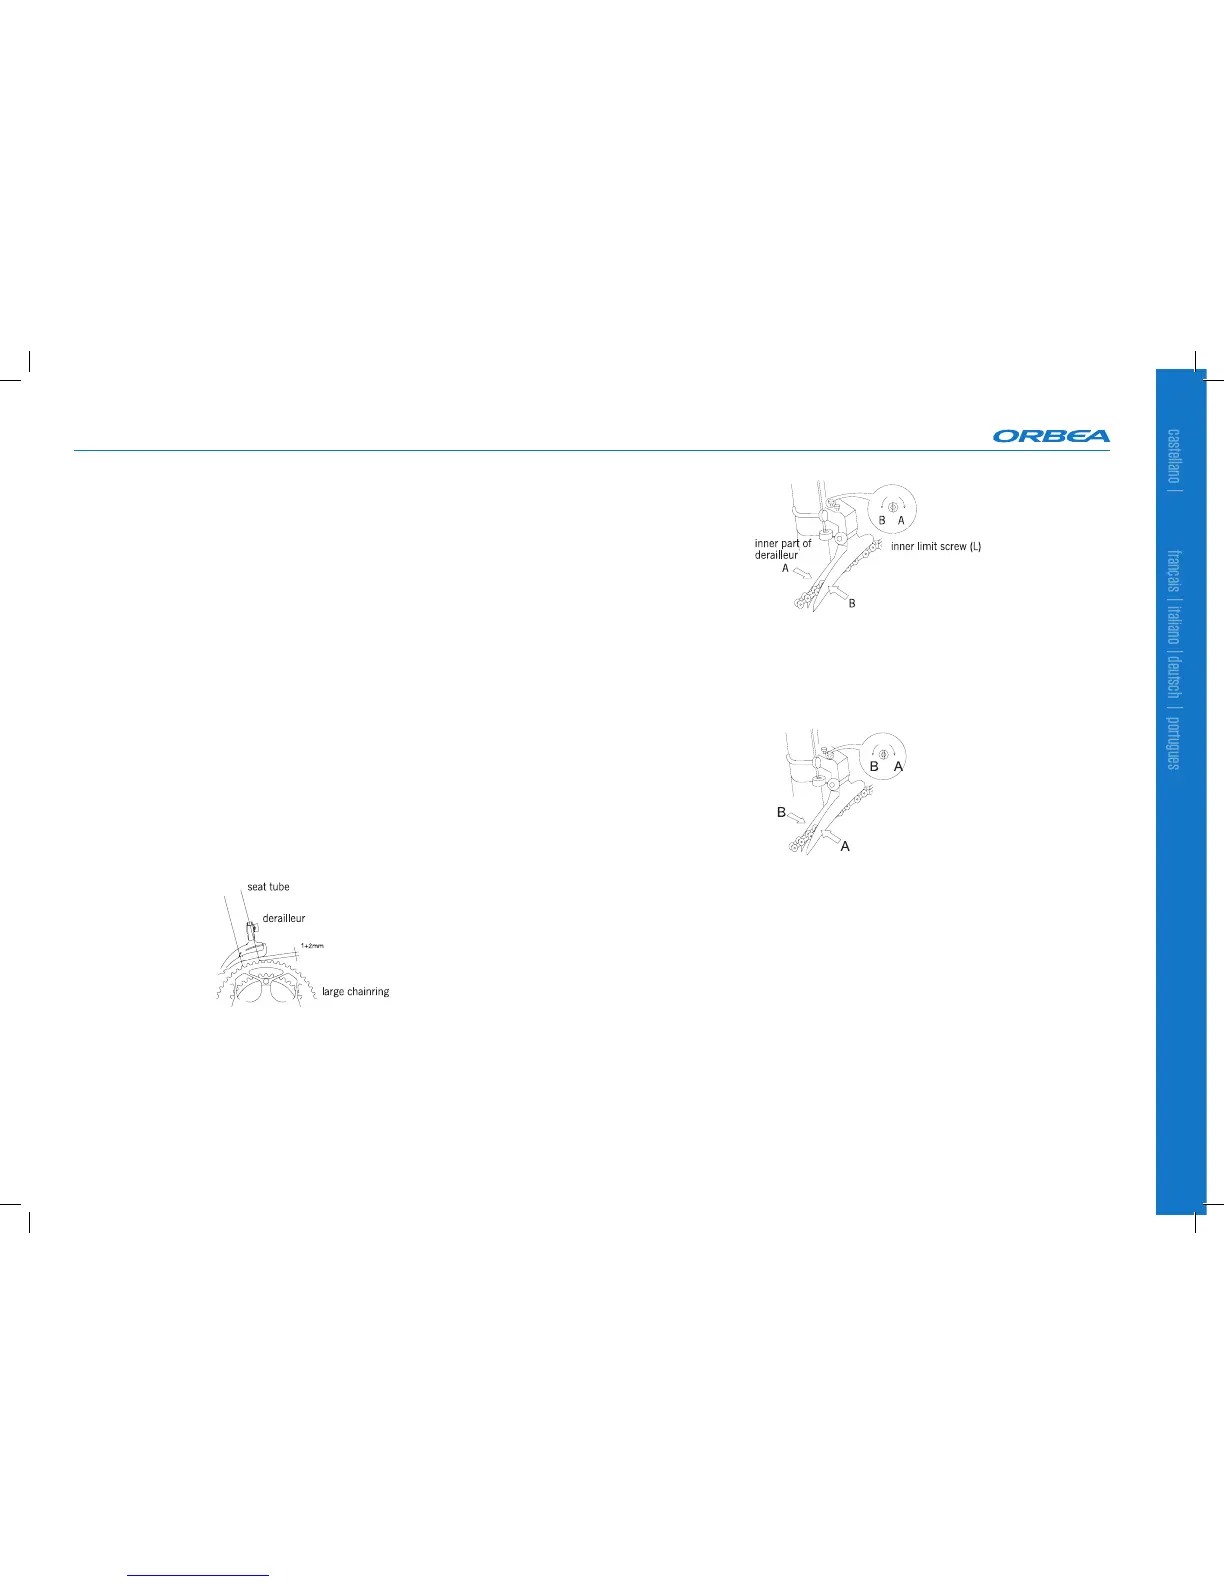
Positioning and adjusting the front derailleur
To correctly position the front derailleur:
- The cage plates must be perfectly parallel to the chainrings.
- Vertically, the position should be such that, with the front derailleur and the chain on the
middle chainring, the gap between the bottom of the outer cage plate of the front derailleur and
the top of the outer chainring teeth is between 1 to 3mm, as shown in the gure below.
For proper regulation of the front derailleur motion, it should have two screws regulating the
inner and outer limits of the motion that can be positioned in different places depending on the
front derailleur model. The adjustment should be performed as follows:
- Place the chain, rear derailleur and front derailleur in the inside chainring-inside cog position.
- Turn the inner limit screw (L), so that when pedaling, the chain moves as close as possible to
the inner part of the inner cage of the front derailleur without rubbing at any point (see gure).
- Place the chain, rear derailleur and front derailleur in the outside chainring-outside cog posi-
tion.
- Turn the outer limit screw (H), so that when pedaling, the chain moves as close as possible to
the inner part of the outer cage of the front derailleur without rubbing at any point (see gure).
To conrm, try pedaling with all of the chainring-cog combinations possible.
If the chain falls off onto the crank arm in any of the combinations, turn the outer limit screw (H)
one quarter turn clockwise.
If the chain falls off onto the bottom bracket in any of the combinations, turn the inner limit
screw (L) one quarter turn clockwise.
If the front derailleur makes noise or the chain does not shift from one chainring to another
smoothly in the intermediate positions, turn the barrel adjustment on the derailleur lever to
achieve the optimum adjustment.
Adjusting the rear derailleur
Like the front derailleur, the rear derailleur has inner and outer screws to limit the motion of the
rear derailleur that can be positioned in two different places, depending on the derailleur model.
The process is very similar to that used to regulate the front derailleur and is explained below:
outer limit screw (H)
outer part of
derailleur
 Loading...