BELTS ADJUSTMENT:
WARNING
A loosened belt may slip and get worn quickly, a too tightened belt may wear out bearings.
Check for belt condition, cracks and wear. Replace if necesary.
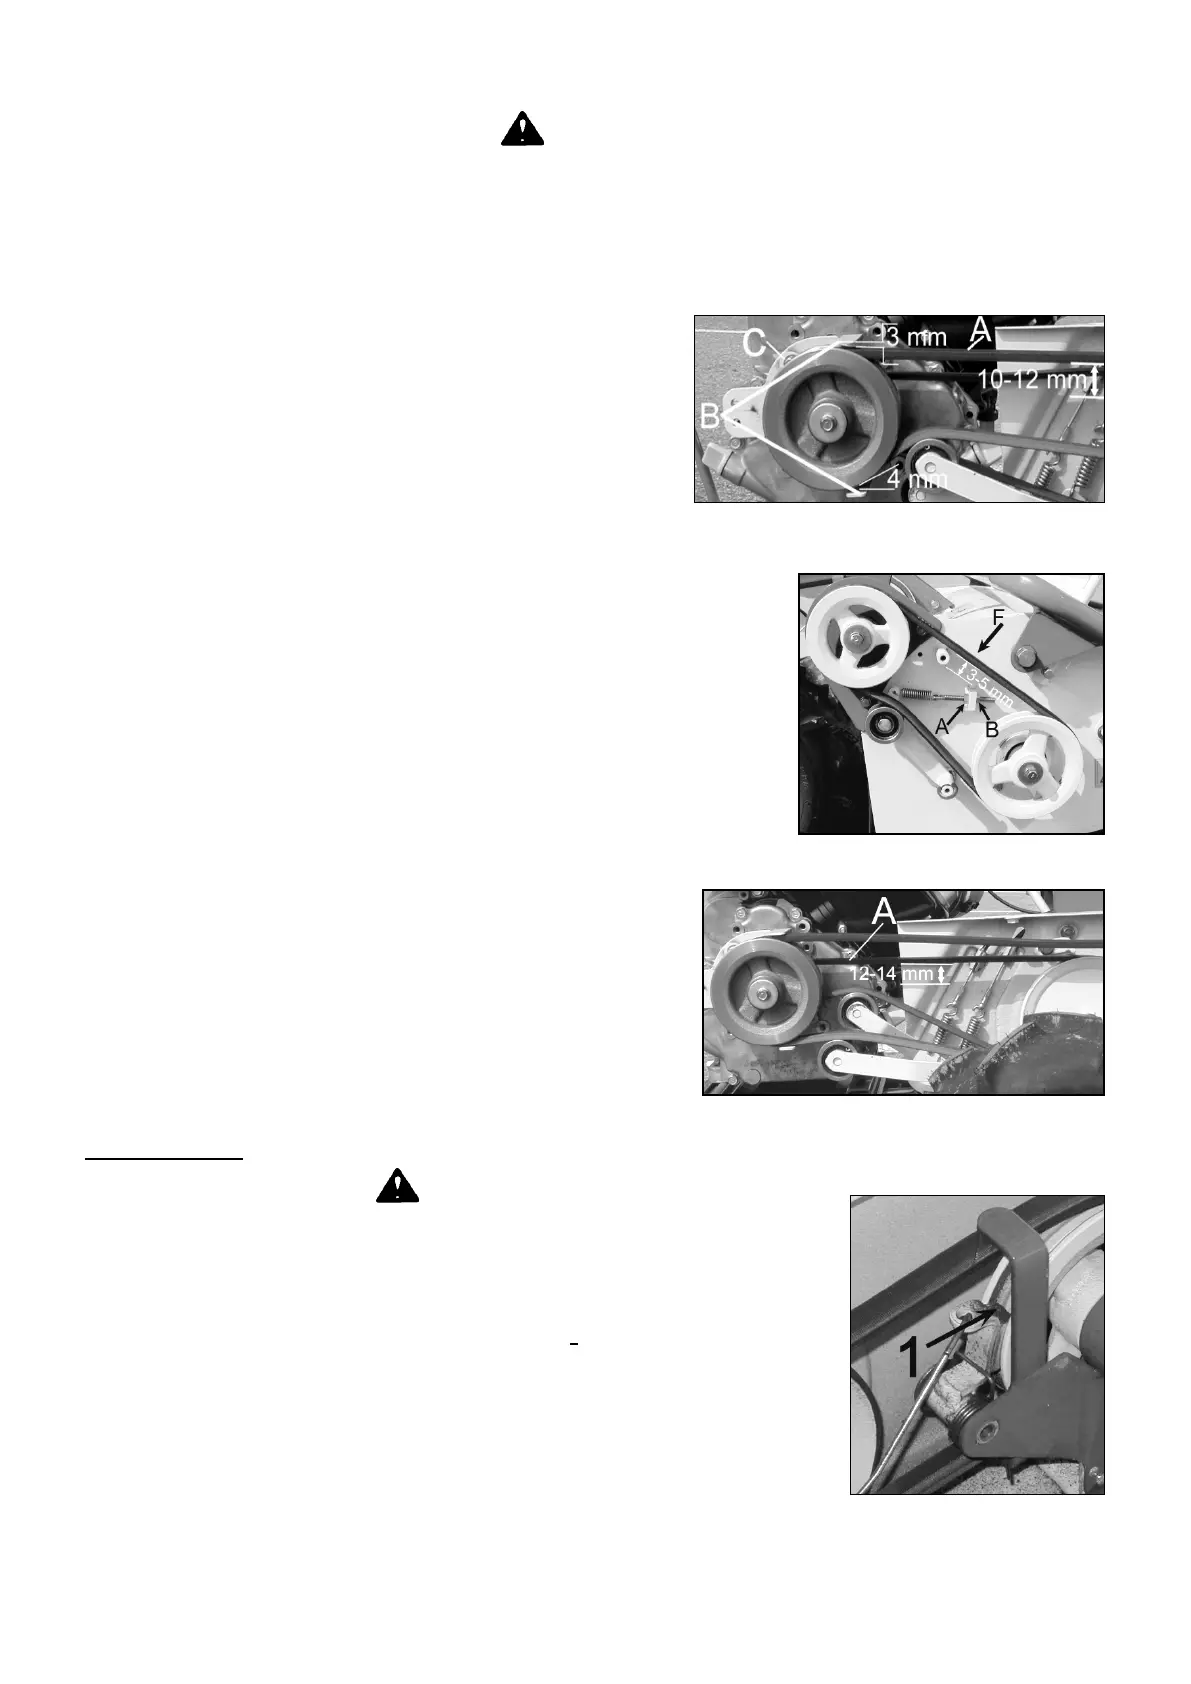
Belt from engine to counter shaft
Switch off the engine, disconnect the spark plug wire and
lock the blade clutch lever in the “ON” position.
Unscrew the three bolts of the shield to reach the belts.
Push the belt with a finger on (A, Figure 22) the belt must
move from 10 to 12 mm. If the belt does not move
accordingly, perform “tension wire” again.
Check that the belt guides “B” are close 3 or 4 mm from
the tighten belt.
If it is necessary, adjust the belt guides as follow :
unscrew bolt C, adjust belt guides as required and screw the bolt again.
Fit the belt cover with the three bolts.
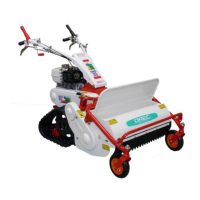
Belt from the counter shaft to the flails
•Stop engine and disconnect sparking cover.
•Unscrew the 2 bolts of the shield to reach the belt.
•Push the belt with a finger on (F, Figure 23) the belt must move from 3
to 5 mm. If the belt does not move accordingly, adjust with screws A &
B.
•Fit the belt cover with the two bolts.
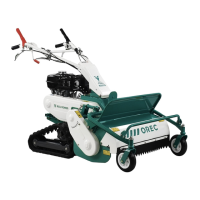
Belt transmission adjustment
•Switch off the engine, disconnect the spark plug wire and lock
the blade clutch lever in the “ON” position.
•Unscrew the three bolts of the shield to reach the belts.
•Push the belt with a finger on (A, Figure 24) the belt must
move from 12 to 14 mm. If the belt does not move accordingly,
perform “tension wire” again.
•Fit the belt cover with the three bolts.
BLADE BRAKE :
WARNING
CHECK THE BLADE BRAKE EVERY MONTH (1, FIGURE 25), CHECK THE TIME FOR
THE BLADE TO STOP WHEN BLADE CLUTCH LEVER IS RELEASED. IF MORE THAN 7
SECONDS ARE NECESSARY FOR THE BLADE TO STOP
, ASK YOUR DEALER
IMMEDIATELY TO CHECK THE BLADE BRAKE SYSTEM.