OREC SF600/600D
• Screw a new blade and check the screwing torque with the chart at the end
of this manual.
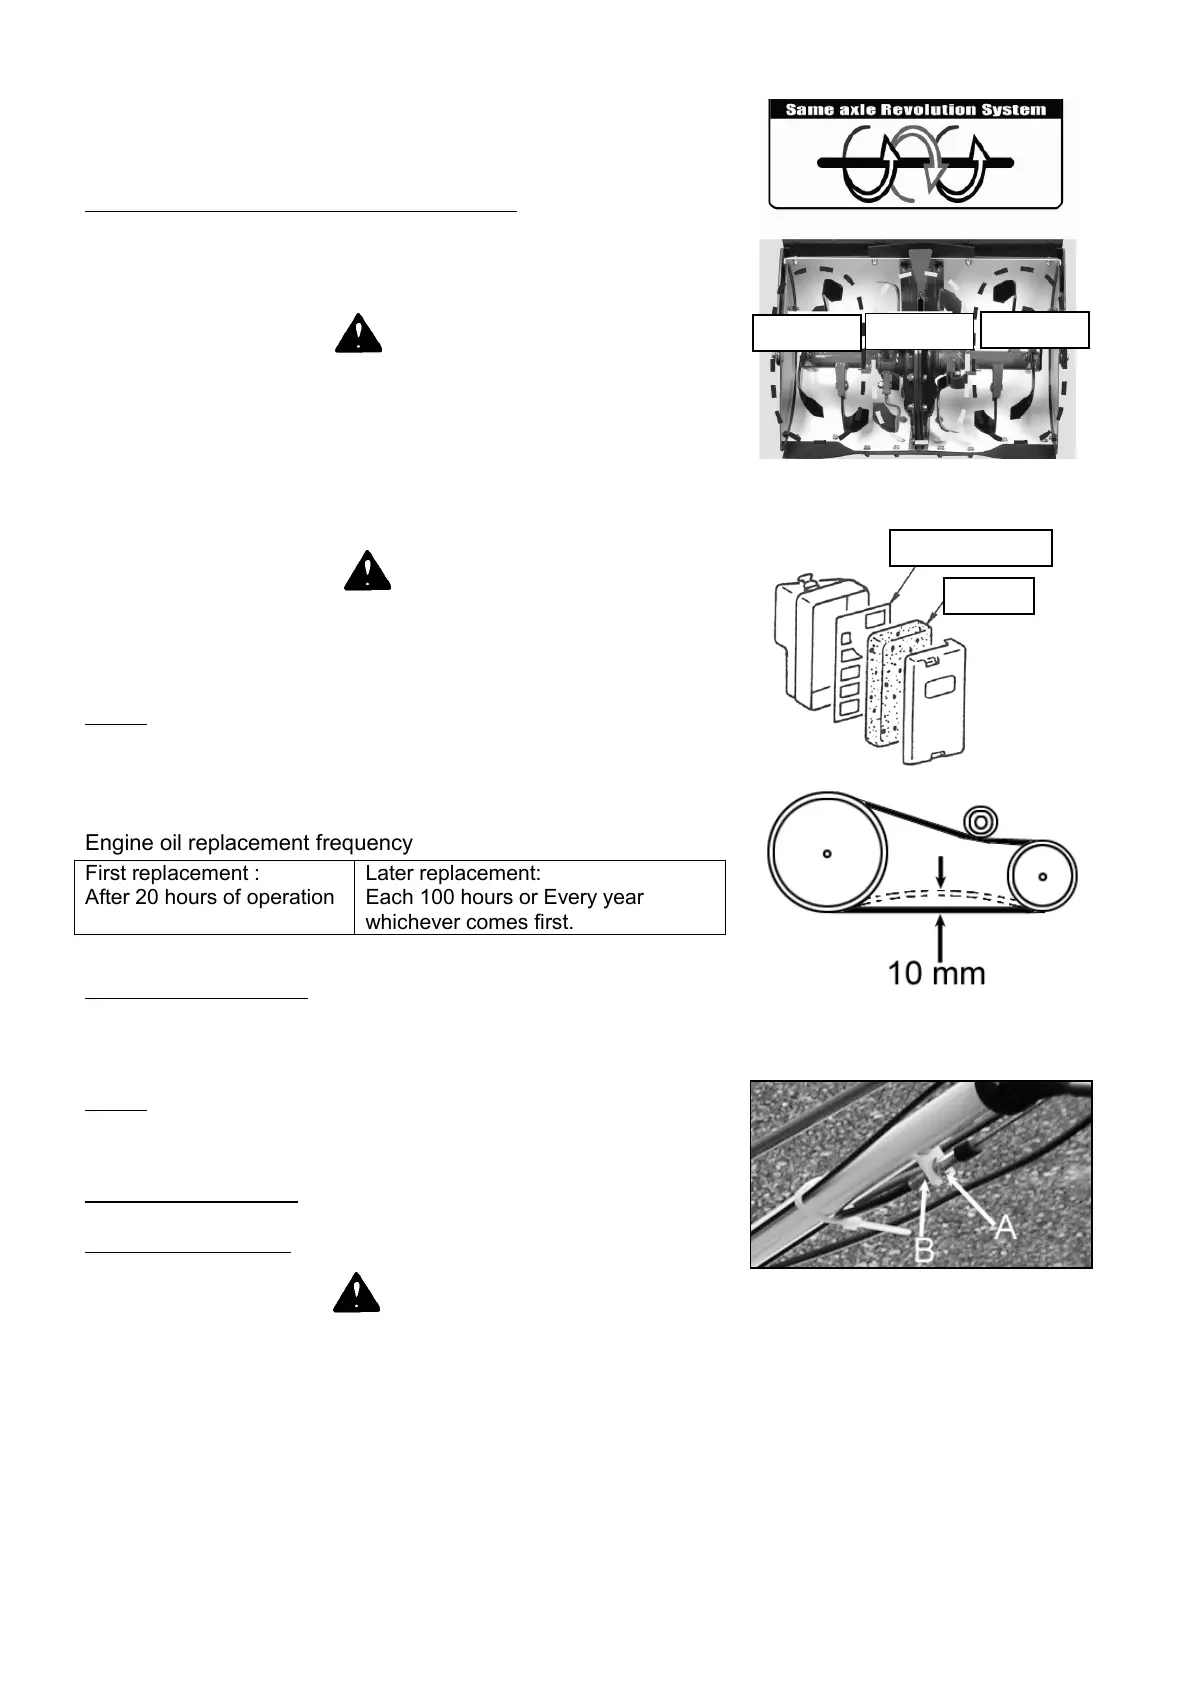
State of the working tool blade (SF600D)(Figure 15-2)
Center section : Up cut
Side section : Down cut
*Dual-Action cutting system makes for finer tilling
CAUTION
Blades can cut hands or fingers; always wear protective gloves when
holding blades.
• Check that rotary blades are in good condition, change worn or damage
blade if the blade is worn
• Changing the blade : Unscrew the to bolts and nuts of the blade on the shaft.
• Screw a new blade and check the screwing torque with the chart at the end
of this manual.
CAUTION
Only use original genuine OREC parts. Other parts may be dangerous for
your health and for the bystanders and the machine. If some vibration occur.
If you feel vibrations in the handlebar, check the blade. Vibrations may cause
loosening of the bolt and nuts and may crack the steel of the machine.
Engine
Refer to engine manual delivered with the machine.
Engine Oil Type : SAE10W30 or API SL class
Engine Oil Quantity : 0.58L
Engine oil replacement frequency
Tightening of bolts and nuts
Check the screwing torque with the chart at the end of this manual.
Vibration may loose bolts, nuts and screws.
Air filter
Check the air filter from dust and debris. Clean the foam with water and soap.
Dry it without squeezing it. Apply air filter oil before mounting.
MAINTENANCE EVERY MONTH
Transmission belt tension
WARNING
A loosen belt may slips and worn quicly, a too tighten belt may worn bearings.
Check for belt condition, cracks and wear. Replace if necesary.
Stop engine, with the engine switch on "stop" position, disconnect the spark plug. Pull out the belt case by unscrewing the
knob.
When the travel lever is pushed down, the lower side of the belt may be pushed from 10 mm (Figure 16).
If this value is not right, adjust it by the tension bolt on the wire (Figure 17).
To increase tension, unscrew the nut A to the top of the machine and screw the nut B to the top. When the adjustment has
been performed, screw again the nut A (Figure 17).
To decrease tension, unscrew the nut B to the low of the machine and screw the nut A to the low. When the adjustment has
been performed, screw again the nut B (Figure 17).
When the adjustment has been performed, replace the belt case and screw the knob again..
Figure 15-2
After 20 hours of operation
Each 100 hours or Every year
Figure 17