A
april36Sep 14, 2025
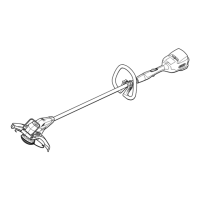
Why Oregon ST250 motor runs, but trimmer head does not move?
- MMichael RobertsSep 14, 2025
If the motor of your Oregon Trimmer runs, but the trimmer head does not move, it may be due to grass wound between the shaft and trimmer head.