ORGAPACK OR-T 50
24
12.06/WE
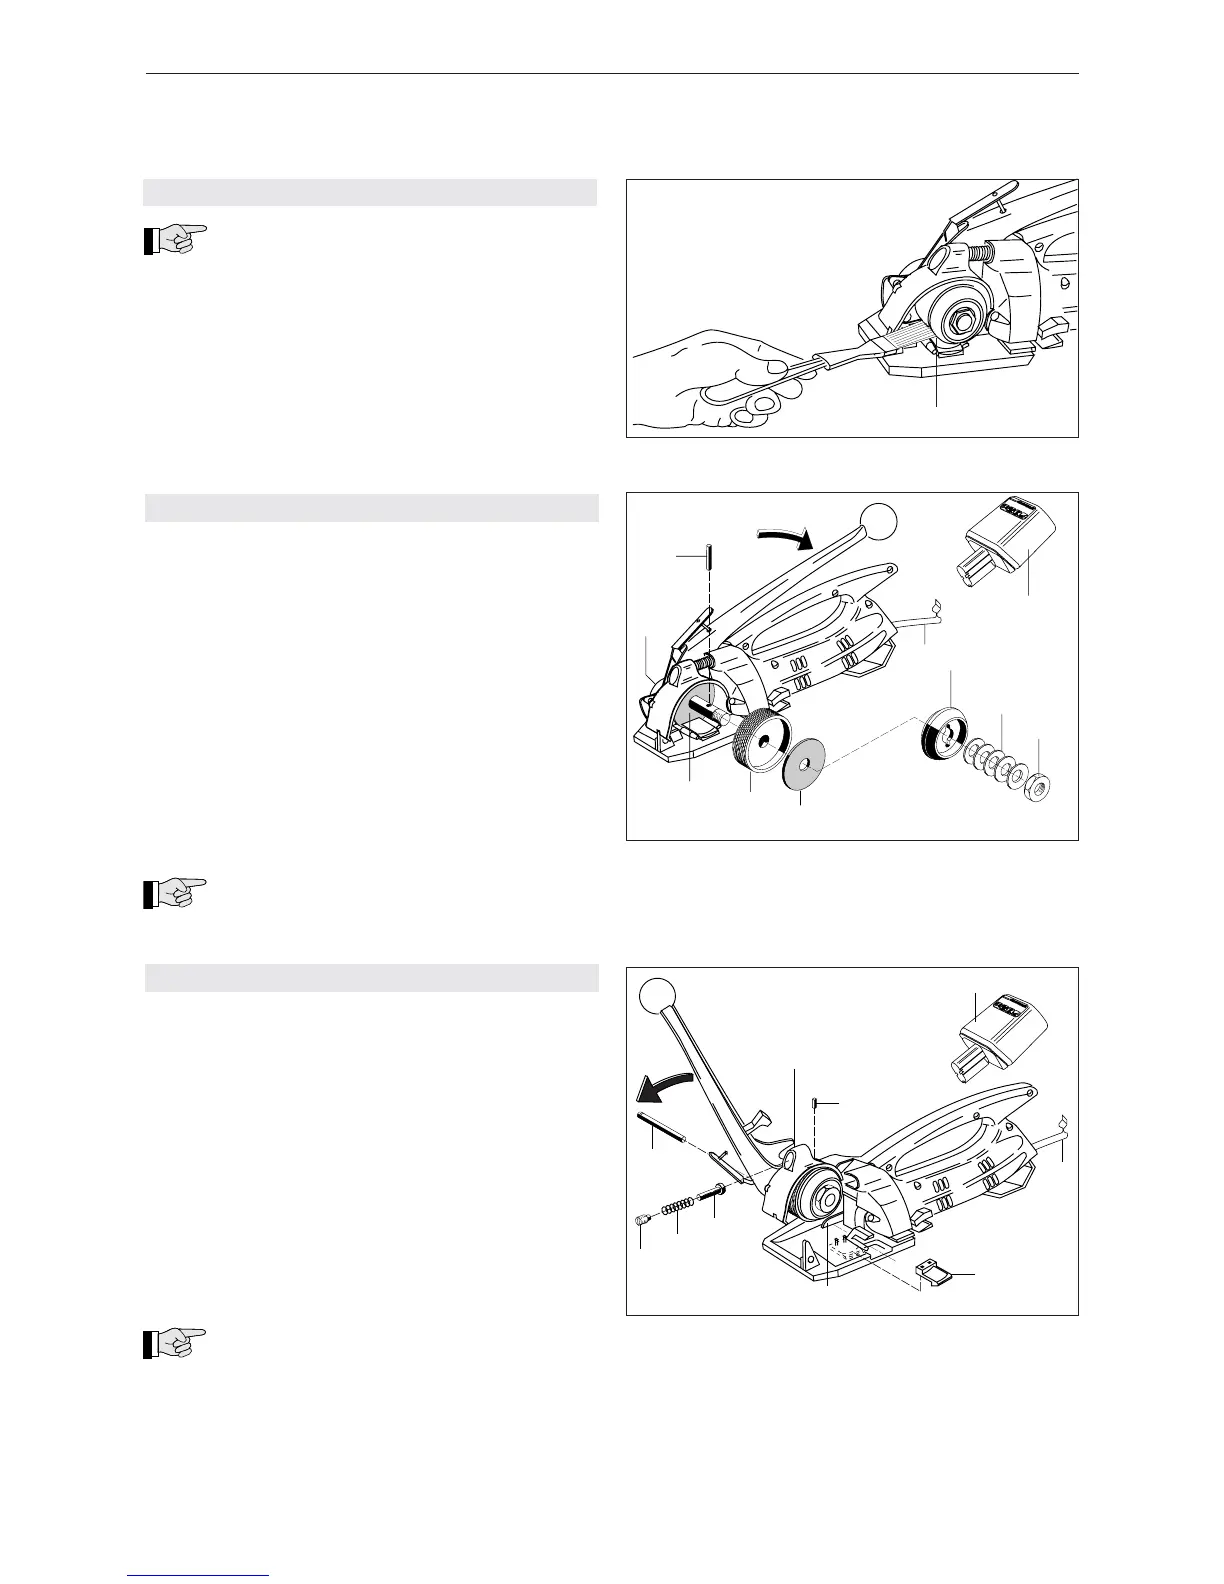
7.5 CLEANING THE TOOL
If the tool is used in a dusty environment, it is
recommended to clean the tool regularly.
The tension wheel (18/1) in particular should be kept
clean.
– Clean the tension wheel with the steel brush sup-
plied with the tool.
7.6 CHANGING THE TENSION WHEEL
Removal
– Open bow spring (19/2) and remove battery (19/1).
– Block the tension shaft (19/9) with the small fork
wrench (SW 11).
– With the other fork wrench (SW 17) loosen the nut.
– Remove fi ve spring washers (19/4) and carrier
(19/3).
– Press tension lever and remove pin (19/10).
– Remove tension wheel (19/7) together with the
clutch disks (19/6) and (19/8).
– Check clutch disks for wear, if necessary replace
it. Replace tension wheel.
Installation
– Install the parts in reverse order.
Do not lubricate the clutch disks. Adjust
the maximum tension force (see chapter 7.3).
7.7 CHANGING THE TENSION SHOE
Removal
– Open bow spring (20/2) and remove battery (20/1).
– Push the tension lever forward until the stop is
reached.
– Remove set screw (20/5) with compression spring
(20/6) and bolt (20/7).
– Release set screw (20/9).
– Push out shaft (20/8) with a small screwdriver.
– Raise rocker unit (20/10) and remove and replace
tension shoe (20/3).
– Clean tooth plates and tension wheel.
Installation
– Install the parts in reverse order.
Before inserting the rocker unit (20/10) lift
stroke lever (20/4) that the switch link of the
rocker lies below the stroke lever.
Afer mounting the shaft turn the tension wheel until
the rocker moves down. Screw in set screw (20/9)
until it is in line with the casing.
Fig. 20