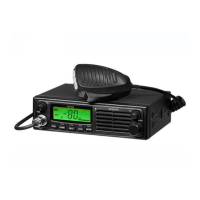
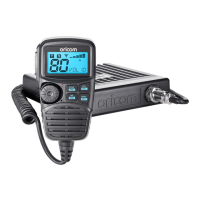
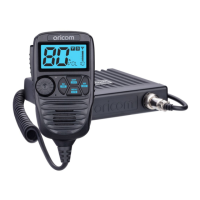
This document describes the Oricom UHF2500 80 Channel UHF Citizen Band Radio, a two-way radio designed for communication in Australia and New Zealand.
Function Description:
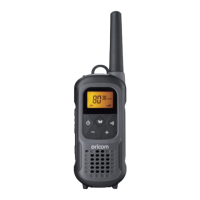
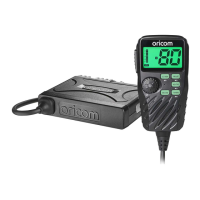
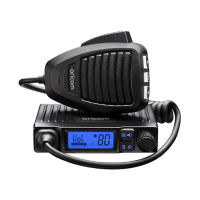
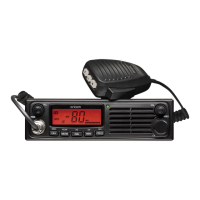
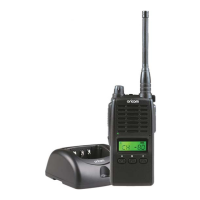
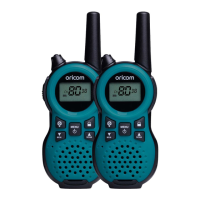
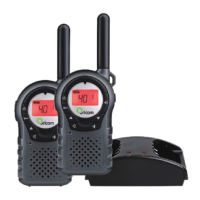
The Oricom UHF2500 is a handheld UHF CB radio used for two-way communication. It operates on the Citizen Band Radio frequencies, allowing users to transmit and receive speech signals. The radio supports 80 UHF channels, with 75 of these being useable voice channels. It is designed to facilitate communication in various environments, including flat open areas, areas with buildings or trees, and dense foliage or mountainous regions, though range may vary depending on obstructions. The device incorporates features like sub-channels (CTCSS and DCS) for more private group communication, a repeater function to extend transmission range, and an auto channel scan to find active signals. It also includes call alert and vibrator functions for incoming signals, a Roger Beep to indicate the end of transmission, and a Key Tone for button presses. The radio is waterproof to IPX7 standard, meaning it can withstand immersion in 1 meter of water for 30 minutes, and is designed to float with a flashing LED and LCD backlight to aid location in water.
Important Technical Specifications:
- Channels: 80 Channel UHF (75 useable voice channels).
- Sub-channels: 38 CTCSS codes, 83 DCS codes.
- Frequency Range: UHF Citizen Band (specific frequencies listed in the "Channel Frequency Table" section, e.g., 476.4250 MHz to 477.4125 MHz).
- Power Source: Rechargeable AA Ni-MH batteries (1200mAH). Can also use non-rechargeable Alkaline batteries, but must not be charged with them.
- Charging Time: Approximately 12-14 hours for full charge.
- Waterproof Rating: IPX7 (no ingress of water when immersed at 1 meter for 30 minutes, provided accessory socket cover is in place and battery is fitted correctly).
- Antenna: Integrated.
- Display: LCD screen with backlight, showing channel, sub-channel, battery level, TX/RX status, Dual Watch, DCS, VOX, Scan, Key Lock, Speaker volume, Call signal, Vibrator, and Repeater function icons.
- Connectivity: Ear/Mic/Charge jack (mini USB connector for charging).
- Compliance: AS/NZS 4365: 2011 and Radio communications (Electromagnetic Radiation Human Exposure) standard 2003.
Usage Features:
- Power ON/OFF: Press and hold the ON/OFF button for 2 seconds.
- Volume Adjustment: Use the + and - buttons.
- Channel Selection: Press MENU once, then use + or - to select channels (1-80). Confirm with PTT. Channels 1-8 and 41-48 are used for repeaters. Channels 9 and above are recommended for general Simplex use.
- Repeater Function (RPT): Select channels 1-8 or 41-48, press MENU twice, then use + or - to turn RPT On/Off. Confirm with PTT.
- CTCSS Sub-channel Setting: Press MENU 3 times, use + or - to select one of 38 sub-channels (0 for off). Confirm with PTT.
- DCS Advanced Digital Code Setting: Press MENU 4 times, use + or - to select one of 83 digital codes. Confirm with PTT.
- Transmitting (Sending Speech): Press and hold PTT, speak into the MIC (5cm away from mouth). Release PTT to stop transmitting.
- Monitor Feature: Press + and MENU simultaneously to check for weak signals. Press MENU to stop.
- VOX (Voice Activated) Sensitivity: Press MENU 5 times, use + to increase sensitivity (max 3), - to decrease (OF for off). Confirm with PTT. Not recommended in noisy environments.
- Auto Channel Scan: Press MENU 6 times, use + or - to start scanning. Pauses on active channels.
- CTCSS Scan: Press MENU 7 times, use + or - to scan CTCSS codes 1-38.
- DCS Scan: Press MENU 8 times, use + or - to scan DCS codes 1-83.
- Vibrator and Call Alert:
- Call-Ring Tone: Press CALL button to send a ring tone (max 3 seconds, once per 60 seconds).
- Selecting Call-Ring Tone: Press MENU 9 times, use + or - to select one of 15 tones. Confirm with PTT.
- Activating Vibrator Mode: Press MENU 10 times, use + or - to activate. Confirm with PTT.
- Roger Beep: Press MENU 11 times, use + or - to turn On/Off. Confirm with PTT.
- Key Tone: Press MENU 12 times, use + or - to turn On/Off. Confirm with PTT.
- Dual Watch Mode: Press MENU 13 times, use + or - to select a dual watch channel (1-80, excluding current). Continue pressing MENU to set CTCSS/DCS codes. Confirm with PTT.
- Key Lock: Press and hold MENU to activate/deactivate. Locks +, -, and MENU buttons. PTT and CALL remain functional.
- LCD Screen Back Light: Illuminates for 5 seconds when Power/Vol button is activated (except PTT and CALL).
- Torch and SOS Function: Press and release Light button for torch. Press and hold Light button while torch is on for SOS function.
- Factory Reset: Press and hold CALL button and power on. Resets to Channel 12.
Maintenance Features:
- Battery Installation: Unlock two screws on the battery compartment cover, install rechargeable batteries observing polarity, then replace and tighten the cover.
- Charging: Connect the supplied USB "Y" cable to the AC power adaptor, then connect one mini USB connector to the charge pod. Place radios in the pod. Alternatively, connect mini USB connectors directly to the radios under the protective cover. Plug AC adaptor into a wall socket. Battery icon will flash during charging.
- Battery Life: The radio has a built-in power saver. Turn units OFF when not in use to conserve battery power.
- Battery Replacement: Risk of explosion if battery is replaced by an incorrect type. Use only supplied rechargeable batteries. Dispose of used batteries according to local regulations, not in household rubbish.
- Cleaning: Not explicitly mentioned, but general electronic device cleaning practices should apply (e.g., wipe with a soft, dry cloth).
- Antenna Care: Do not use a radio with a damaged antenna. Do not modify or change the antenna. Do not hold the antenna when the radio is "IN USE."
- Waterproof Integrity: Ensure the accessory socket cover is in place and the battery is fitted correctly to maintain IPX7 rating. Do not submerge if the battery cover, external jack cap rubber seal, or transceiver is damaged or cracked.
- Warranty Service: Retain proof of purchase for warranty service. Contact Oricom Support for assistance. If a product is faulty, a Product Return Authorisation number will be issued, and a form provided for return.
- Data Backup: Before sending for repair, be aware that user-generated data may be lost. Make a copy of any saved data. Goods may be replaced with refurbished items.