9
ASSEMBLY INSTRUCTIONS
10
11
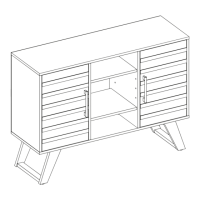
10. Insert four Shelf Supports (GG) into the desired holes
inside each compartment. Make sure you place the 4
shelf supports at the same level so the shelf is not tilted.
Tilt and rest the Adjustable Shelves (G and H) onto the
Shelf Supports (GG).
Hardware Used
GG
Shelf Support x 16
GG
H
G
G
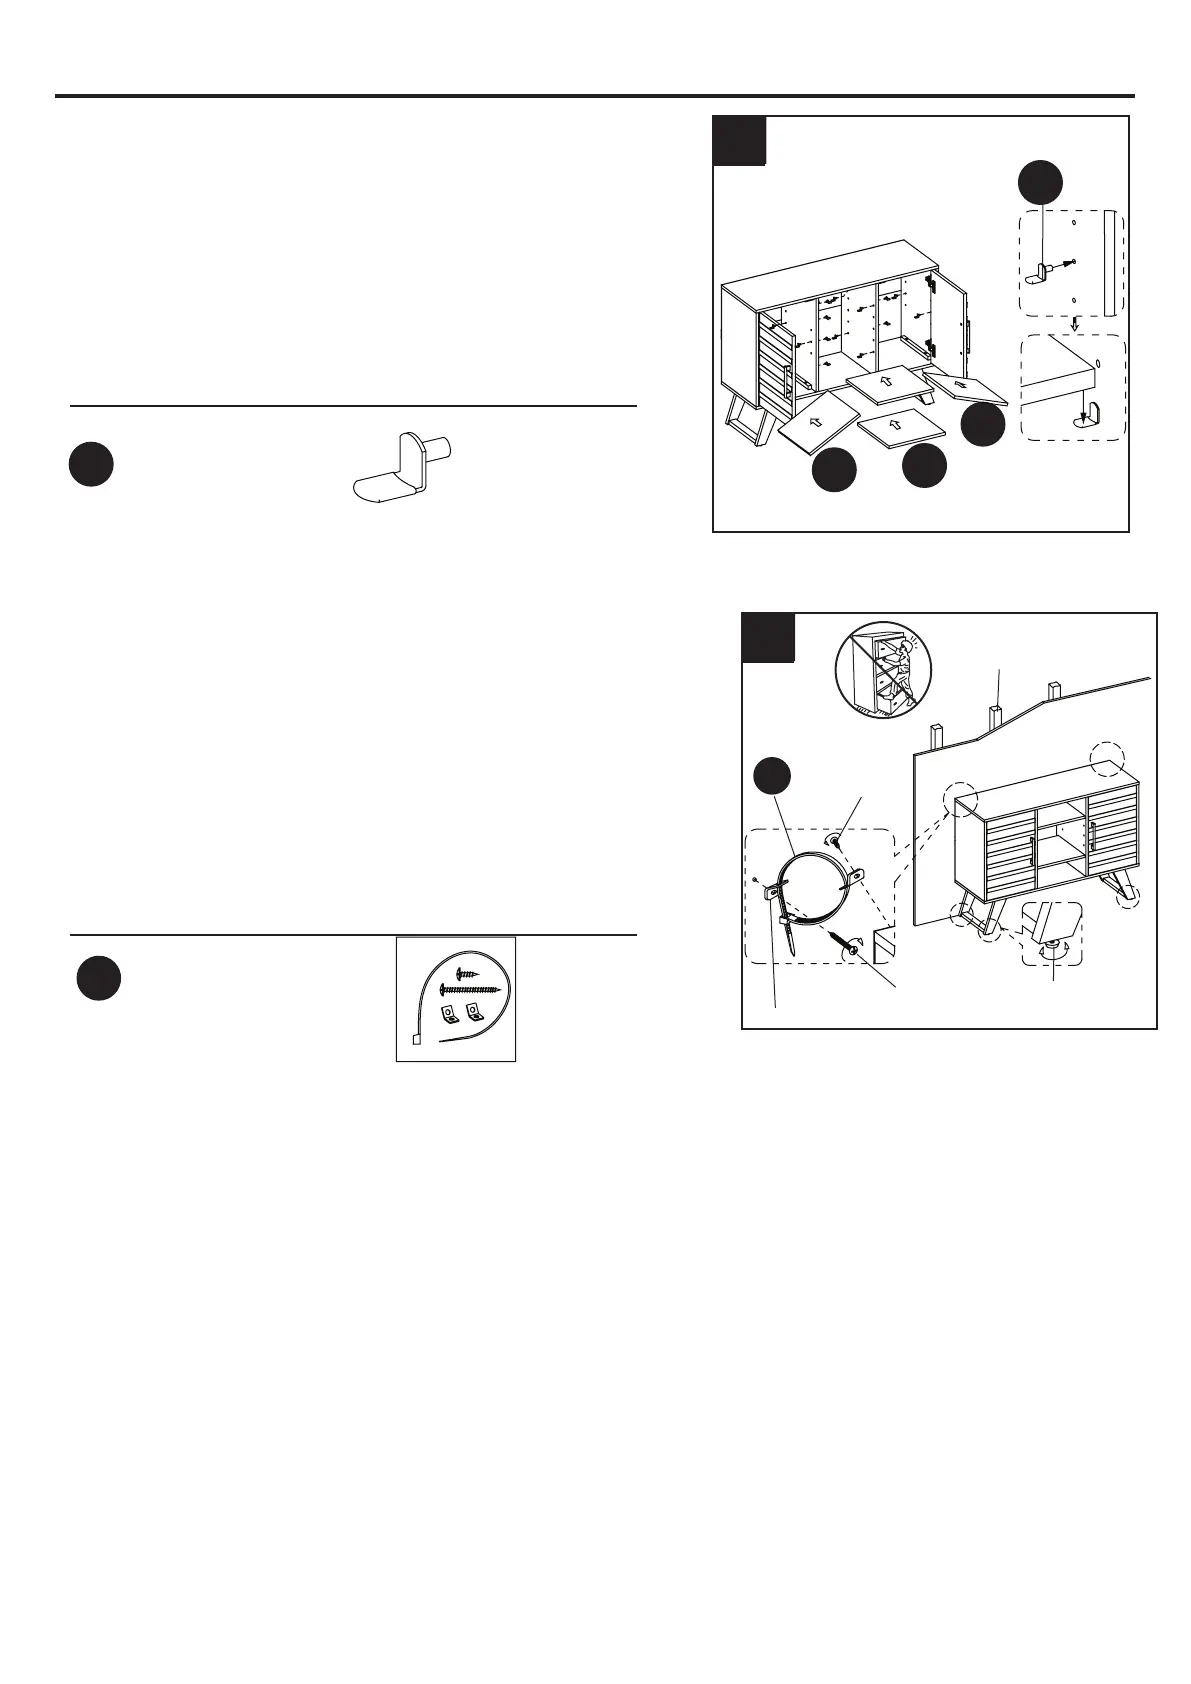
Tipping Restraint
Hardware Kit
MM
Installing the tipping restraint hardware
x 2
Wooden stud
Short
Screw
Metal Bracket
Long Screw
Floor
Leveler
Wall
11.1 Position the assembled unit at the desired location
against a wall. If necessary, adjust the pre-attached oor
levelers
by hand to level the doors and correct tilting.
11.2 Follow the instructions printed on the plastic bag
containing the tipping restraint hardware to attach the
tipping restraint hardware (MM) to the unit and the wall.
Hardware Used
MM