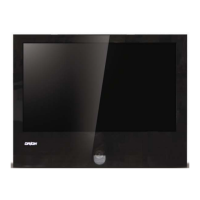
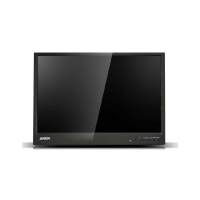
This document describes an LED-backlit LCD color monitor, specifically designed for continuous operation in closed-circuit TV (CCTV) systems. It features a rugged structure and a Flat Panel Display with an active matrix, thin-film transistor (TFT), liquid crystal display (LCD).
Function Description
The monitor serves as a display unit for various video sources, including BNC, VGA, and HDMI inputs. It is primarily intended for use in CCTV systems, providing a visual output for surveillance and monitoring. The device supports multilingual OSD (On Screen Display) menus for easy configuration and optimization of display settings.
Usage Features
Power and Connectivity:
The monitor operates on a DC 12V power input. It includes multiple input interfaces:
- DC12V: The main power input.
- HDMI IN: For High Definition Multimedia Interface sources.
- VGA IN: For VGA input sources.
- BNC 1 (CVBS) IN: For Composite Video Broadcast Signal (CVBS) sources.
- BNC 2 (CVBS) Out: A BNC looping output for CVBS sources, allowing the signal to be passed through to another device.
Control Buttons and OSD Menu:
The monitor features a set of control buttons, typically located on the device itself, and can also be controlled via a remote control. These buttons include:
- Source: To select the desired input source (VGA, HDMI, BNC).
- Menu: To enter the OSD menu, save adjustments, and exit the OSD.
- Left & Right (VOL): To change values within the selected menu.
- Up & Down: To navigate through menu options.
- Power: To turn the monitor on or off.
- LED Indicator: Displays green when the monitor is on and red when it is off.
- IR Receiver: For remote control commands.
The OSD menu allows for comprehensive adjustment of picture, sound, and general settings. To navigate the OSD:
- Press the MENU button to enter the OSD MENU.
- Use the Up/Down buttons to select the desired main-MENU.
- Use the Left/Right buttons to select the desired sub-MENU.
- Use the Left/Right buttons to change the value of the selected setting.
- Press the MENU button to confirm adjustments within a sub-MENU.
- Press the MENU button to exit a sub-MENU and return to the main-MENU.
- Press the MENU button again to exit the OSD MENU completely.
Input Source Selection:
When no signal is detected, the monitor will display a "No signal/Check Signal" message. To select an input source:
- Press the 'SOURCE' button on the monitor or the 'INPUT' button on the remote controller.
- Use the Up/Down buttons to change the input source (VGA, HDMI, BNC).
- Press the Left/Right button to select the desired input source.
Picture Settings (A. PICTURE):
This section allows users to customize the visual output:
- Picture Mode: Offers various presets like Standard, Soft, User, and Vivid.
- Standard: Provides standard contrast and sharpness.
- Soft: Reduces contrast and sharpness.
- User: Allows users to set custom brightness, contrast, color, and hue.
- Vivid: Enhances contrast and sharpness.
- Contrast: Adjusts the contrast level (0-100).
- Brightness: Adjusts the brightness level (0-100).
- Color: Adjusts the color saturation (0-100).
- Tint: Adjusts the tint (0-100).
- Sharpness: Adjusts the sharpness level (0-100).
- Aspect Ratio: Sets the video format (16:9, 4:3).
- Noise Reduction: Reduces noise in the display image (LOW/MIDDLE/HIGH/DEFAULT/OFF).
- Color Temperature: Adjusts the color setting, with options like Medium, Warm, User, and Cool.
- Medium: Provides a neutral white color tint.
- Warm: Provides a reddish white color tint.
- User: Allows custom setting of Red, Green, and Blue values.
- Cool: Provides a blue-ish white color tint.
PC Settings (B. PC - only on VGA input interface):
This menu is specific to VGA input and includes:
- Auto Adjust: Automatically fits the image setting.
- Horizontal Pos.: Adjusts the horizontal position of the picture (0-100).
- Vertical Pos.: Adjusts the vertical position of the picture (0-100).
- Size: Adjusts the display size (0-100).
- Phase: Reduces video distortion and instability components (0-100).
Sound Settings (C. SOUND):
This section controls audio output:
- Sound Mode: Offers presets like USER, SPORTS, MOVIE, MUSIC, and STANDARD.
- Treble: Adjusts the treble level (0-100).
- Bass: Adjusts the bass level (0-100).
- Balance: Adjusts the audio balance (-50 to +50).
- Surround Sound: Selects sound effects (Surround, Off, SRS TruSurround XT).
General Settings (D. SETTING):
This menu provides general monitor configurations:
- OSD Language: Sets the language for the OSD menu (English, Chinese).
- Restore User Default: Resets all monitor settings to factory defaults.
- No Signal Screen: Determines the color displayed when there is "No signal" (Blue, Black).
- No Signal Standby: Configures standby power behavior when there is "No signal" (On, Off).
- Prevent Burn-in: An innovative technology to prevent "After Image" or "Ghost Image" on the LCD, especially useful for monitors running 24/7 in CCTV environments (On, Off).
Maintenance Features
Safety Precautions:
- Power: Only use the provided power unit. Do not pull the cable to unplug.
- Environment: Keep the device away from rain, humidity, smoke, vapor, dust, and intense vibrations. Avoid direct sunlight and heat sources.
- Handling: Do not open the device. Do not touch with wet hands. If the device falls or the casing is damaged, disconnect it and contact a retailer or authorized installer.
- Foreign Objects: Do not introduce solid or liquid material inside. If this occurs, disconnect power and seek professional inspection.
- Ventilation: Ensure at least 5 cm of free space around the device for proper airflow. Do not block or cover ventilation slots.
- Placement: Do not place heavy or heat-generating objects on top. Do not install on unstable surfaces.
- Temperature Acclimation: After transporting from a cold to a warm place (or vice versa), allow approximately three hours for the device to adapt to the new ambient temperature and humidity before operation.
- Installation: The monitor can be positioned on a horizontal surface using its plastic base and rubber feet. It can also be wall-mounted with a bracket (not provided). Ensure it is firmly fastened.
Cleaning the Device:
- Dust and Dirt: Rub delicately with a dry cloth.
- Stubborn Dirt: If a dry cloth is insufficient, dip the cloth in a neutral detergent.
- Avoid: Do not use volatile liquids (petrol, alcohol, solvents) or chemically treated clothes, as these can cause deformation, deterioration, or scratches to the paint finish.
Privacy and Copyright:
- The monitor is intended for CCTV systems. Users are responsible for complying with local laws and regulations regarding monitoring and recording video signals. Recording of copyrighted images is forbidden. The manufacturer is not liable for non-compliance with laws.
Prevent Burn-in Function:
This is a key maintenance feature for CCTV applications, designed to extend the lifespan of the LCD panel by preventing permanent image retention (ghosting) that can occur when static images are displayed for extended periods, especially in 24/7 operation.