Use these buttons to increase and decrease the device's sample rate. The following
choices are available: 32kHz, 44.1kHz, 48kHz, 88.2kHz, 96kHz, 176.4kHz, and 192kHz.
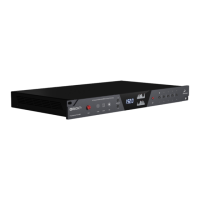
6. Display
Multi-function display * that shows the Sample Rate on the left and individual input/output
volume levels on the top and bottom meters ( up to 64 channels at a time, adjustable from
the software Control Panel).
* There's a protective film over the display, which may dim the illumination – feel free to
remove it.
7. Antelope button
Hold down the Antelope button to access the Control Menu *, which lets you adjust:
1. Clock Source
2. Peak Meter
3. Monitor Trim
4. Line Out Trim
5. Line In Trim
6. SR Conversion
7. S-MUX In
8. S-MUX Out
Use the Frequency Up/Down buttons to navigate. Press the Frequency Down (?) button to
enter a menu. To confirm, press and hold the Frequency Down button.
* To restore Factory Defaults:
1. Unplug the power cable
2. Press and hold the Frequency Up and Down buttons simultaneously
3. Plug the power cable back in.
8. Preset buttons (1-5)
Five Preset buttons store and recall your ‘favorite’ settings. The following functionality is
available:
1. Save Preset
2. Recall Preset
Use the Frequency Up/Down buttons to navigate. Press the Frequency Down (?) button to
enter a menu. To confirm, press and hold the Frequency Down button.
5. Rear Panel Explained