13
If the object is truly unknown (i.e. not listed in the Atlas EQ-
G database), the hand controller will take you back to the
IDENTIFY menu. Press ESC to exit this function.
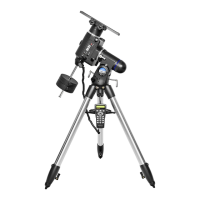
Linking with a Computer
The Atlas EQ-G can be connected to a computer via the sup-
plied computer interface cable. Many commercially available
planetarium softwares can utilize this function and be used
to control the Atlas EQ-G. Look for software that is compat-
ible with the Celestron NexStar5, like Starry Night Pro. The
description below will lead you through the procedure on how
to connect and disconnect the Atlas EQ-G to a computer.
1. Align the mount as described previously (see “Aligning the
Atlas EQ-G”).
2. Connect the supplied computer interface cable to the
smaller modular jack (RJ-11) on the hand controller (Figure
11). Connect the other end of the cable to the COM port of
your computer.
3. Select RS-232 under the UTILITIES menu on the Atlas
EQ-G hand controller. Press ENTER.
4. In the planetarium software of your choice, choose
“Celestron NexStar5” in the driver setup and follow the
instructions provided by the program to connect the mount
and computer. The Atlas EQ-G will be under the full con-
trol of your computer once the connection is successfully
established.
Disconnecting from the Computer
1. Follow the instructions provided by the planetarium soft-
ware to close the connection to the mount.
2. On the Atlas EQ-G hand controller, press ESC to resume
normal hand control operations.
Note: Do NOT disengage the Atlas EQ-G unit before you
close the connection in the planetarium program. Doing
so may cause some programs to freeze.
Note: See Appendix C for more information on computer
interfacing.
Auto Guiding
For astronomical imaging, the Atlas EQ-G has a designated
autoguider interface (Figure 10). The pin-outs on the 6 pin
modular connector are SBIG compatible and can be used
with most autoguiders available. Refer to Figure 15 when con-
necting the autoguider cable to the Atlas EQ-G and calibrating
the autoguider. Guiding speed can be adjusted using the Auto
Guide Speed function in the Setup Menu.
Figure 15. Pin diagram for the Atlas EQ-G autoguider jack.
 Loading...