6
3. Loosen the Dec. lock lever and rotate the telescope’s opti-
cal tube until it is parallel with the right ascension axis, as it
is in Figure 5.
4. Move the tripod so the telescope tube and right ascen-
sion axis point roughly at Polaris. If you cannot see Polaris
directly from your observing site, consult a compass and
rotate the tripod so the telescope points north.
The equatorial mount is now polar aligned for casual observing.
More precise polar alignment is recommended for astropho-
tography. For this we recommend using the polar axis finder
scope.
From this point on in your observing session, you should not
make any further adjustments to the latitude of the mount, nor
should you move the tripod. Doing so will undo the polar align-
ment. The telescope should be moved only about its R.A. and
Dec. axes.
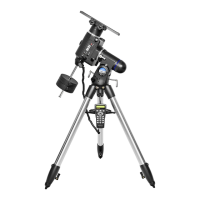
The Polar Axis Finder Scope
The Atlas EQ-G mount comes with a polar axis finder scope
(Figure 7) housed inside the right ascension axis of the mount.
When properly aligned and used, it makes accurate polar
alignment quick and easy to do. Unthread the cap at the rear
of the mount’s right ascension axis and remove the cap on
the front opening of the equatorial mount (Figure 5) to view
through the polar axis finder scope.
Alignment of the Polar Axis Finder Scope
1. Loosen the Dec. lock lever and rotate the optical tube on
the declination axis so that the tube is at a 90° angle to the
right ascension axis (Figure 8). This provides an opening
allowing a clear view through the polar axis finder scope
along the R.A. axis. Tighten the Dec. lock lever.
2. Look through the polar finder at a distant object (during the
day) and center it in the crosshairs. You may need to adjust
the latitude adjustment L-bolts and the tripod position to do
this. Focus the polar finder by rotating the eyepiece.
3. Rotate the mount 180° about the R.A. axis. It may be con-
venient to remove the counterweights and optical tube
before doing this.
4. Look through the polar finder again. Is the object being
viewed still centered on the crosshairs? If it is, then no fur-
ther adjustment is necessary. If not, then look through the
polar finder while rotating the mount about the R.A. axis.
You will notice that the object you have previously centered
moves in a circular path. Use the three alignment set-
screws on the polar axis finder (Figure 7) to redirect the
crosshairs of the polar finder to the apparent center of this
circular path.
5. Repeat this procedure until the position that the crosshairs
point to does not rotate off-center when the mount is rotat-
ed in R.A.
The polar axis finder scope is now ready to be used. When not
in use, replace the plastic protective cover to prevent the polar
finder from getting bumped.
Using the Polar Axis Finder Scope
The reticle of the polar axis finder scope for the Atlas EQ-G
has a tiny star map printed on it that makes precise polar align-
ment quick and easy. To polar align the mount using the polar
axis finder scope, follow these instructions:
1. Approximately polar-align the mount as outlined in the pro-
cedure above.
2. Loosen the Dec. lock lever and rotate the optical tube on
the declination axis so the tube is at a 90° angle to the right
ascension axis (Figure 8). Tighten the Dec. lock lever.
3. Focus the polar finder by rotating the eyepiece. Now, sight
Polaris in the polar axis finder scope. If you have followed
the approximate polar alignment procedure accurately,
Polaris will probably be within the field of view. If not, move
the tripod left-to-right, and adjust the latitude up-and down
until Polaris is somewhere within the field of view of the
polar axis finder scope.
4. The mount has a built-in illuminator that allows you to see
the reticle pattern in the polar axis finder scope at night.
Simply turn on the power switch on the Atlas EQ-G mount
(see “Powering the Atlas EQ-G Mount”) and the polar axis
finder scope reticle will be illuminated. Note the constel-
lation Cassiopeia and the Big Dipper in the reticle. They
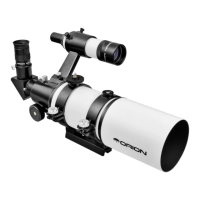
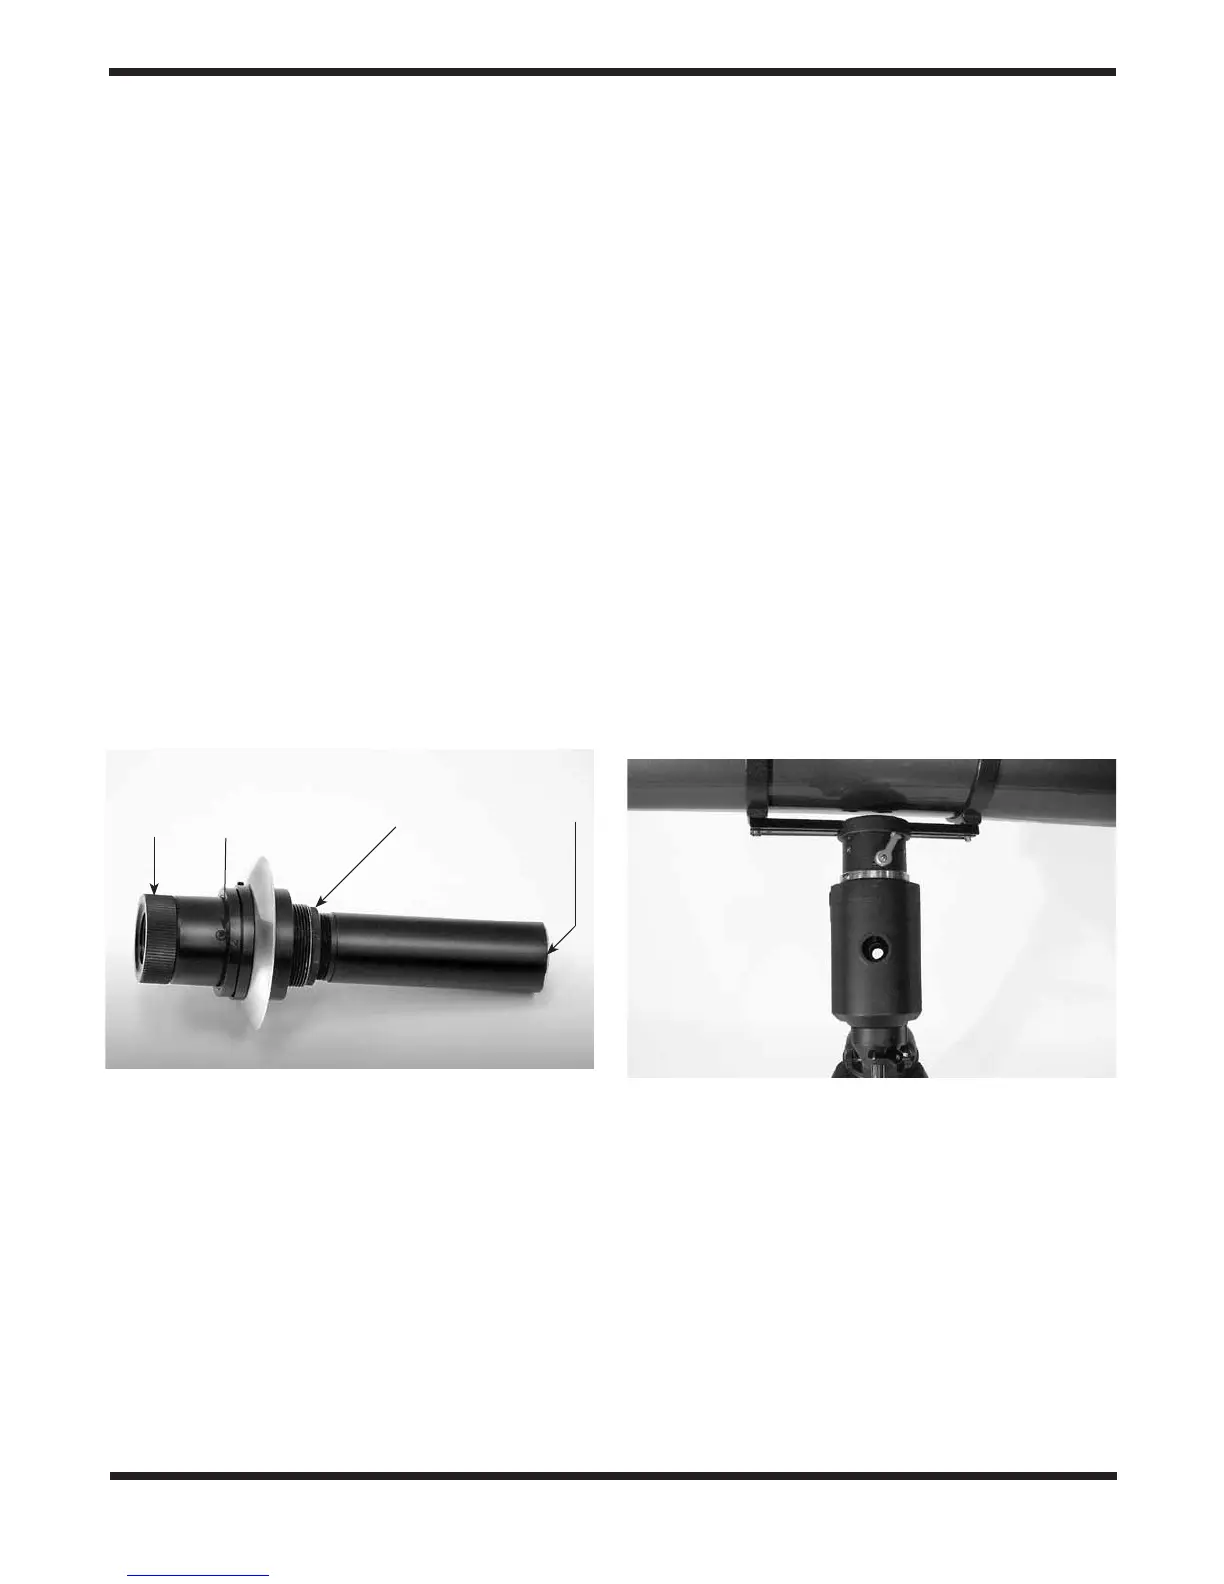
Figure 7. The polar axis finder scope.
Eyepiece
focus ring
Alignment
setscrew (3)
Focus
lock ring
Objective
lens
Figure 8. The optical tube must be at a 90° angle to the R.A. axis
in order to view through the polar axis finder.
 Loading...