4
2. Assembly
1. Attach the three aluminum tripod legs (A) to the mounting
platform (Q) (Figure 3a) with the three hinged leg braces
facing inward. Three hex-head bolts (B) each about 3" long,
with 5/8” washers (C) and wing nuts (D), are provided for
this purpose. Note that the bolts should be inserted from
the side of the leg that has the hex-shaped hole, so that
the bolt head seats in the hex-shaped hole (Figure 3b).
The washer then the wing nut are placed on the opposite
side on the exposed end of the bolt.
2. Attach a leg lock thumbscrew (E) to each leg as shown
(Figure 4). Extend the sliding inner portion of the adjust-
able-height tripod leg to the desired length for all three
legs. Lock in place by tightening the leg lock thumbscrews.
Do not over-tighten the leg lock thumbscrews or you
may damage the collar they are attached to.
3. Now stand the tripod upright, spreading the legs evenly
apart so the accessory tray can be positioned to attach to
the three leg braces.
4. Attach the accessory tray (F) to the leg brace supports
(Figure 5) with the three short screws (G), small (3/8”)
washers (H), and small wing nuts (I) provided. Place a
washer on the screw. Then place the accessory tray on
top of one of the leg braces so that the mounting screw
passes through the hole at one of the corners of the
accessory tray, and through the slot in the leg brace. Then
place another small washer on the screw and thread on
and tighten the wing nut. Repeat this procedure until the
tray is attached to all three leg braces.
The tripod is now fully assembled (Figure 6)
. Next you will
install the equatorial mount onto the tripod.
5. Locate the equatorial (EQ) mount (J) and place its base
into the hole in the center of the mounting platform (Q)
(Figure 7a). Then secure it in place with the azimuth lock
knob and washer (K) (Figure 7b).
6. Thread the latitude adjustment bolt (L) into the threaded
socket (Figure 8) until it contacts metal inside the housing.
7. Next, thread the counterweight shaft (M) into the base of
the Declination axis of the mount (Figure 9).
8. Thread the counterweight lock knob (N) into the counter-
weight (O) a few turns.
9. To slide the counterweight onto the counterweight shaft,
rst remove the Philips screw and washer from the end
of the shaft. Make sure the counterweight lock knob (N) is
loosened enough so that the metal pin inside the counter-
weight is clear of the shaft hole. Slide the counterweight
about 2 inches from the bottom of the counterweight shaft
and secure it in place with the lock knob (Figure 10). Then
replace the washer and screw at the end of the counter-
weight shaft.
10. Attach the slow motion cables (P) to the gear shafts as
shown in Figure 11. The longer cable should be attached
to the declination gear shaft; the shorter cable to the right
ascension gear shaft. Orient the cable so that the thumb-
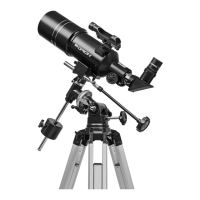
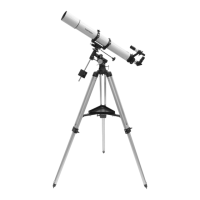
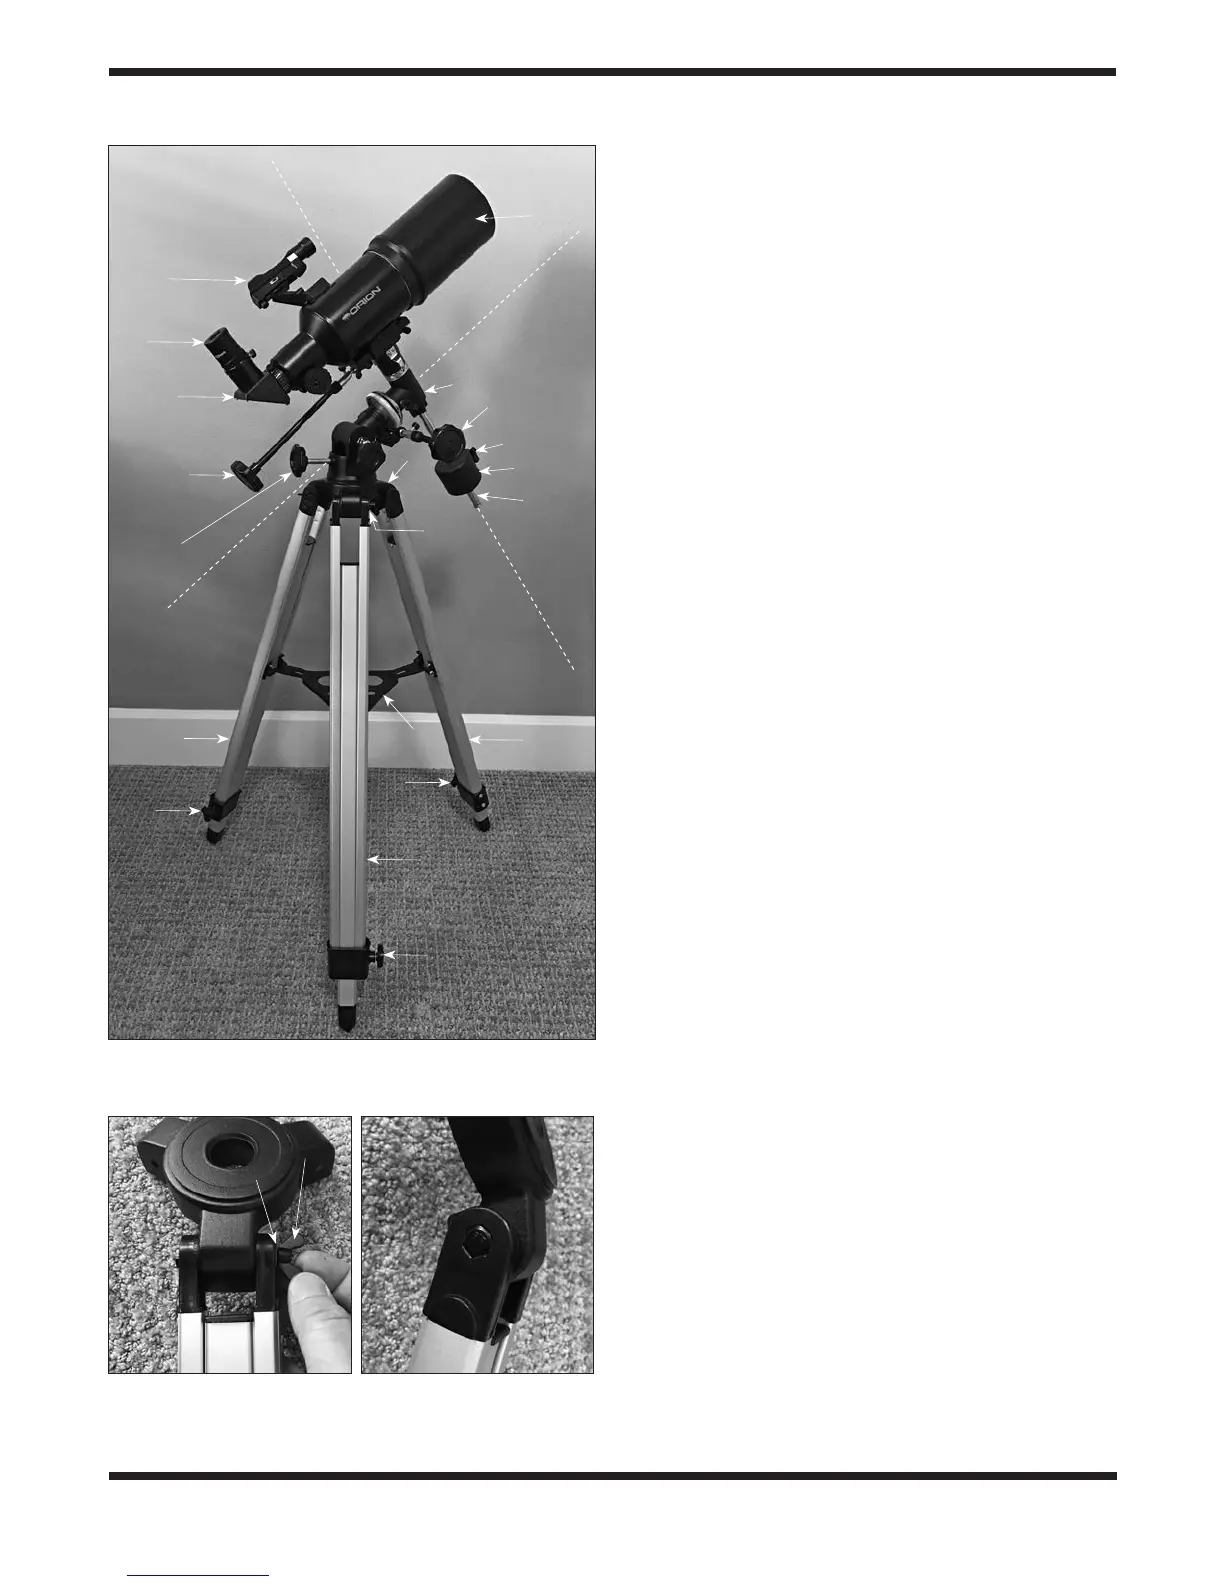
Figure 2. The Observer 80ST EQ telescope fully assembled, with
key parts identied.
Figure 3. a) Attach the three tripod legs to the mount platform,
b) making sure the bolt’s hex-shaped head seats in the hex-shaped
recess of the tripod leg.
Washer
Wingnut
L
A
A
A
E
E
E
P
(Dec)
U
W
R
S
K
Q
P
(R.A.)
J
N
O
M
F
R.A. Axis
Dec. Axis