Do you have a question about the Orion SkyView Pro 100mm ED EQ and is the answer not in the manual?
Instructions for carefully removing the telescope from its packaging and checking all parts.
Step-by-step guide for assembling the telescope for the first time, noting precautions for optical surfaces.
Instructions on how to achieve sharp focus using the focuser knobs for clear viewing.
Procedure to accurately align the finder scope with the main telescope for easier object location.
Steps to adjust the focus of the finder scope for clear viewing of the reticle and distant objects.
Explanation of how magnification is calculated and how to select appropriate eyepieces for different views.
Guidance on using larger 2-inch eyepieces for a wider field of view.
Instructions for using 1.25-inch eyepieces directly with the focuser, bypassing the diagonal.
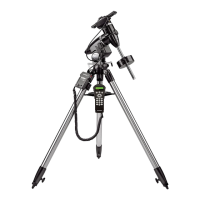
Detailed steps for aligning the telescope mount with the Earth's rotational axis for accurate tracking.
Instructions for using an optional accessory to achieve precise polar alignment quickly and easily.
Procedure to align the polar axis finder scope itself with the telescope's mount.
Guide on how to use the polar axis finder scope to achieve accurate polar alignment.
How to use slow-motion controls for precise pointing and tracking of celestial objects.
Explanation of celestial coordinates (R.A. and Dec.) and how setting circles help locate objects.
Steps to calibrate the declination setting circle for accurate coordinate-based aiming.
Steps to calibrate the right ascension setting circle for accurate coordinate-based aiming.
How to use calibrated setting circles and a star atlas to locate celestial objects.
Guidance on how to orient the telescope to point to various positions in the sky, including zenith.
Advice on choosing a good location for observing, away from light pollution and obstructions.
Explanation of atmospheric seeing and transparency and how they affect image quality.
Importance of allowing the telescope optics to acclimate to outdoor temperature for peak performance.
Tips on allowing eyes to adapt to darkness for better night vision and improved observation.
Guidance on choosing and using eyepieces, starting with low power for easier object acquisition.
Tips for observing the Moon, including optimal phases and the use of moon filters.
Crucial safety warning and instructions for observing the Sun with a solar filter.
Information on observing planets like Jupiter, Saturn, Venus, and Mars, and recommended viewing conditions.
How stars appear and tips for observing double stars and their colors.
Guidance on observing faint deep-sky objects like nebulas, clusters, and galaxies under dark skies.
A method for locating faint deep-sky objects by using bright stars as reference points.
Steps for photographing the Moon, including exposure times and recommended accessories.
Techniques for photographing planets, requiring motor drives and specific camera adapters.
Method for capturing wide-field deep-sky images by mounting a camera on the telescope.
Proper methods for cleaning optical surfaces without causing damage or scratches.
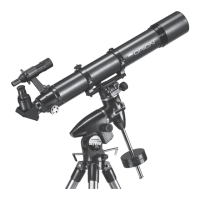
The Orion SkyView Pro 100mm ED EQ is an exceptional equatorial apochromatic refractor telescope, designed for both observing and imaging astronomical objects. Its ED (Extra-low Dispersion) glass objective lens minimizes color distortion, providing sharper, more pleasing views compared to standard refractors. The telescope comes with a sturdy SkyView Pro equatorial mount, enabling stable viewing and easy tracking of celestial targets.
The primary function of the Orion SkyView Pro 100mm ED EQ is to provide magnified views of astronomical objects such as stars, the Moon, planets, nebulas, galaxies, and star clusters. It can also be used for long-distance terrestrial viewing. The equatorial mount is designed to compensate for the Earth's rotation, allowing objects to remain in the telescope's field of view without constant manual adjustment.
The telescope operates by gathering light through its objective lens and focusing it to create an image that is then magnified by an eyepiece. The Crayford focuser ensures smooth and precise focusing without image shift, a common issue with typical rack-and-pinion designs.
For astronomical observation, the equatorial mount requires polar alignment, which involves aligning the mount's right ascension (R.A.) axis with the Earth's rotational axis. For Northern Hemisphere observers, this typically means pointing the R.A. axis towards Polaris, the North Star. Once polar-aligned, celestial objects can be tracked by slowly rotating the telescope on its R.A. axis using the slow-motion control knob. This keeps objects from drifting out of the field of view.
The telescope is equipped with setting circles on both the R.A. and declination (Dec.) axes. These circles, when properly calibrated and used with a star atlas, allow users to locate celestial objects by their specific coordinates (R.A. and Dec.) on the celestial sphere. While setting circles may not place an object dead-center in the eyepiece, they should bring it into the field of view of the finder scope, from where fine adjustments can be made.
The SkyView Pro 100mm ED EQ is also suitable for astrophotography. With the included camera adapter, it transforms into a 900mm f/9 telephoto lens for single-lens reflex cameras. Different types of astrophotography, such as Moon photography, planetary photography, and "piggyback photography" for deep-sky objects, are possible.
| Optical Design | Apochromatic Refractor |
|---|---|
| Aperture | 100mm |
| Focal Length | 900mm |
| Focal Ratio | f/9 |
| Mount Type | Equatorial |
| Eyepieces Included | 25mm Sirius Plossl |
| Accessories | Dovetail Plate |
| Tripod | Steel |