10
Appendix A
Collimation – Aligning the Optics
Collimation is the process of adjusting the optics of a tele-
scope so they are precisely aligned with one another and with
the telescope tube. For this reector telescope, the primary
and secondary mirrors must be in precise alignment. Your
telescope’s optics were aligned at the factory, and should
not need much adjustment unless the telescope is handled
roughly. Accurate mirror alignment is important to ensure the
sharpest possible images viewed through your telescope, so
it should be checked occasionally. With practice, collimating is
relatively easy to do and can be done in daylight.
It helps to perform the collimation procedure in a brightly lit
room with the telescope pointed toward a bright surface, such
as a light-colored wall. The telescope tube should be oriented
horizontally (parallel to the ground). Placing a piece of white
paper in the telescope tube opposite the focuser (i.e., on the
other side of the secondary mirror from the focuser) will also
be helpful (see Figure 12). You will need a Phillips screwdriver
to perform the collimation.
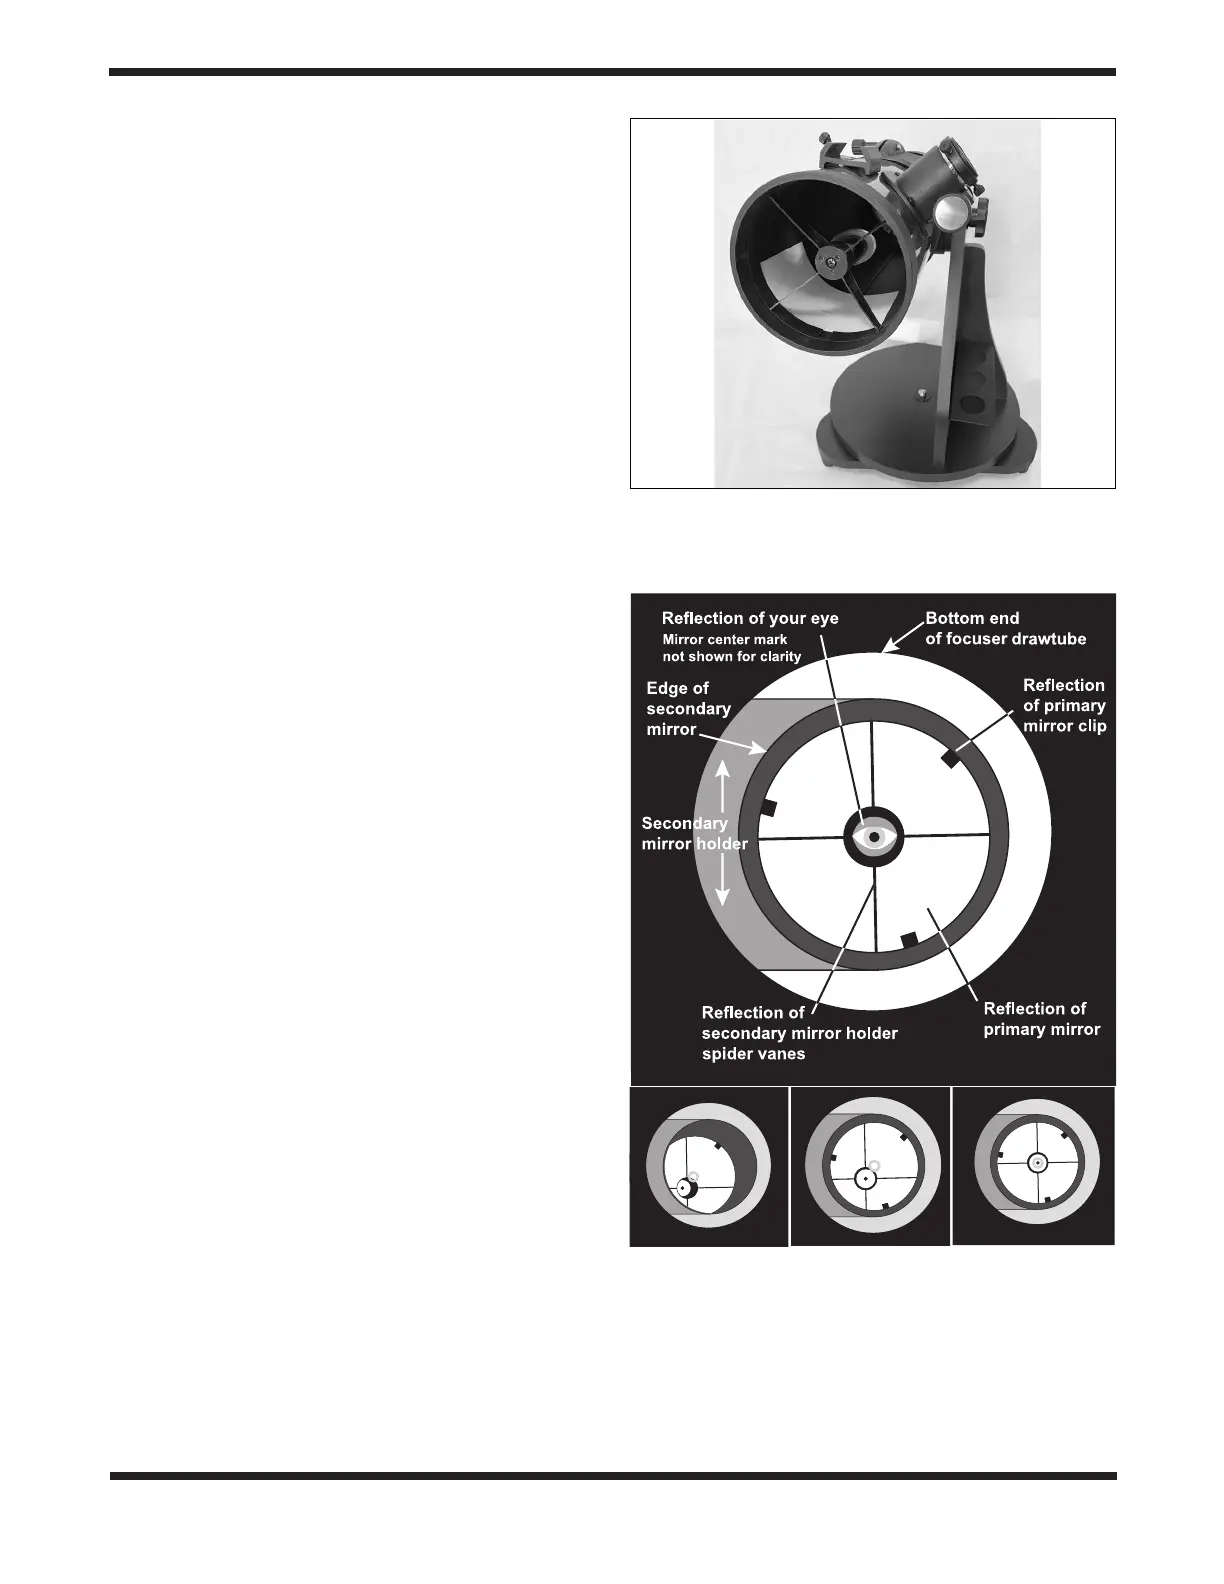
To check your telescope’s collimation, remove the eyepiece
and look down the focuser. You should see the secondary
mirror centered in the focuser, as well as the reection of
the primary mirror centered in the secondary mirror, and the
reection of the secondary mirror (and your eye) centered in
the reection of the primary mirror, as in Figure 13A. Got all
that? Review it again carefully, and compare what you see to
Figure 13A. If anything is off-center, proceed with the follow-
ing collimation procedure.
NOTE: Precise collimation is best achieved by using an
optional collimating tool, such as a quick-collimation cap,
a Cheshire eyepiece, or a laser collimator. Check our web-
site for available collimating tools. Figures 13B through
13D assume that you have an optional Cheshire eyepiece
or collimation cap in the focuser.
Primary Mirror Center Mark
You may have noticed that your StarBlast 6 has a small adhe-
sive ring in the center of the primary mirror. This “center mark"
allows you to achieve a very precise collimation of the primary
mirror; you don’t have to guess where the center of the mirror
is, which is important in the collimation process. The center
mark is especially useful when using an optional collimating
device.
Note: The adhesive ring should not be removed from the
primary mirror. Because it lies directly in the shadow of
the secondary mirror, its presence in no way adversely
affects the optical performance of the telescope or the
image quality. That might seem counter-intuitive, but it’s
true! Leave it in place.
Aligning the Secondary Mirror
Align the secondary mirror rst. Look down the focuser at the
secondary (diagonal) mirror. If the entire primary mirror reec-
tion is not visible in the secondary mirror, as in Figure 13B,
you will need to adjust the tilt of the secondary mirror. This
is done by alternately loosening one of the three secondary
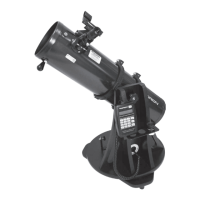
Figure 12. Before collimating your telescope, place a piece of
white paper inside the optical tube opposite the focuser. Make sure
the telescope tube is oriented parallel to the ground during the
collimation process. [StarBlast 4.5 Astro Reector pictured]
Figure 13. Collimating the optics. (A) When the mirrors are
properly aligned, the view down the focuser drawtube should look
like this. (B) Here, only part of the primary mirror is visible in the
secondary mirror, so the secondary mirror needs to be adjusted
(tilted). (C) Here the secondary mirror is correctly aligned because
the entire primary mirror is visible in it. But the reection of the
secondary mirror is off-center. So the primary mirror still needs
adjustment. (D) Now the primary mirror is correctly aligned, so the
secondary mirror is centered.
A.
B.
C.
D.
 Loading...