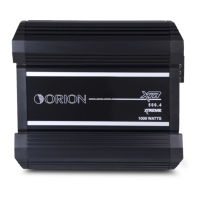
This document is an owner's manual for the Orion XTR 800.4 XTREME Amplifiers, specifically the 800.4 model. It provides comprehensive information on the amplifier's features, specifications, installation, and troubleshooting.
Function Description
The Orion XTR 800.4 XTREME Amplifier is designed to be a leader in its class, offering powerful, advanced features and ease of use for car audio systems. It is a 4-channel amplifier with a fully variable low-pass crossover from 45Hz to 5kHz and a high-pass crossover from 10Hz to 10kHz. The XTREME 800.4 also includes the INTELLIQ subwoofer optimizing circuitry and dual remote gain capability. The amplifier is capable of 6, 5, 4, 3, or 2 channel operation. The manual emphasizes that proper installation is crucial for optimal performance and reliability, recommending that installation be performed by an authorized Orion dealer.
Important Technical Specifications
The XTREME 800.4 amplifier boasts impressive power output and a wide range of adjustable settings.
- Power Output:
- 4 Ω stereo: 100 x 2 (front channels), 100 x 2 (rear channels)
- 2 Ω stereo: 200 x 2 (front channels), 200 x 2 (rear channels)
- 4 Ω mono (bridged): 400 x 1 (front channels), 400 x 1 (rear channels)
- Distortion (THD): <0.1% THD for both front and rear channels.
- Frequency Response: 20Hz to 20kHz ±0.25dB.
- Linear Bandwidth: 6Hz to 50kHz ±3dB.
- Signal-to-Noise Ratio (full bandwidth): >100dB.
- Damping Factor (@ output connector, full bandwidth): >400 at output connector.
- Slew Rate: >30V/µs.
- Input Sensitivity: 200 mV to 5 Vrms.
- Input Impedance: 20 k ohm.
- Fuse Type: (3) 20 Amp ATC.
- Crossover:
- Low-Pass Crossover Frequency Range: 45Hz to 5kHz (continuously variable).
- High-Pass Crossover Frequency Range: 10Hz to 10kHz (continuously variable).
- INTELLIQ Range: 0dB to 10dB of Boost.
- Dimensions: 18"L x 10.25"W x 2.25"H (457mm x 260mm x 57mm).
The amplifier is designed to handle various input configurations, including 4-channel, RCA input/copy 1+2, and internal crossover configurations. It supports different speaker connections, such as 4-channel stereo, 3-channel stereo/bridged, and 2-channel bridged configurations.
Usage Features
The XTR 800.4 offers a high degree of flexibility in its setup and operation:
- Input Configurations: Supports 4-channel input, RCA input/copy 1+2, and various internal crossover configurations. The "COPY 1+2" feature allows the front channel's crossover features to be routed to both the front and rear channels, enabling bandpass crossovers for midbass and midrange speakers.
- Crossover Adjustments: Features continuously variable low-pass and high-pass crossovers. The front channels can be configured for either high-pass, low-pass, or bandpass operation. The rear channels are continuously variable from 45Hz to 5kHz for low-pass operation and 10Hz to 10kHz for high-pass operation. The "X10" button extends the high-pass crossover frequency range to 10kHz, 35Hz, 120Hz, and 1kHz, making it useful for smaller diameter midrange and tweeter speakers.
- INTELLIQ Subwoofer Optimizing Circuitry: This feature allows for fine-tuning of the subwoofer's performance. It includes adjustable boost levels (6dB and 10dB) and various enclosure types (sealed, vented, sealed bandpass, vented bandpass, aperiodic) with corresponding acceptable problems and solutions. The INTELLIQ system helps to achieve optimal sound quality by adjusting the Q setting and frequency response.
- Remote Gain Operation: The amplifier supports remote gain control, allowing users to adjust the subwoofer level from the driver's seat. This is particularly useful for optimizing the sound for different music styles or listening preferences.
- Power Connections: Requires a minimum 8 gauge power and ground cable for acceptable performance, with 4 gauge recommended for optimal performance. Fuse power wire should be less than 18" from the battery.
- Speaker Connections: Supports various speaker configurations, including 4-channel stereo (2 Ohm minimum per channel), 3-channel stereo/bridged (4 Ohm minimum for front channels, 2 Ohm minimum for rear bridged), and 2-channel bridged (2 Ohm minimum per bridged channel).
- Mounting: The amplifier can be mounted in various positions ("in" position, "out" position, "standard" manner) to accommodate different installation requirements. It is recommended to choose a location that allows for adequate ventilation to prevent overheating.
Maintenance Features
The manual provides detailed troubleshooting tips and guidelines for maintaining the amplifier's performance:
- Troubleshooting Tips: A comprehensive table lists common symptoms, probable causes, and recommended actions to take. This covers issues like no output, fuse blown, power wires not connected, audio input not connected, speakers not connected, audio cycles on and off, loose or poor audio input, loose power connections, distorted output, shorted speaker wires, distorted output section, poor bass response, battery fuse blowing, and amplifier fuse blowing.
- Autosound 2000 Troubleshooting Tips: This section offers advanced troubleshooting advice, including checks for proper wiring, power supply, signal input, and output. It also provides guidance on identifying and resolving issues related to noise, such as inadequate power supply isolation or ground loops.
- General Precautions and Installation Tips:
- Safety: Warns against cutting or drilling into gas tanks, fuel lines, brake lines, hydraulic lines, vacuum lines, or electrical wiring.
- Wiring: Emphasizes securing the amplifier to prevent damage from vibration or impact. Recommends using the correct wire size and type for power, ground, and speaker connections.
- Heat Management: Advises against mounting the amplifier in areas with poor air circulation to prevent overheating.
- System Integration: Provides guidance on connecting the amplifier to various components of a car audio system, including head units, equalizers, and crossovers.
- Testing the System: Outlines a step-by-step process for testing the system after installation, including checking all wiring connections, verifying power LED status, and adjusting gain levels.
- Adjusting the Sound: Offers detailed instructions on how to adjust the sound of the system, including setting gain levels, crossover frequencies, and fine-tuning the internal crossover settings for midbass and tweeter outputs.
The manual stresses the importance of using proper tools and techniques for installation and maintenance, recommending professional assistance from an authorized Orion dealer for complex issues. It also highlights the warranty policy, which covers defects in material and workmanship for a specified period, provided the product is purchased from an authorized dealer and not subjected to misuse or unauthorized modification.