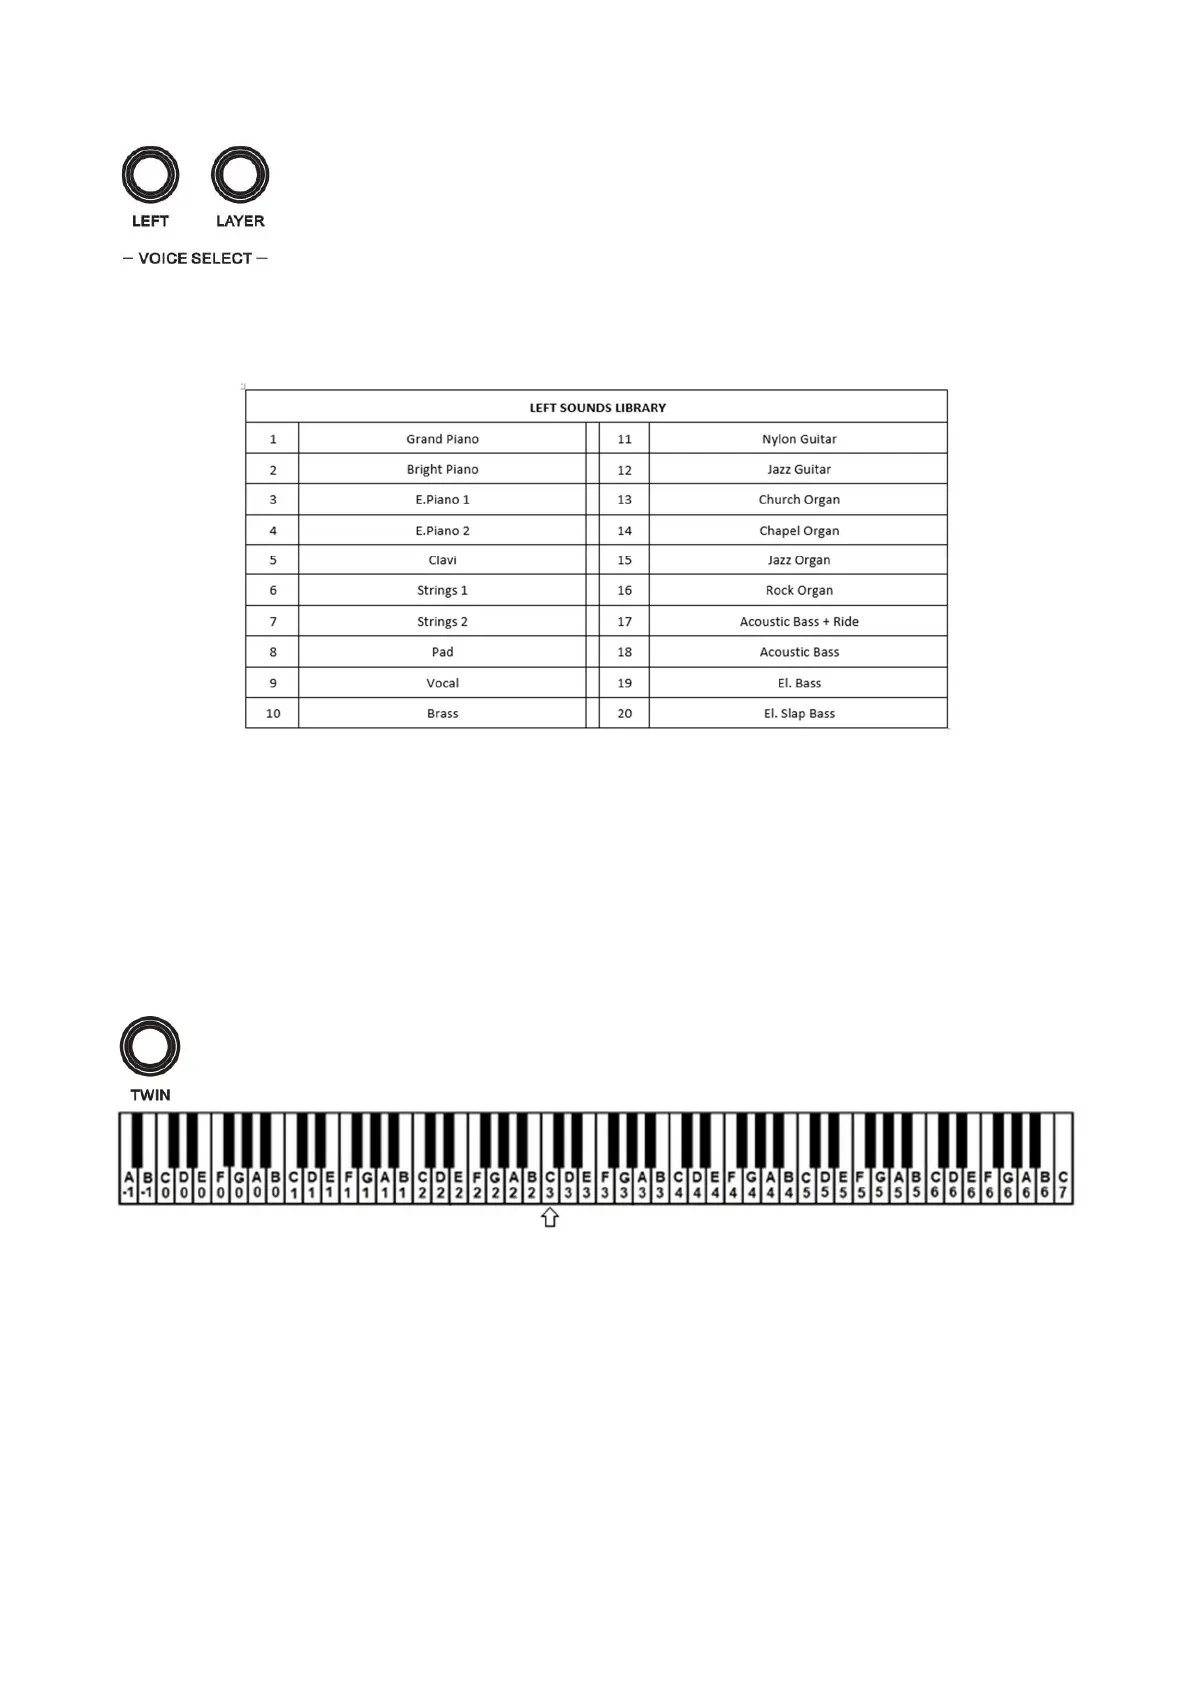
LEFT / SPLIT
When the LEFT button is selected (its Led starts blinking) the keyboard automatically split in
two parts and a new sound is selected on the left part of the keyboard.
The STRINGS 2 sound is automatically selected on the left part.
While the LEFT button is blinking, it is possible to change the sound for the left part of the keyboard using the (\/) and
(/\) buttons or DATA CONTROL. The available sounds for the Left section can be selected from the below list of
dedicated sounds.
After a few seconds the SPLIT button Led stops blinking and will stay ON.
SET NEW SPLIT POINT
Press and hold the LEFT button until the display shows the default Split point, that is set to G2 also indicated with
number 55 that is the midi code of the note (key).
To change the Split point, press and hold the LEFT button and select the new split point by pressing the related key.
As soon as the LEFT button is released, the display will return to standard use.
TWIN
When the TWIN button is selected the instrument keyboard automatically splits in two sections, playing
the same octaves. This feature allows the teacher and the student to practice together the same notes, in the
same octaves on the same instrument.
The split point of the TWIN features is set at C3 key.
RHYTHM STYLES
The instrument has also a selection of rhythm styles with automatic accompaniments.
To select a rhythm:
- Press and hold the RHYTHM button
- Using the (\/) and (/\) buttons or DATA CONTROL scroll in the display the available rhythm of the internal
style library until the desired rhythm is found (full rhythm list at the end of the manual).
- Release the RHYTHM button to confirm.
TEMPO
The TEMPO (\/) and TEMPO (/\) buttons control the Tempo of the Rhythm. The desired Tempo will be indicated in
the display.
By pressing both Tempo buttons at the same time to set the Tempo value at 120.
 Loading...