+
EN
INSTRUCTIONS
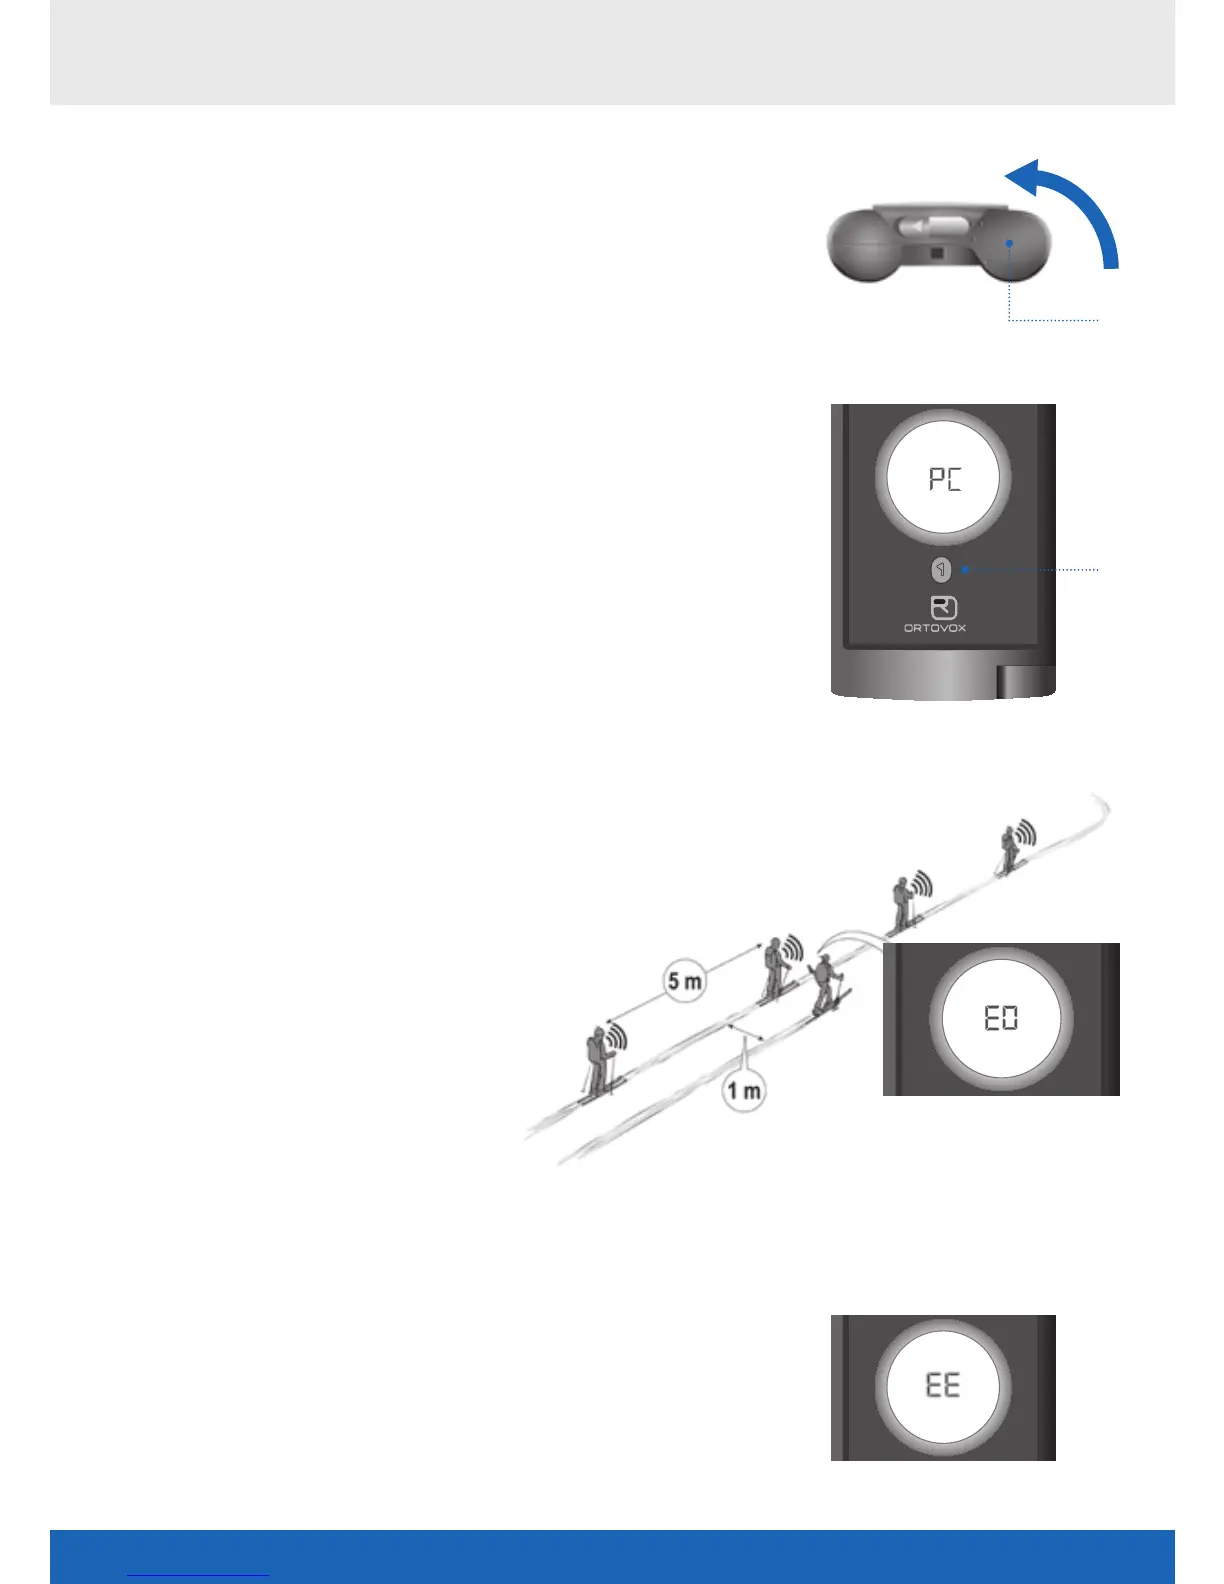
•Now turn on the +. To do so, turn the
ON/OFF switch () counter-clockwise.
The self-test begins.
•During the self-test, press the flagging
button () until “PC” appears. The + is
now in the partner check function but
there is no transmission signal.
•Only one transmission signal can ever be
tested at a time. The minimum distance during
the partner check is m; the distance to other
transmitters must be at least m.
•The check looks at the transmission frequency,
the transmission duration, and the cycle
duration. “EO” means that the transmission
signal tested is fully functional.
•Warnings and defects for the inspected
transmitters are displayed as “EE”.
•The partner check is completed by pressing in
the transmission switch over button () in
transmission mode or by pressing the flagging
button () in search mode ().
OX-GAL-3+-BUCH-vh.indd 35 06.06.13 15:26
 Loading...