Do you have a question about the Ortur Laser Master 1 and is the answer not in the manual?
This laser engraver is a desktop model, not intended for industrial use.
Features a G-sensor to stop the laser beam if unauthorized movement is detected.
Stops laser if computer halts or USB disconnects, preventing fire.
Cuts off laser if motor stops moving to prevent fire during operation.
This laser engraver supports Pulse Width Modulation (PWM) mode for laser control.
Details 7W for picture engraving, 15W for cost-effectiveness, and 20W for faster speeds.
Always wear safety goggles when operating the laser engraver.
Set up in a fireproofing area with good ventilation for safe operation.
Keep minors away; they require adult supervision and proper eye protection.
Avoid impacts and touching the laser beam or hot heat sink to prevent injury.
Use M3*8 screws and M3 spacers to fix the Laser Module on the Y axis assembly.
Use M5*16 screws and M5 Nuts to fix the X axis and extended supporting plate.
Use M5*16 screws and M5 nuts to fix the other side of the X axis supporting plate.
Plug the Laser Module Cable into the pinboard for electrical connection.
Align screws at screw holes and place the X Axis Assembly onto the Y Axis Assembly.
Use the wrench to tighten 4*M5 Nuts and 4*M5 Spacers securely.
Use a plastic cable tie to neatly secure the Laser Module Cable.
Plug the X Motor Cable into the corresponding X Motor connector.
Stick non-slip pads to the bottom corners and perform initial test in a fireproof area.
Download the Host Control Software 'LaserGrbl' and necessary drivers from provided links.
Install the appropriate VCP drivers for your Windows system (32-bit or 64-bit).
Install the 'LaserGRBL' carving software on your Windows computer.
Plug in the power adapter, press the power switch, and connect the engraver to the computer via USB.
Check 'Device Manager' for 'STMicroelectronics Virtual COM Port' to confirm successful connection.
Run LaserGRBL, import 'CustomButtons.gz' for advanced settings and direct use.
Connect the engraving machine using the correct COM port and Baud rate.
Utilize Start/Pause/Stop, Reset, Unlock, and Motion controls for operation.
Adjust Baud rate for quality/speed and configure display settings for the engraving area.
Address engraver stopping during carving by adjusting 'Grbl' settings in the 'Settings' menu.
Import the image file and configure initial parameters like resize and preview.
Adjust engraving accuracy from Low (5) to High (20) for desired detail.
Configure engraving speed and laser power (S0-S1000) based on material type.
Set the target image size and position in millimeters for the engraving area.
Wear safety goggles and place the object under the laser lens for focus adjustment.
Set the laser unit height to 55mm from the object's surface for best focus.
Activate a faint light beam to check for safety and clarity; stop if dazzling or burning.
Adjust the lens focus ring to achieve the smallest possible light spot for precision.
Click the icon to home the X and Y axes before starting the engraving operation.
Use directional icons to move the laser unit to the desired position on the material.
Click the icon to set the current position as the starting point for engraving.
Click the start icon to begin the engraving process.
Download the trial version of LaserBurn software from the official website.
Install the software on your computer and launch the application.
Select GRBL in the New Device Wizard and proceed to the next step.
Choose Serial/USB as the connection method and press Next.
Name your device 'Ortur Laser Master' and set X/Y axis dimensions (150mm/160mm).
Select 'Front Left' as the origin and activate 'Auto-home' on startup.
Click Finish, select 'Ortur Laser Master', and press 'Make Default' to prepare for use.
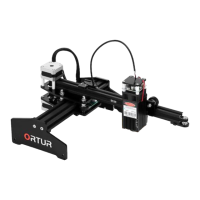
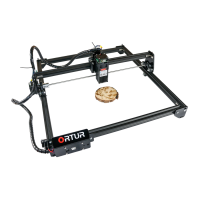
The Ortur Laser Master 1 is a desktop laser engraver, designed for personal use rather than industrial applications. This device is equipped with several safety and operational features to ensure a user-friendly and secure experience.
The Laser Master 1 serves as a laser engraver, capable of engraving and cutting various materials. It operates in PWM mode, allowing for precise control over the laser's power output. The device is compatible with Windows operating systems and utilizes host control software like "LaserGRBL" and "LightBurn" for operation.