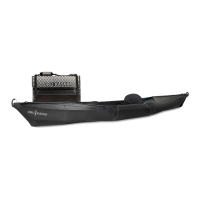
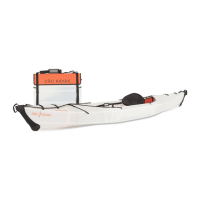
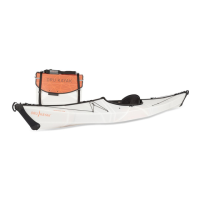
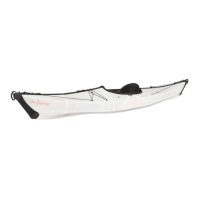
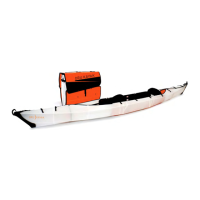
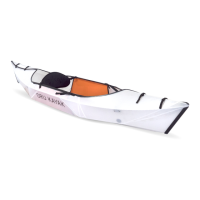
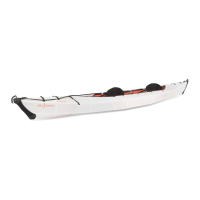
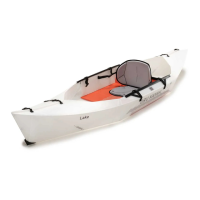
The Oru Kayak Beach LT Sport is a foldable kayak designed for portability and ease of assembly and disassembly. It transforms from a compact box into a functional kayak, and back again, making it suitable for users who value convenient storage and transport.
Function Description:
The Oru Kayak Beach LT Sport serves as a recreational kayak for paddling on water. Its primary function is to provide a stable and comfortable vessel for single-person use, while also offering the unique advantage of being foldable into a box form for easy carrying and storage. The kayak's design emphasizes structural rigidity and comfort through its various components, ensuring a pleasant paddling experience.
Important Technical Specifications:
While specific dimensions and weight are not explicitly listed in the provided manual pages, the manual indicates that the kayak is made from "double-walled corrugated polypropylene." This material is noted for its durability, naturally showing marks and scratches over time, which are considered normal wear and tear as long as the hull is not punctured. The kayak includes a 4-piece paddle (though the paddle itself is not detailed in these pages, its storage is mentioned). The design incorporates various straps, buckles, and channels for secure assembly and structural integrity.
Usage Features:
Assembly:
The assembly process is broken down into nine steps:
- Open the Oru Kayak box: This involves loosening and sliding off two loops, setting aside the shoulder strap, lifting off the lid (which becomes the floorboard), and unclipping side buckles to remove loose components.
- Unfold the box: The user holds two folds at orange stickers and pulls to open, extending the box into a long sheet. The ends are pushed apart, and the hull is popped flat by pushing down inverted folds to create a bowl shape. The skin will be stiff during this process.
- Attach the footrest: Flaps on the sides of the cockpit are folded in, the footrest and bulkhead are pulled into the hull, and the footrest is clipped to adjustable footrest straps.
- Close the front of the kayak: The ends are inverted, and the end strap at the bow (front) is fully tightened. The attached bow bulkhead is placed into the bulkhead channels on the cockpit side of the screw, and may need to be held in place for the next step.
- Slide on front zipper channels: Holding the bow, the zipper channel is guided onto the deck trim. Downward pressure and forward pushing with hands are recommended while sliding. It's crucial not to force the zipper to avoid damage and to ensure the bulkhead stays inside the bulkhead channels. The front fairing is stretched over the bow, and a small buckle is clipped onto the deck line buckle. Velcro on top of the bulkhead is attached.
- Close the back of the kayak: This step is similar to closing the front. The stern (back) end loop strap is fully tightened. The loose stern bulkhead is placed in the bulkhead channels, ensuring the velcro side is on top, and may need to be held for the next step.
- Slide on rear zipper channels: Similar to the front, the stern is held, and the zipper channel is guided onto the deck trim with downward pressure and forward pushing. Both zippers must be correctly on the stern. The rear fairing is stretched over the stern, and a small buckle is clipped onto the deckline buckle and tightened. Velcro on top of the bulkhead is attached.
- Insert the floorboard: The floorboard is oriented with the seat back plate towards the stern. It is bent upward, and its edges are placed into the floorboard channels. The center of the floorboard is then pressed down and pushed into the channels (it may not sit flat until the next step).
- Install the seat: The bottom of the seat column is inserted into the slot of the seat column plate on the floorboard. Seat back straps are clipped into buckles on carrying handles. Two clips are connected to cord loops on the back end of the floorboard channel. The gel seat pad is placed under the bungee on the floorboard. Finally, the tension strap is connected and tightened until the buckle reaches the stop in the strap.
Final Adjustments (Before Getting In):
- Adjust the backrest: Loosen the knob on the rear of the seat one full turn (avoid overturning), slide the seat oval to the desired height, and re-tighten the knob until the seatback is secure.
Final Adjustments (Once You're In):
- Adjust for comfort: Tighten or loosen the seatback straps while leaning against the backrest. Adjust the footrest distance by tightening or loosening adjustable straps to keep legs comfortably bent with knees splayed outward.
Assembly Checklist:
- Bow and stern bulkheads are in place.
- Tension strap is buckled and tightened.
- All footrest seat buckles are clipped and tightened.
- Bow and stern straps are tight, and fairings cover both ends.
- Zipper channels are tight, and no deck trim is visible underneath.
- Decklines are buckled to the fairings and tightened.
Disassembly:
Disassembly is essentially the reverse of assembly, with some specific tricks:
- Unclip fairings and remove zippers: From bow to stern, unclip fairings and remove them from both ends. Unbuckle the footrest and seatback, unloose seatback clips, and unbuckle the tension strap. Do not loosen the end straps yet. Remove all three zippers from the deck.
- Loosen end straps: Fully loosen the end straps after removing the zippers.
- Remove components: Remove the seatback, seat pad, footrest, and both bulkheads.
- Remove floorboard: Lift up on the floorboard to remove it. If rubber trim sticks in channels, try wiggling it.
- Fold the hull: Fold either the bow or stern inward like an accordion, using a knee to assist. Repeat with the other end.
- Remove footrest and bow bulkhead: Pull these parts out of the hull. These will be stored after the next step.
- Form the box: Push the black arrow towards the black target and the orange arrow towards the orange target until the box is formed. The two folded sides will slide past each other.
- Pack loose components: Place the footrest, bulkheads, and zippers into the folded boat, followed by other loose components like the seat back.
- Secure the box: Bring the middle female strap to the side of the box and clip it into the male buckle. Repeat on the other side.
- Attach floorboard as lid: Place the floorboard over the top of the box, inserting the long sides into the rails. Place and tighten the shoulder strap loops over the box, ensuring the protector is centered on the kayak and fully tightened. Ensure the plate is in the correct orientation before tightening the straps.
Maintenance Features:
- Spare parts kit: The kayak includes a spare parts kit with extra hardware for repairs and upkeep, indicating that minor maintenance and part replacement are anticipated and supported.
- Draining water: A tip is provided for draining any water that may collect inside the plastic corrugated flutes: stand the assembled kayak vertically for about 10 minutes.
- Instructional video: An instruction video is available online for both assembly and disassembly, providing visual guidance for maintenance and proper handling.
- Customer support: Contact information (email and phone number) is provided for product or assembly questions, suggesting readily available support for troubleshooting and maintenance inquiries.