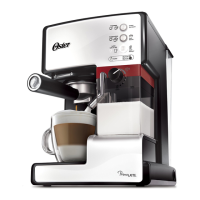
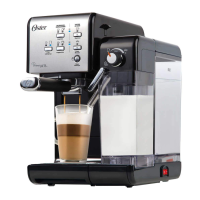
15
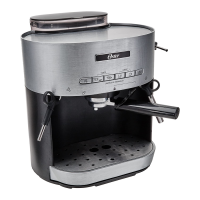
1. Brew Head
2. Porta-Filter
3. Frothed Milk Dispensing Tube
4. Cup Height Adjusting Drawer
5. Removable Drip Tray and Drip Grid
6. Drip tray Overflow Indicator
7. Porta-Filter Retention Clip
8. Filter for Single Shot of Espresso
9. Filter for Double Shot of Espresso
10. Measuring Scoop/Tamper
11. Milk Reservoir Lid
12. Froth Control Knob
13. Frothing Tube Lever
14. Removable /Clear Milk Reservoir
15. On/off Switch “I/O” (right side of appliance)
16. Water Reservoir Lid
17. Removable Water Reservoir
DESCRIPTION OF THE APPLIANCE
1
16
17
3
13
12
11
14
7
2
2
4
5
6
8 9 10
3 4
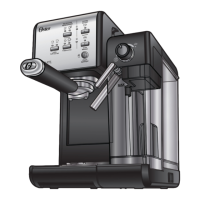
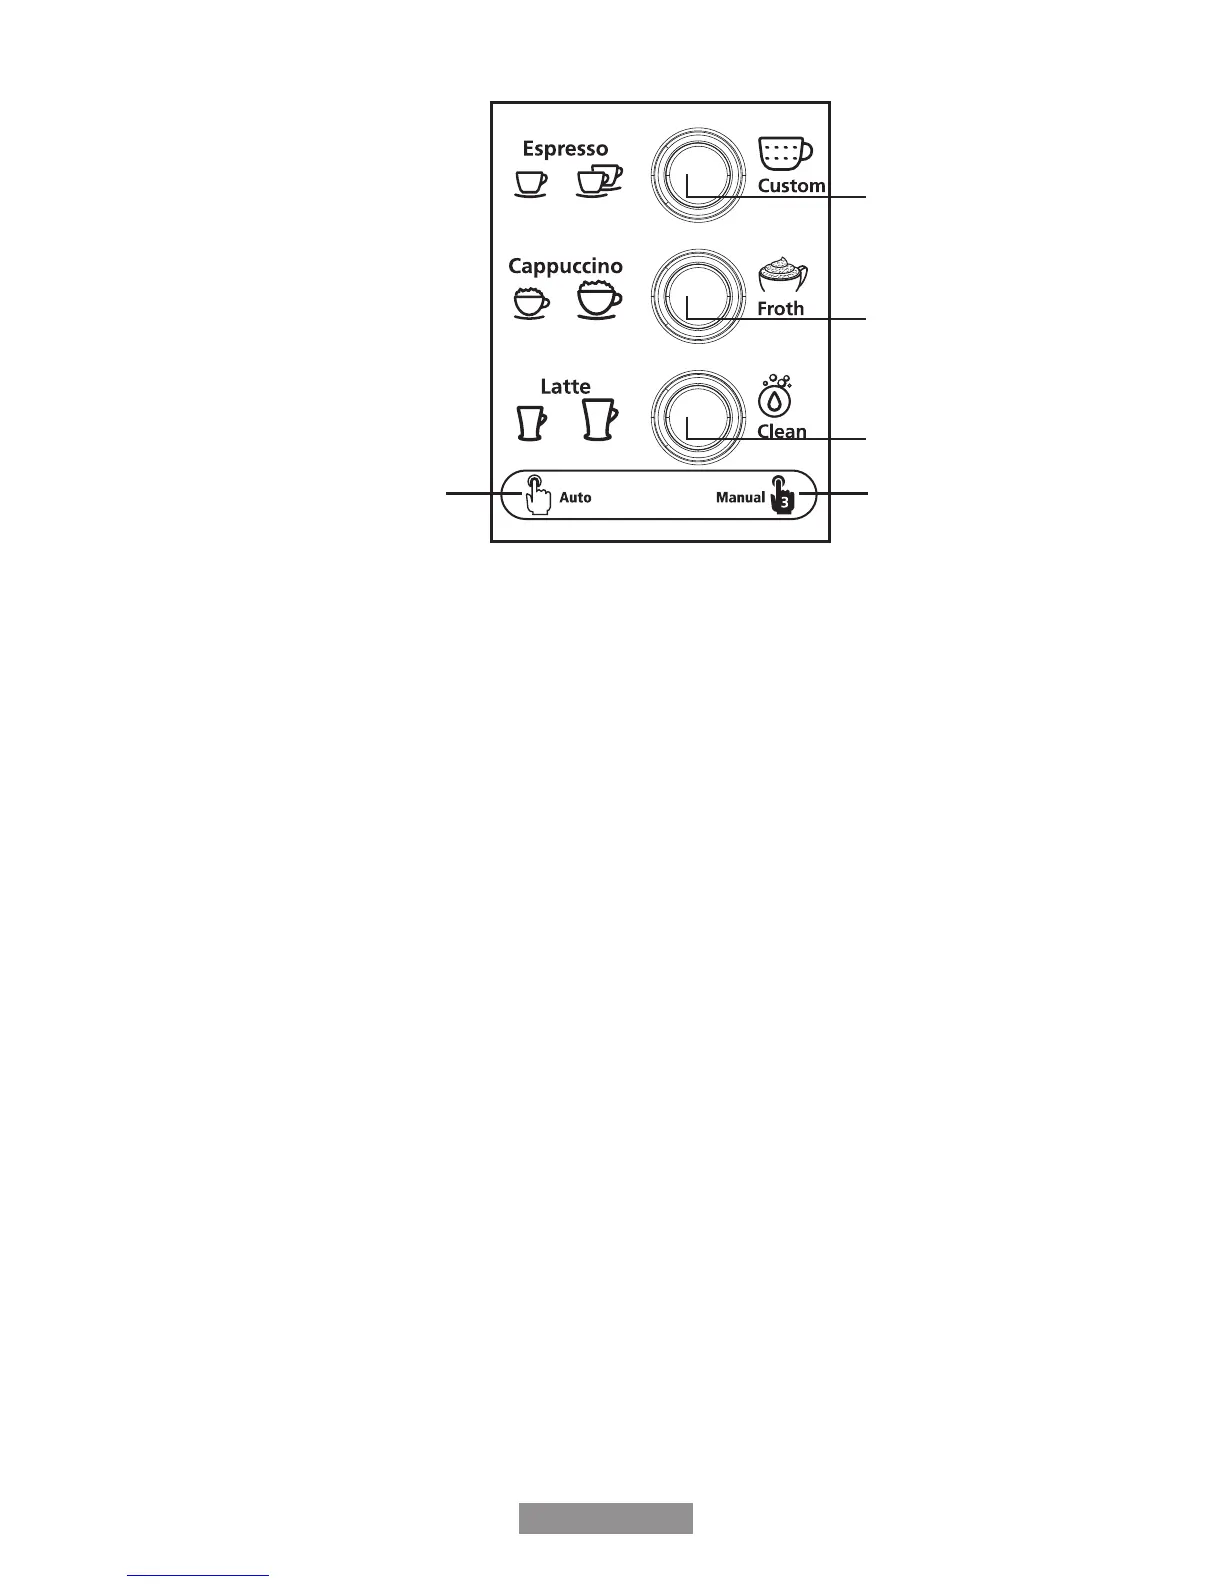
Control panel
A
B
C
ED
Understanding the Controls
Your control panel is divided into 2 parts. The left side of each button indicates the automatic
brewing functions (See D in Figure). The right side indicates the manual function of each
button (See E in Figure).
Lights Indicate:
-Button Light Pulses
- Unit is heating up
- Unit is brewing/frothing/cleaning
-Button Light Remains Illuminated
- Unit is ready for use
-Cappuccino and Latte Button Lights do not illuminate
- Milk Reservoir not fully inserted in unit.
-Icon Lights illuminate
-Indicates your brew selection
-Button Light Flashes
-Water Reservoir is empty
-Function selected before unit is ready
Espresso (Button A):
-Automatic: Select espresso size.
-Manual: Customize the amount of espresso in your beverage.
Cappuccino (Button B):
-Automatic: Select cappuccino size.
-Manual: Customize the amount of frothed milk in your beverage.
Latte (Button C):
-Automatic: Select latte size.
-Manual: The manual function of this button controls the cleaning cycle for
the frothed milk dispensing tube.
NOTE: Please read the rest of the instructions before operating the Oster
®
espresso,
cappuccino & latte maker.
BVSTEM6601-049_14EM1.indd 5-6 10/06/14 11:19 AM