7
Learning About The Oster Pro
TM
1200 Blender
With 6 Cup Glass Jar
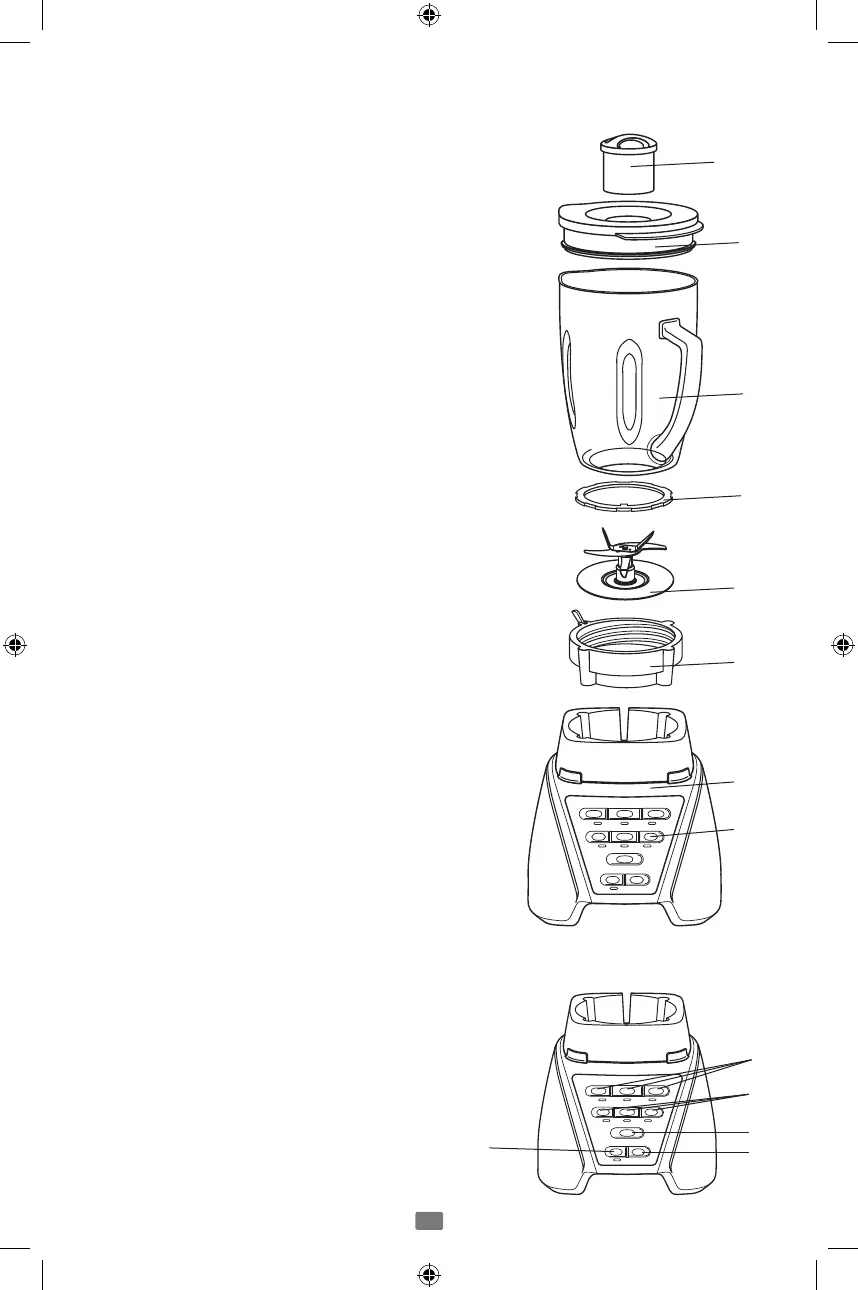
1. Filler Cap / 2 Ounce Measuring Cup: – Allows
you to add ingredients during use. Also allows
you to open to allow steam to escape when
blending hot foods.
2. Jar lid – Seals the blender jar.
3. Jar – 6-cup Dishwasher Safe Boroclass glass jar
withstands Thermal shock.
Glass Jar Blade Assembly – With locking feature
to secure blade assembly to threaded jar bottom.
Seals the jar to the blade for leak-proof operation.
4. Sealing Ring :
5. Blade – Creates a forward and reverse action
when the Programmed Settings are in use.
6. Threaded Jar Bottom With Locking Lever –
Advanced design for simple assembly to jar.
7. Motor Base – Holds the jar securely. Contains
a powerful, reversible, variable speed motor.
8. Control Panel
a. Power Button (On/Off button) – Turns the
product On and Off.
b. Pre-Programmed Settings: Use for flawless
results at the touch of a button. Select the
desired setting and watch the Oster Pro
TM
1200 blender cycle through the program,
spinning the blade forward and backwards
for expert results at the touch of a button.
Unit will shut after running through the
cycle.
Select From:
Green/ Frozen Smoothies
Food Chop / Salsa
Milkshakes
c. Manual Controls: Select from Low-Med-
High
d. Pulse button – Press to pulse and
release to stop.
e. Stop Button: Press to stop any cycle or
manual control setting.
b
c
a
d
e
1
2
3
4
5
6
7
8