6
Device Maintenance
When required, clean the
sensor in order to remove
any accumulated dirt,
sludge, gunk or debris.
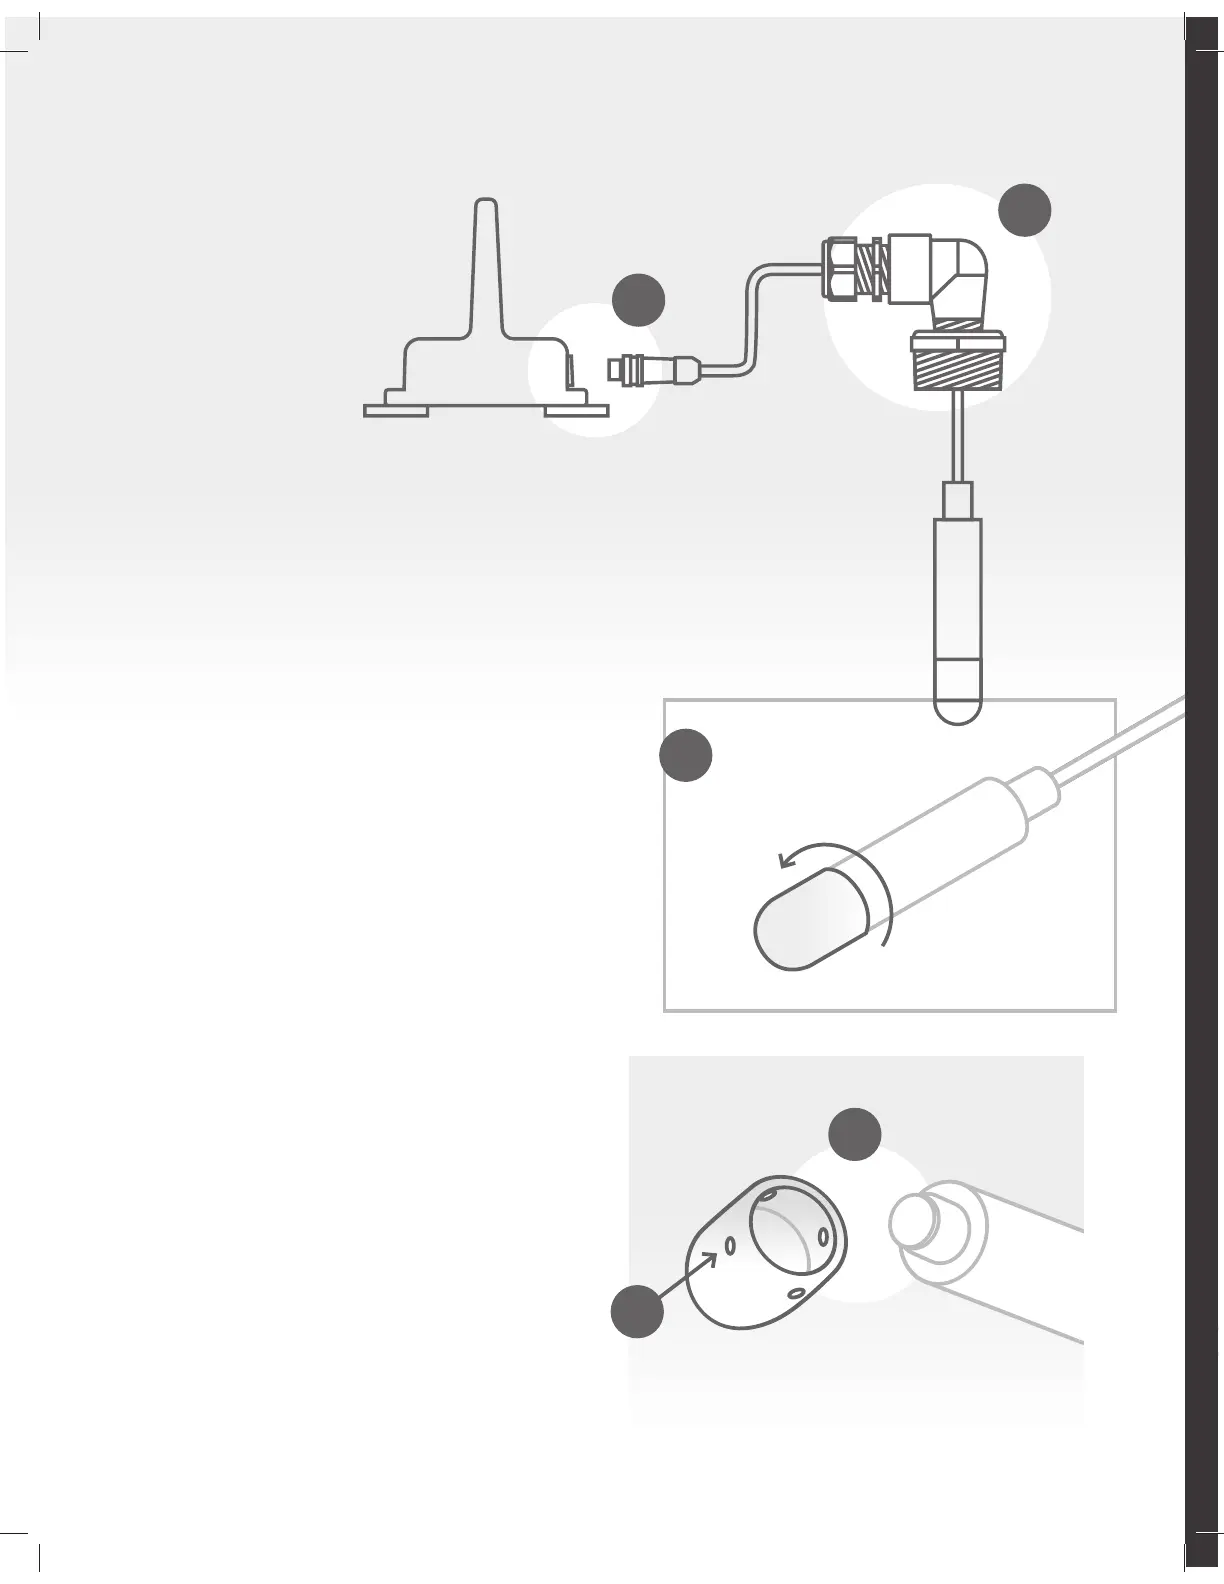
Step 1 Remove sensor from tank
a. Disconnect the cable from the
communicator and carefully remove
the sensor from the tank.
b. Avoid disconnecting or loosening any of
the parts which secure the cable in place.
Loosening these joints can cause the cable
to shift in length. This can eect the
accuracy of the reading.
Step 2 Disassemble sensor and clean
c. Once removed, rinse sensor thoroughly
under running water.
d. When exterior of sensor is clean, twist
the tip of the sensor counter-clockwise
to unscrew.
e. Rinse the inside of the tip cover thoroughly
ensuring all dirt, grease or debris has been
washed away.
f. Ensure the small orifices on the tip cover are
also thoroughly cleaned so fluid can filter
through freely.
Step 3 Reassemble and install sensor
g. Towel or air dry sensor shaft and tip
thoroughly and re-attach.
Inner tip is sensitive. Avoid touching.
h. Install sensor in tank.
If needed: add Teflon paste or tape to the
bushing fitting. Remember to roll the cable
to avoid damage while screwing in.
i. Reconnect cable to transmitter.
d
e
f
b
a
 Loading...