20
• Get the user to walk in order to build up a vacuum. Get the user to stand and check whether
the vacuum is maintained.
• If the vacuum is still not maintained: The fault is in area 2 or 3.
Checking area 3
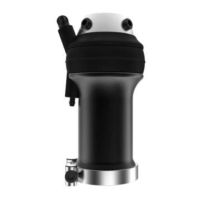
• Connect the pressure gauge directly to the vacuum pump.
• Activate the vacuum pump two to four times (vacuum of 340hPa to 680hPa).
• If the vacuum is maintained: The vacuum pump is OK. The fault is in area 2.
• If the vacuum is not maintained: Replace the valves of the vacuum pump. Then check
whether this measure was successful.
• If this measure was not successful: Replace the functional ring. Then check whether this
measure was successful.
• If this measure was not successful: Send the vacuum pump to the manufacturer for
inspection.
Checking area 2
• Connect the pressure gauge with a T-piece between the socket connector and the vacuum
pump.
• Seal the opening to the socket connector on the inside of the prosthetic socket with air-tight
adhesive tape (e.g.PVC tape).
• Activate the vacuum pump until a vacuum of 340hPa to 680hPa is reached.
• If the vacuum is not maintained: The socket connector is defective. Replace the socket
connector. Then check whether this measure was successful.
• If the vacuum is maintained: The glued joint of the socket connector is likely defective.
• Seal the opening to the socket connector on the inside of the prosthetic socket with a small
piece of paper and air-tight adhesive tape (e.g. PVC tape).
• Activate the vacuum pump until a vacuum of 340hPa to 680hPa is reached.
• If the vacuum is not maintained: Glue the socket connector again. Then check whether this
measure was successful.
8.2 Replacing the valves
1) Pull the old valves off the functional ring, noting the flow direction (arrows on the valves).
2) Clean the functional ring with compressed air.
3) Plug the new valves into the openings of the functional ring in the correct flow direction.
8.3 Replacing the functional ring
To replace the functional ring, the adapter with pyramid is removed from the base body. The O-
rings on the adapter and the mounting screw are also replaced together with the functional ring.
> Required materials: 4X247 pretensioning tool, torque wrench (e.g.710D20), degreasing
cleaner (e.g.634A58 isopropyl alcohol), Loctite243or Loctite246
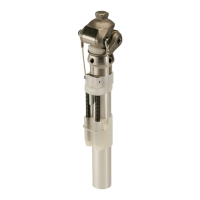
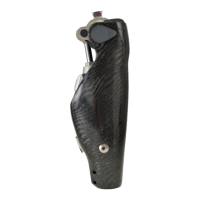
1) Remove the vacuum pump from the prosthesis.
2) Insert an Allen key (6mm) into the hole in the pyramid and unscrew the mounting screw in
the distal end of the base body (see fig.2).
3) Pull the adapter with pyramid up and out of the base body (see fig.3).
4) Remove the functional ring.
5) If the O-rings are worn: Remove the O-rings from the adapter (see fig.10).
6) If the O-ring is worn: Remove the O-ring from the mounting screw (see fig.10).
7) Clean the mounting screw and adapter including thread with degreasing cleaner (see fig.10).
8) Slide new O-rings onto the adapter and apply silicone grease. Make sure that no silicone
grease gets into the threads (see fig.10).
9) Slide a new O-ring onto the mounting screw (see fig.10).
10) Apply Loctite to the thread of the mounting screw.
11) Slide the new functional ring onto the adapter. The structure of the functional ring permits
installation only with the correct alignment.