23
INSTALLATION
INSTALLATION OF INDOOR UNIT
Step 1: Choosing installation location
• Recommend the installation location to the customer and then conrm it with the customer.
Step 2: Install wall-mounting frame
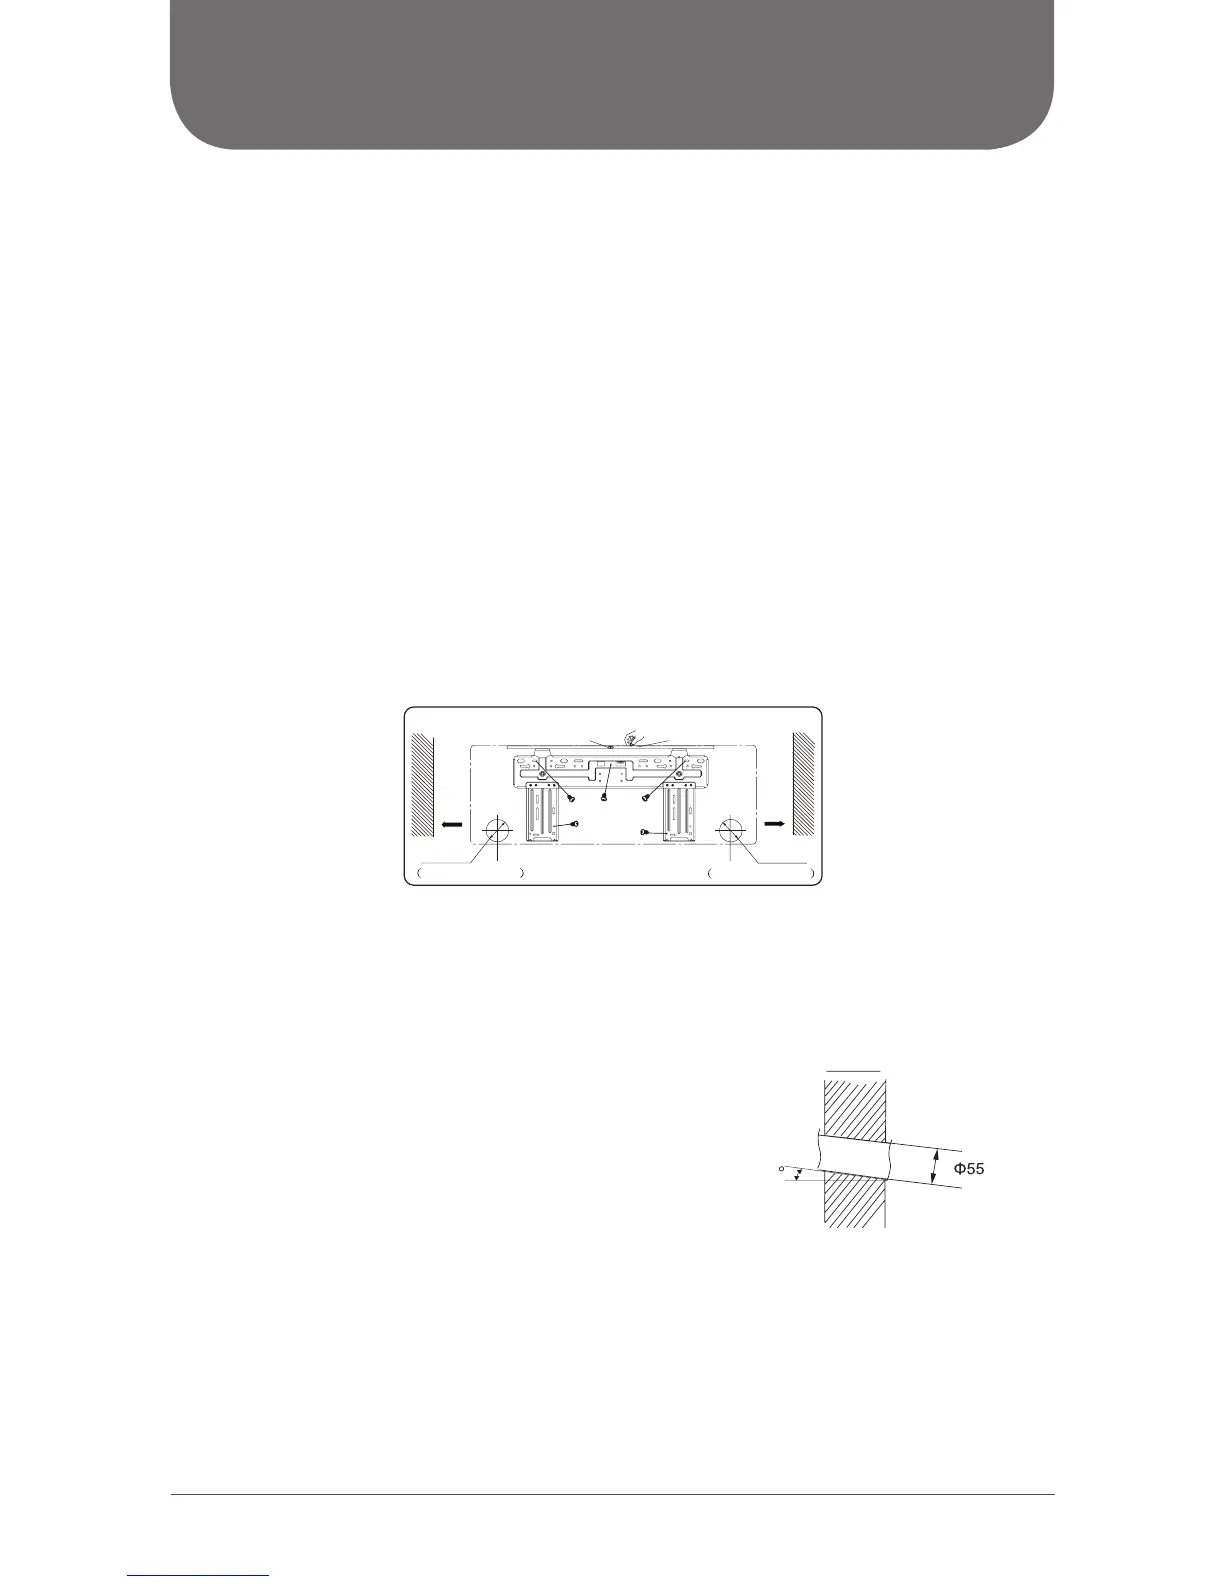
• Hang the wall-mounting frame on the wall; adjust it in horizontal position with the level meter
and then point out the screw xing holes on the wall.
• Drill the screw xing holes on the wall with the impact drill (the drill head specication should
be the same as the plastic anchor) and then put the plastic anchors in the holes.
• Fix the wall-mounting frame on the wall with tapping screws (ST4.2X25TA) and then check if the frame
is rmly installed by pulling the frame. If a plastic anchor is loose, drill another xing hole nearby.
Step 3: Open piping hole
• Choose the position of piping hole according to the direction of outlet pipe. The position of piping
hole should be a little lower than the wall-mounting frame, as shown below.
Left
Wall
Φ55mm
Right
Mark in the middle of it
Level meter
Rear piping hole
Wall
Space
to the
wall
above
150mm
Space
to the
wall
above
150mm
Φ55mm
Rear piping hole
• Open a piping hole with a diameter of Φ55 mm on the selected outlet pipe position.
In order to drain eciently, slant the piping hole on the wall slightly downward to the outdoor
side with a gradient of 5° to 10°.
NOTES:
• Pay attention to dust and take relevant safety measures
when opening the hole.
• The plastic anchors are not provided and should
be bought locally.



 To Next Page